
Happy Holidays to all! Here’s my tiny Christmas tree — I know it’s lacking in a topper but it makes me happy. The topper issue will be addressed in 2021.

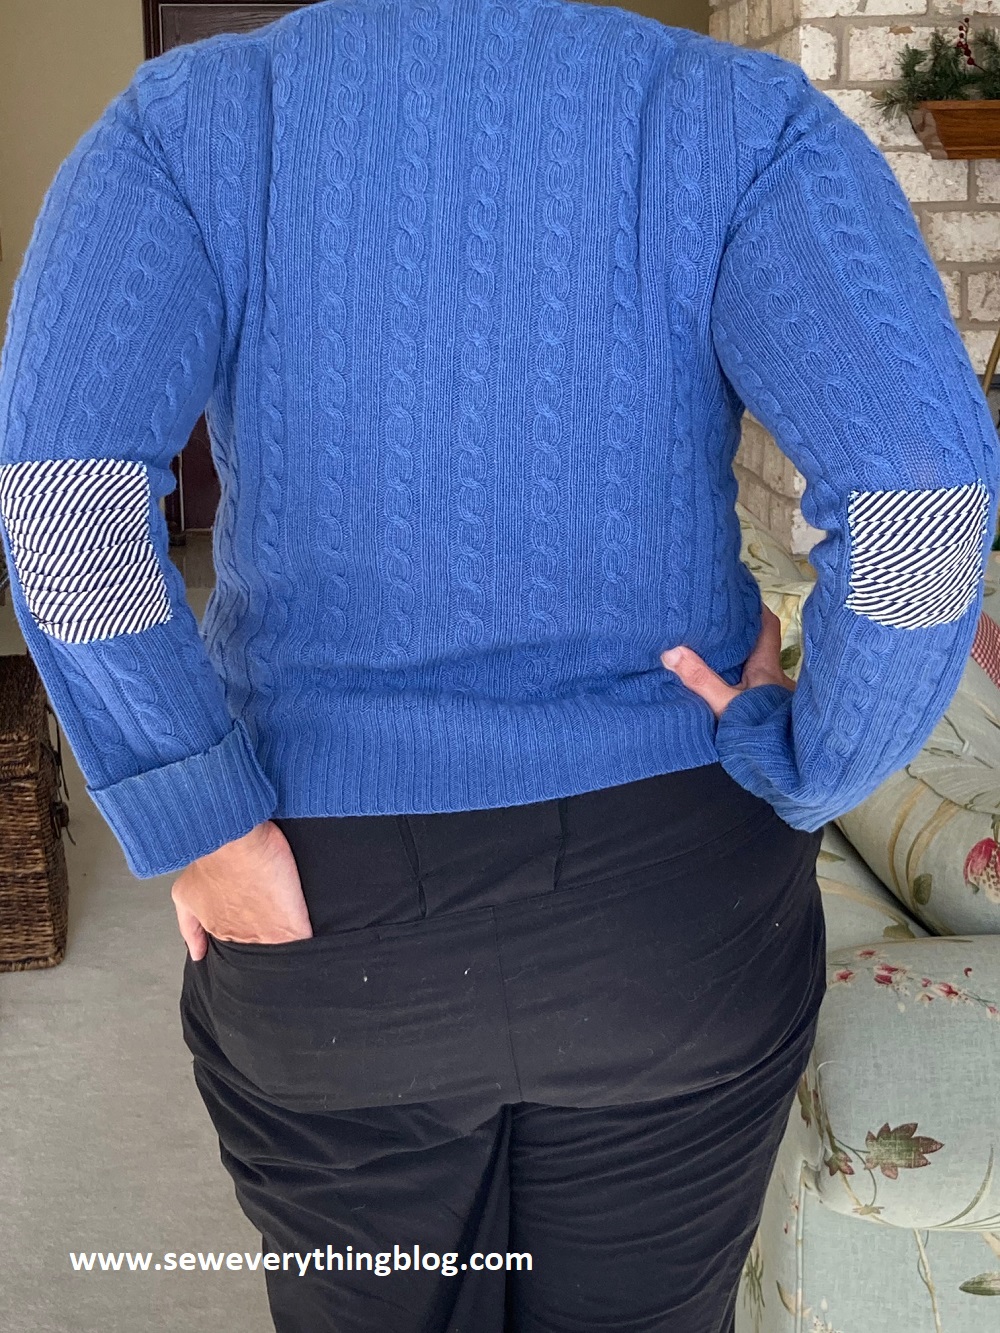
The Street Urchin Look (below): You can call it “primitively patched”, crappy mending or whatever, but I’m dubbing it the “street urchin” style of mending; because there’s a ring to the term. Because, it conjures up those ragamuffin English urchins that run rampant in Charles Dickens’ books.
The un-culled: A wool cardi with a hole in the elbow, two cotton/silk blouses. The unsalvagable striped blouse was sacrificed to the cardigan. The flowered blouse — who knows where it’ll end up.

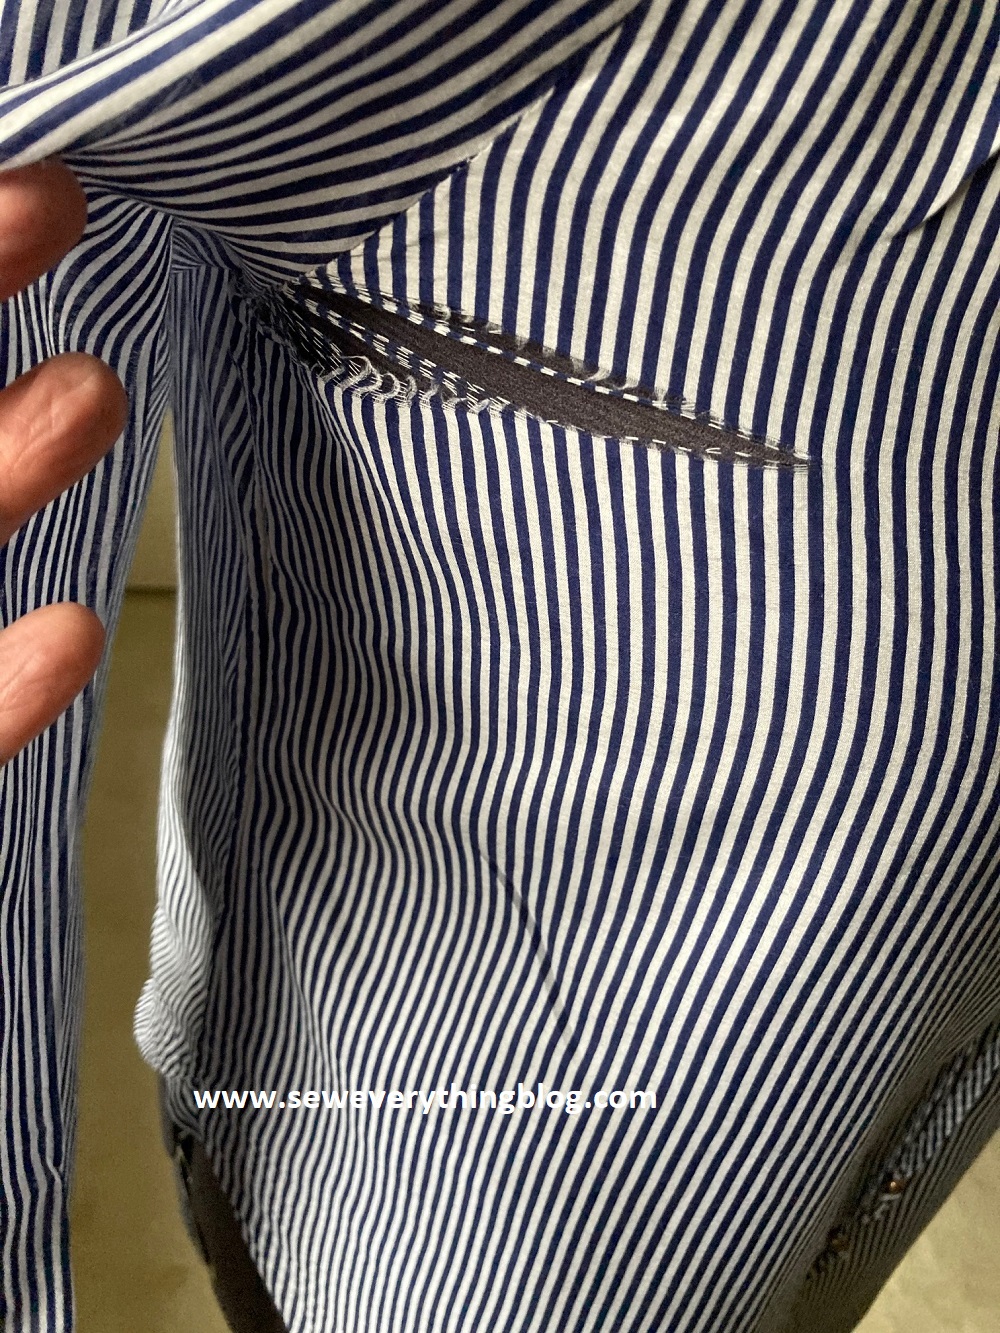

I’m loving this approach to mending a hole in a closely fitted wool cardigan, which the owner (my daughter who doesn’t much like to cull her wardrobe) has been wearing since her graduate school days. So, how must I approach the mending without requiring the usual darning? Wait, there’s additional stuff — two J. Crew silk/cotton blouses from the same era that have been literally worn to shreds (see close up) and are not to be trashed. Huh. The striped one was designated as the sacrificial blouse to be hacked for a patch on the elbow. At this point, the striped blouse should consider itself lucky to be re-used in such a way. It could have been in the trash bin, if I had my way.
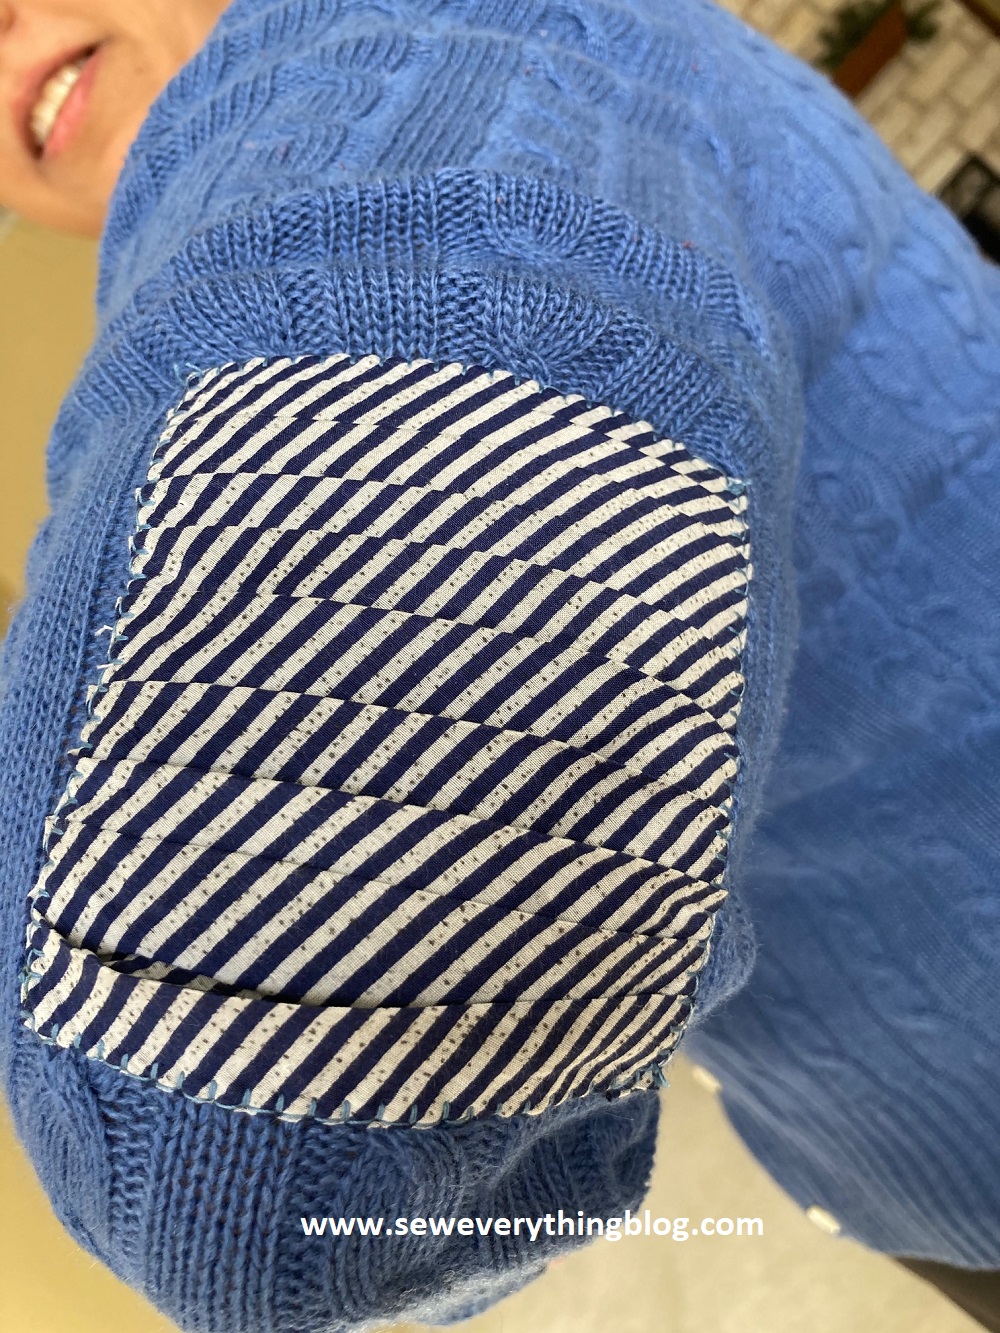
The Patch: First up, interface the patch with thin knit interfacing, because the fabric is a thin cotton/silk. Fact: being so fine, even the thinnest interfacing is sort of showing through. I don’t think street urchins would care. So, I’m moving on.

Since the sweater is a stretchy knit with extra stress at the elbow, and the patch is a non-stretchy woven, I came up with this idea: pleat the woven and interfaced patch on the bias so it now has inherent stretch when the elbow is bent. All four sides are turned under; it’s easier to manipulate the turning on the sides where the pleats are running horizontally – the pleat fold will form the turn. On the sides adjacent to the pleat direction, the fabric “stack” is thicker and will take some determination to turn and press firmly. Use a wooden clapper to show the patch who’s boss. Now you have a crisp edge to sew on.
Basting Patch on Sleeve to Cover the Hole: Of course, you’ll pin it in place, first. Basting may be a beast (note the play on words) when it’s a narrow sleeve, but if you slide a narrow sewing ham inside, it becomes easier to avoid catching the other side of the sleeve in the basting; or, roll up a towel or fabric in lieu of a ham. Now baste on the patch with loose straight stitches — to be removed in the last step.

Making it Permanent: You think basting was a beast? Now you’re ready to machine sew the patch on to the sweater sleeve. If you decide to permanently sew the whole thing by hand, go for it. If using a machine, read about the acrobatics below.
I do not recommend a straight stitch in this case because this is an elbow patch. On a stretchy sweater. With a narrow sleeve – and an elbow has to bend. So, here I used a “blanket stitch” built into the machine – which almost all machines have these days. A question was raised about why those “professorial” jackets have non-stretchy leather/suede patches; why indeed? Because the professorial jacket sleeves are loose enough to not require major stretch? What do you think? Anyone has an answer?
The machine sewing acrobatics:
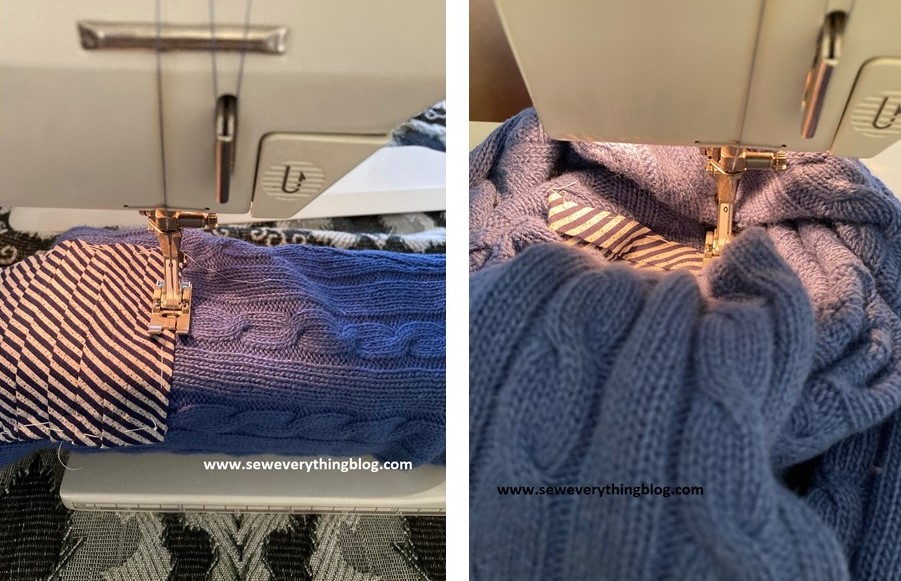
Select the blanket stitch on the machine or any stitch that forms a similar formation. Two opposite sides of the patch could be sewn easily since I could remove the “table” and slide the sleeve onto and under the presser foot. The other two edges is where you need to be nimble. Snap the table back into place. Starting with one open front neck area, slide the sweater, the shoulder, the sleeve under the presser foot until you reach the patch; you may have to remove the presser foot mid-slide and install it once the patch is in the right place. You are working with ONE LAYER – remember not to catch any other part of the sweater. Carefully sew the last two edges. Remember that after sewing one edge, you can easily slide the opposite edge under the presser foot. Whew.
Afterthoughts:

Since the sweater began to get the street urchin look, I should have used a bright red or yellow thread for sewing it down. I could even hand sew large, colorful stitches after the machine stitching. But the modern, career-woman owner of the sweater didn’t agree. Therefore, in the picture above, I digitally added the charming details of a randomly sewn patch. I think this look can be carried further in a fun, fashionable way.
Happy Holidays, my friends! Be safe. I have a feeling that next year will be much, much better than 2020. We have been tested….
Samina

Ingenious! Great,detailed instructions.
LikeLike
Glad you liked the post, Lenora!
LikeLike
I enjoyed reading this post and I like the use of the digital addition of the stitches to show how it could look. Great job 👌
LikeLike
Thank you, Kellie! I’m thrilled that you enjoyed the post! I’ve discovered that adding things digitally to a photo can open up a whole new world in predicting the final look — kind of.
LikeLiked by 1 person