
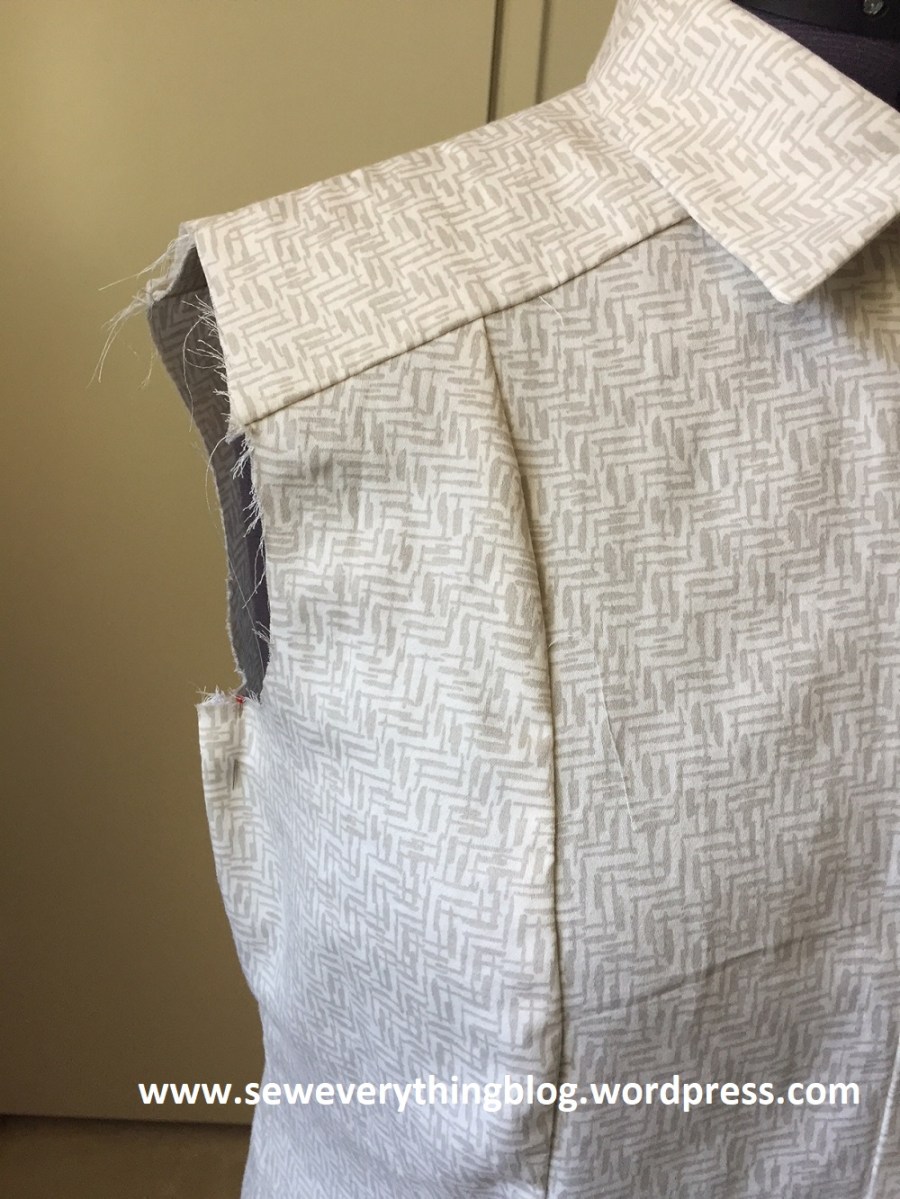
About McCall’s Pattern 7470…. I found that the sleeved and sleeveless versions therein have the same front and back printed sections – and can be a conundrum depending on how picky you are about fit.

You see, the armhole in a sleeveless garment MUST be close to the body, but sleeved versions need that extra ease; so that when the sleeve is attached, it gives the wearer room to move the arm around. Without sleeves, there is no restriction to arm movement; so the little extra bloop is unsightly. Since I was making a sleeveless version, I moved the underarm seam ½ inch higher and ½ inch in (toward the bodice). You can either wear the sleeveless version with “slack” under the arm, or take a few minutes to bring it closer to your body.

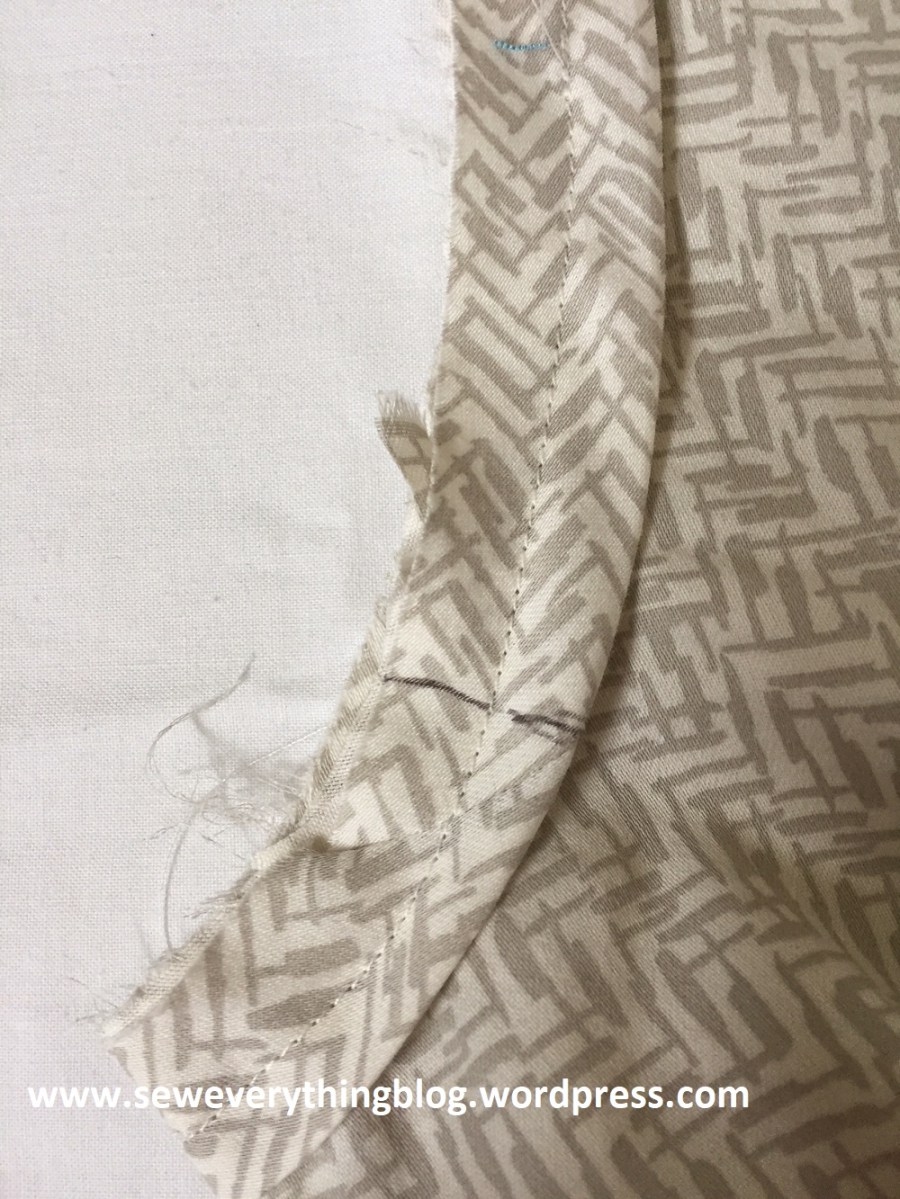
Here’s a ridiculously simple way to bring in the seam at the underarm for a snugger fit: gauge how much you need to take in the side seam at the underarm. I tried this dress on and decided on a 3/8 inch pinch. Then it was sewn down, blending into the original side seam -at about 2 inches down. Do not forget to make a note on the pattern itself for future reference. Also remember that the armhole is now smaller, which is a good lead-in to the next armhole-finishing tip.
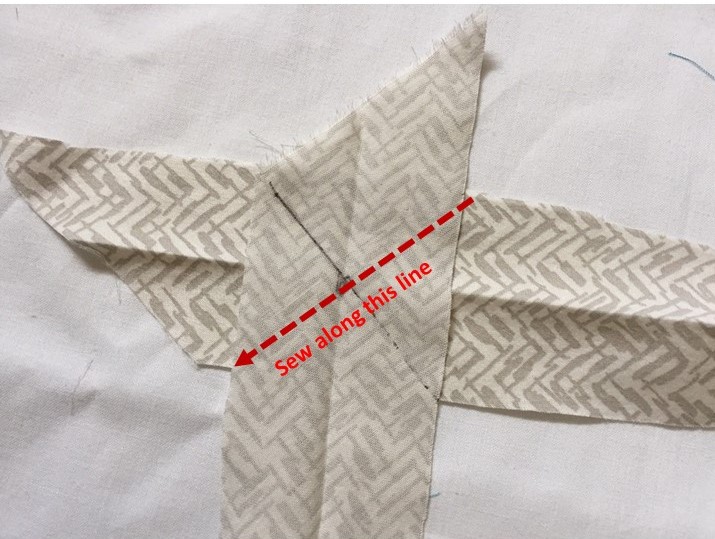
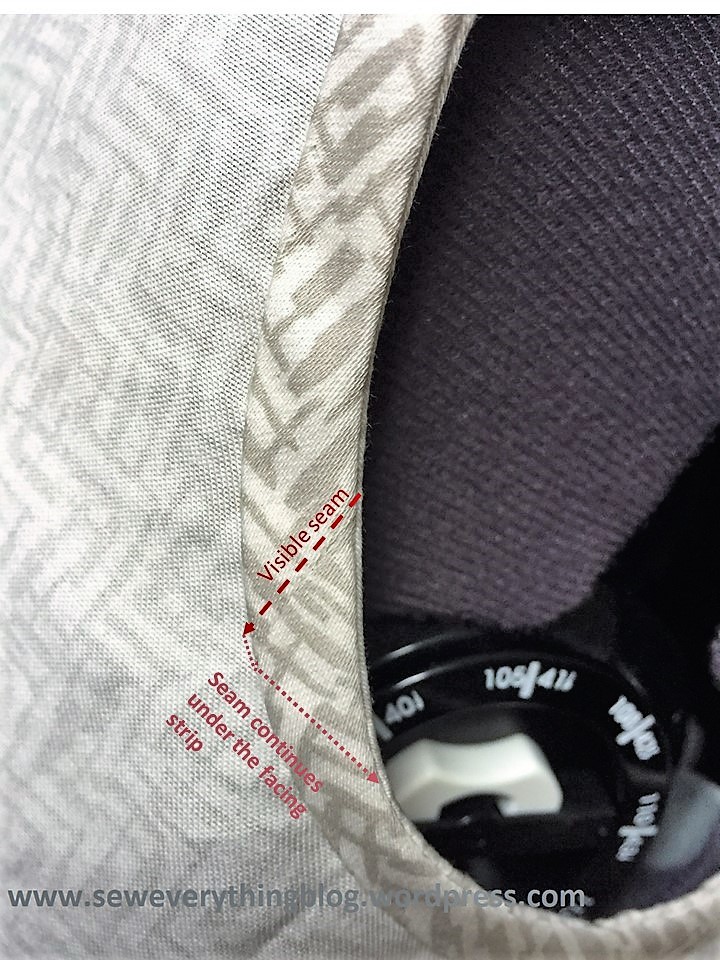
While we’re on sleeveless issues, did you know this one? Some patterns will ask you to finish your armhole with a bias strip facing, as M7470 does. Well, at some point, you will have to join the strip into a circle because the armhole is a circle (duh). When the joint of the strip is sewn together in a straight seam, it will have more layers of fabric at that point when you’re attaching it to the sleeve. It works better to sew the ends together in a slanted seam. When folded, the extra layers are spread out and thus avoid a bumpy area. I hope the following images help the explanation.


Trim seam to 1/4 inch. Open out and press seam open.
I’m still on a shirt-, shirttunic-, shirtdress- making roll. Rolling along!
Samina

Nicely done! And your instructions and photos are very helpful!
LikeLiked by 1 person
Thank you, Linda!
LikeLiked by 1 person
I love these tips! Ready to wear armholes were all too big on me after I needed to wear a larger size to fit my bust, but when I started sewing I found they are also hard to sew. I get gaping problems.
Lots of nice details on your dress, and like the print.
LikeLike
Thank you, Lisa! I used an old flat bedsheet which somehow got left behind when the bed was donated. The fabric is very soft and good quality, so I decided to make this shirt dress in the spirit of upcycling and refashioning.
LikeLike
Thanks for the detailed explanation and pictures. It’s a simple change but makes a big difference. That will be a lovely dress.
LikeLike
You re welcome, Barbara! Glad you liked the post.
LikeLike
Great tutorial. And I love the fabric you’re using.
LikeLike
Thank you, Catherine!
LikeLike
I’ve noticed that discrepancy of pattern pieces (noooo, they aren’t the same by a long shot) and while I know it’s a “we’re trying to make this simpler” move, it can turn into a “we’re going to help you create something that doesn’t fit and makes you feel uncomfortable” which ….pisses me off. At the very least, they could mark the piece with two seam lines and save some heartache along the way. As someone who took a lot of sleeves off RTW, it’s just an unloved piece of clothing in the making.
LikeLiked by 1 person
It’s a cost saving move, probably. But it is a big time irritant. The pattern is Palmer Pletsch which has a lot of pin-fitting instructions – I’ll give them that. But not this specific adjustment. I’m really not into pin-fitting with the pattern tissue. My bad….
LikeLike
This is really helpful. Thanks!
LikeLiked by 1 person
I remember how to join bias by thinking of the bias as the legs of slacks and then sew the waistband on. If you sew the other way you sew the crotch together and can’t wear the slacks. My other bias revelation was that just because the pattern says you need x yards of bias, it does NOT need to be all in one piece. As long as you have pieces long enough for each area, you’re good.
LikeLike