

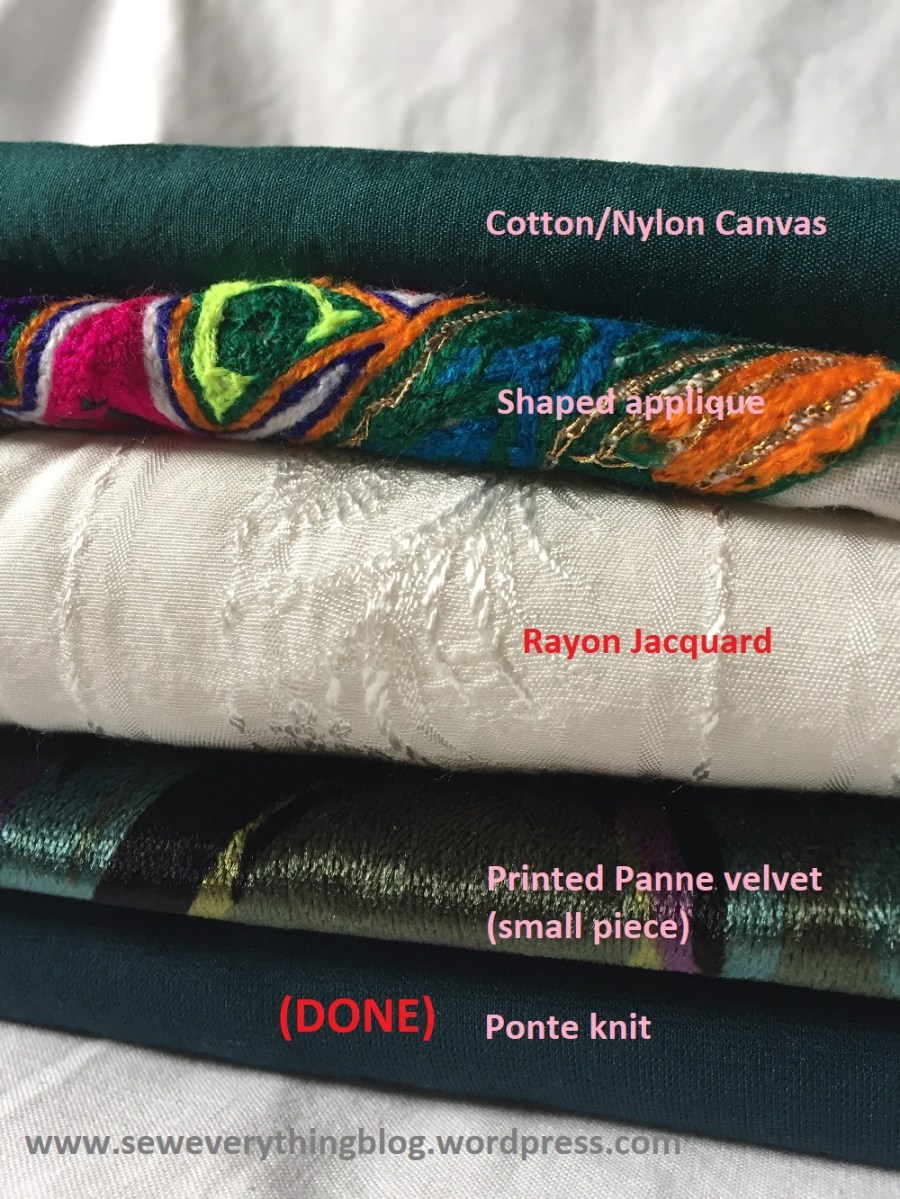
….. items 2, 3 and 4 are waiting to be created.
Dear Readers, I’ve blogged about this particular pair of pants ad nauseum. Because, I have now made ten pairs from the same pattern, and wear them on a daily basis. So, bear with me. I will take you deeper into the making of these pants and list a couple of tips and ideas.
I’ve started making my second mini SWAP a.k.a. Sewing With A Plan, with a hunter green ponte knit (from Sew Much Fabric ) and Vogue 1411. Do you own this pattern? If not, why not? Never mind, read on for a few more sewing tips, and then discuss in the comment section.
A thread intensive project
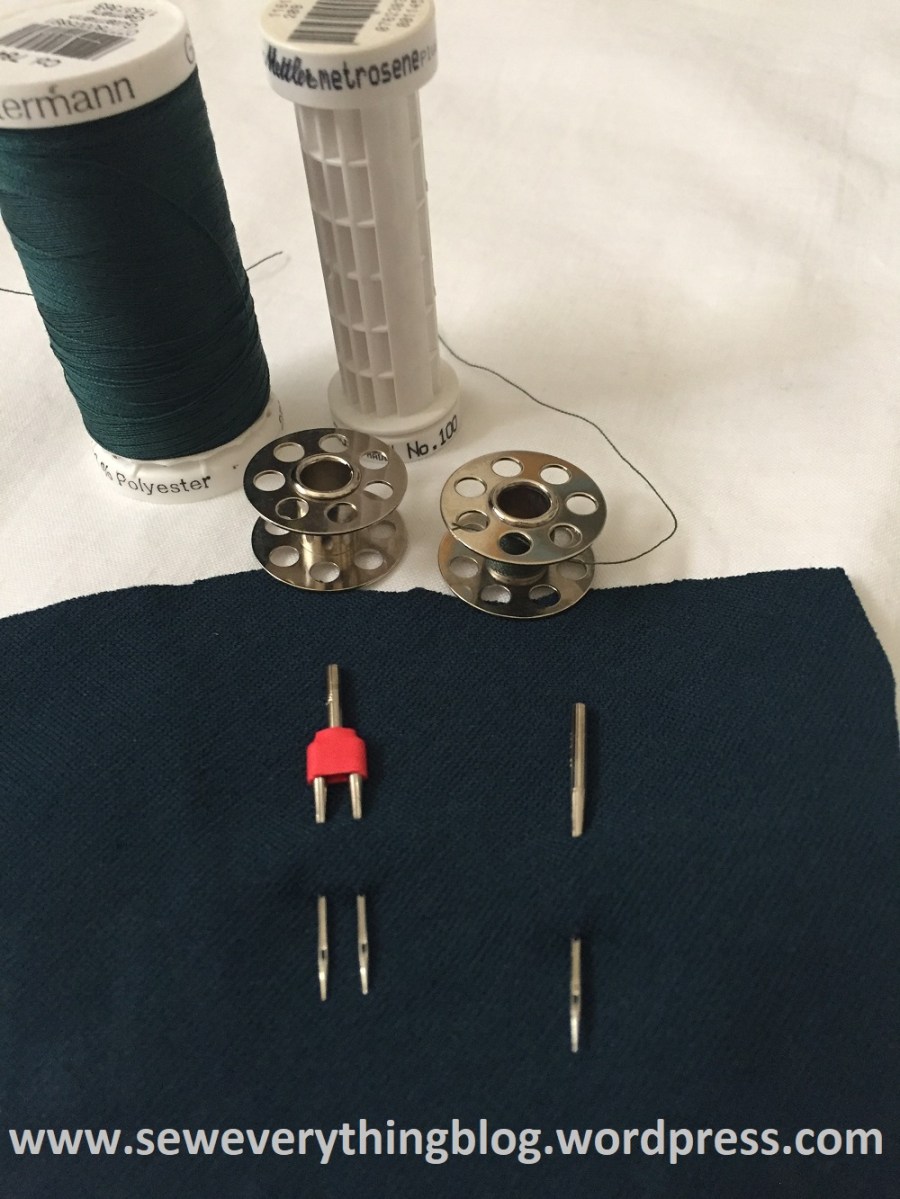
- You’ve been warned! The results are worth it, though. You’ll need two full spools of 164 yards each (or one big 274 yard spool) plus two full bobbins. You see, the designer-recommended stitch for seaming and top stitching, is the triple stitch. The triple stitch (#8 on my Bernina 1230) goes four stitches forward and two back, thereby using more thread than a normal straight stitch. The pants are very snugly fitted, and need a strong stitch for longevity and preventing malfunctions (seam splits). If you wear these on a daily basis, you’ll definitely need to use the triple stitch. Plus, grab yourself a stretch twin needle and a regular ballpoint needle.
The topstitching will get you

- Another reason for high thread usage is the top stitching almost everywhere with a double needle and triple stitching! The pants are designed with four pieces (three seams) on the front, and two pieces (one seam) on the back. That is four extra seams in addition to side seams, inseams, crotch seam and the waistband seams; it’s the design seams that elevate this pattern into a higher stratosphere. And…. all are topstitched with a double needle. See where all your thread is going?
The seams, with pintucks on top

- The above use of twin needles for all topstitching results in – guess what – somewhat of a pintucked look!! Pintucking is my obsession du jour, and now I want to apply them everywhere. How about if I use pattern piece 2 (the oddly shaped piece at knee level on each front) and pintuck the whole piece before sewing it together? Be prepared for yet another pair of Vogue 1411. Heh.
Hidden daisies
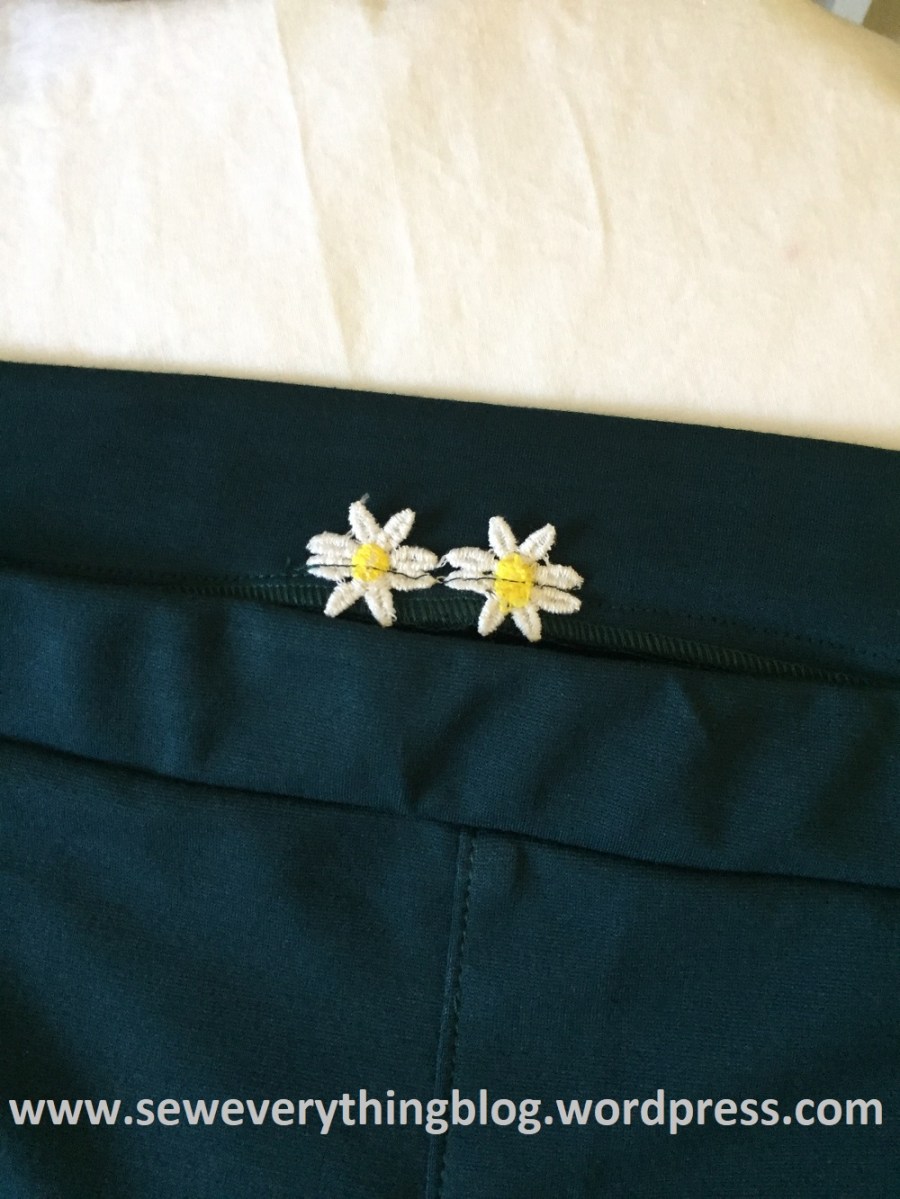
- Lastly, a fun little hidden item to mark the back waistband: a couple of tiny daisies cut out of a long stashed daisy trim. Well, I usually sew in a small piece of ribbon inside the back waistband; when the ribbon was used up, what is a sewist to do? Why, dig out that useless daisy trim, of course. See why we seamstresses hate to throw away the little, seemingly-useless things in our stash?
Cheer me on while I make item 2 in my SWAP – which one will it be?? Meanwhile, I’m wearing these hunter green pants with a coordinating old favorite — my Picasso print tunic.
Samina

Interesting pattern, I don’t own it but am tempted.
LikeLiked by 1 person
Very impressive – and I love the daisies 😃
LikeLiked by 1 person