
Hi readers! The second item in the SWAP 2018 is done – about time, too. Using Simplicity 4528, which has become one of my favorite “workhorse” patterns. Nothing new to report there, except…..


Right: Wearing S.W.A.P. items 1 and 2
In principle, it’s the easiest thing in the world to match the front of your garment, specifically the neckline to a pre-made applique. Right? Mine did not match. After lots of fudging, the neck was completed, and lessons were learned. If you will not ever sew a pre-embroidered neck applique to a garment, you can move on to my other delightful blog posts. Otherwise, read on….
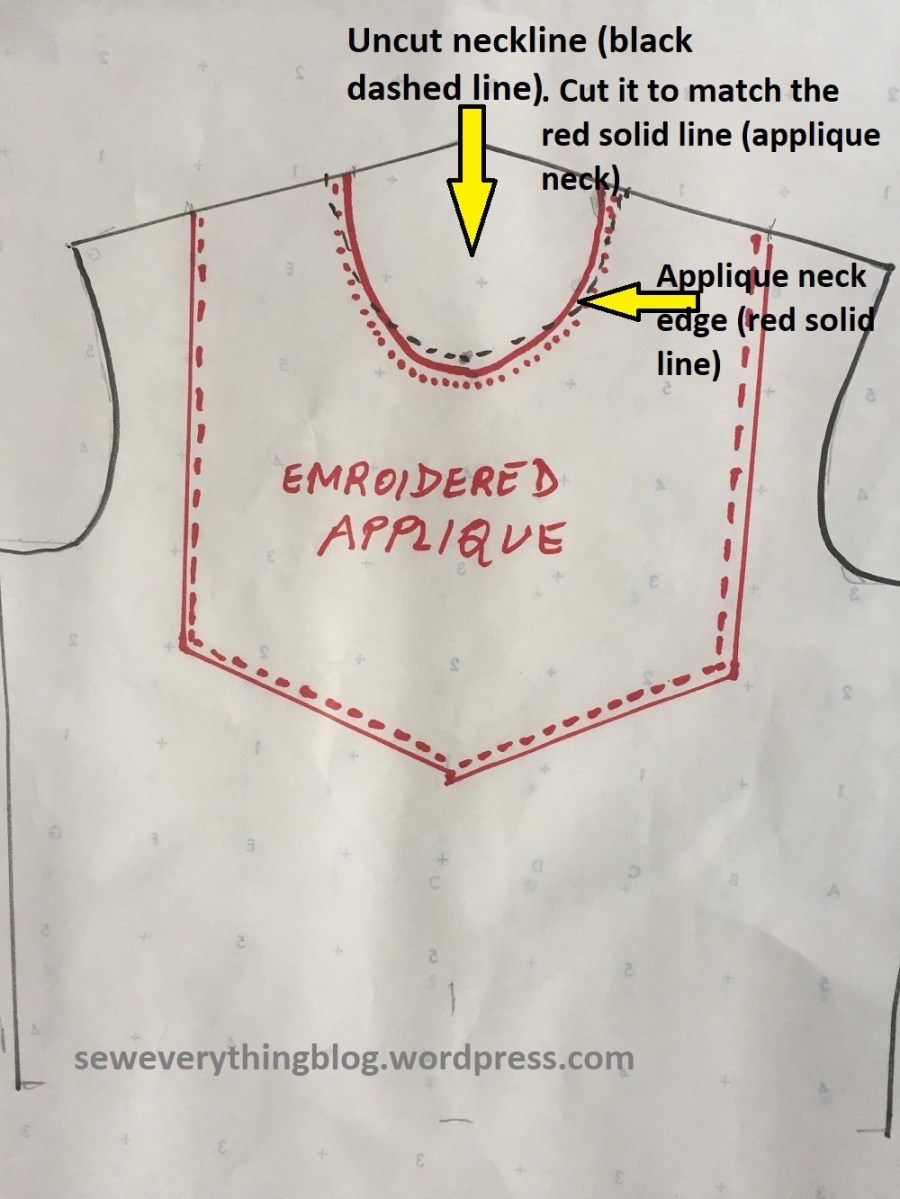
The key concept to remember is that you cannot change the outline of the applique, but you can change the lines of your tunic to match the applique. The better way is to not cut out the neckline until after the applique is basted to the front. I hope this drawing helps clarify my words.
Steps to take:
- To begin, I cut the extra base cotton away from around the embroidery leaving about ½ inch for the seam allowance.

- Cut out the front pattern piece only, in fashion fabric (do not cut the back yet), leaving the neckline un-cut on the front.
- Mark center front on the fabric and the applique.
- Sew pieces of the garment front together, if it has princess seams, like mine. Otherwise, proceed.
- Place the applique on the garment piece, matching center fronts and pin.
- With both layers completely flat on the table, baste around the shape, turning the seam allowance of the applique under; now you can cut away the extra fabric at the neckline of the fashion fabric so that the neck shape matches the applique. Now it’s ready for finishing both layers of the neckline together – either with a facing or a binding later. Permanently stitch down the embroidered piece to the front (except the neck and shoulders; leave them basted for now).
- Now is the time to cut out the back, making sure that the shoulder lengths of front and back match up (not necessarily the pitch of the shoulder line). Sometimes, the shoulder edges of the embroidery piece will extend further into the neck edge. If needed, extend shoulder seam of the back pattern toward the neck, since we can’t make any changes to the embroidery applique.
- Continue making the garment as usual. You will want to attach front and back at the shoulders, leaving the embroidery piece free at the shoulders. You will sew it on permanently on top of the tunic shoulder seam.
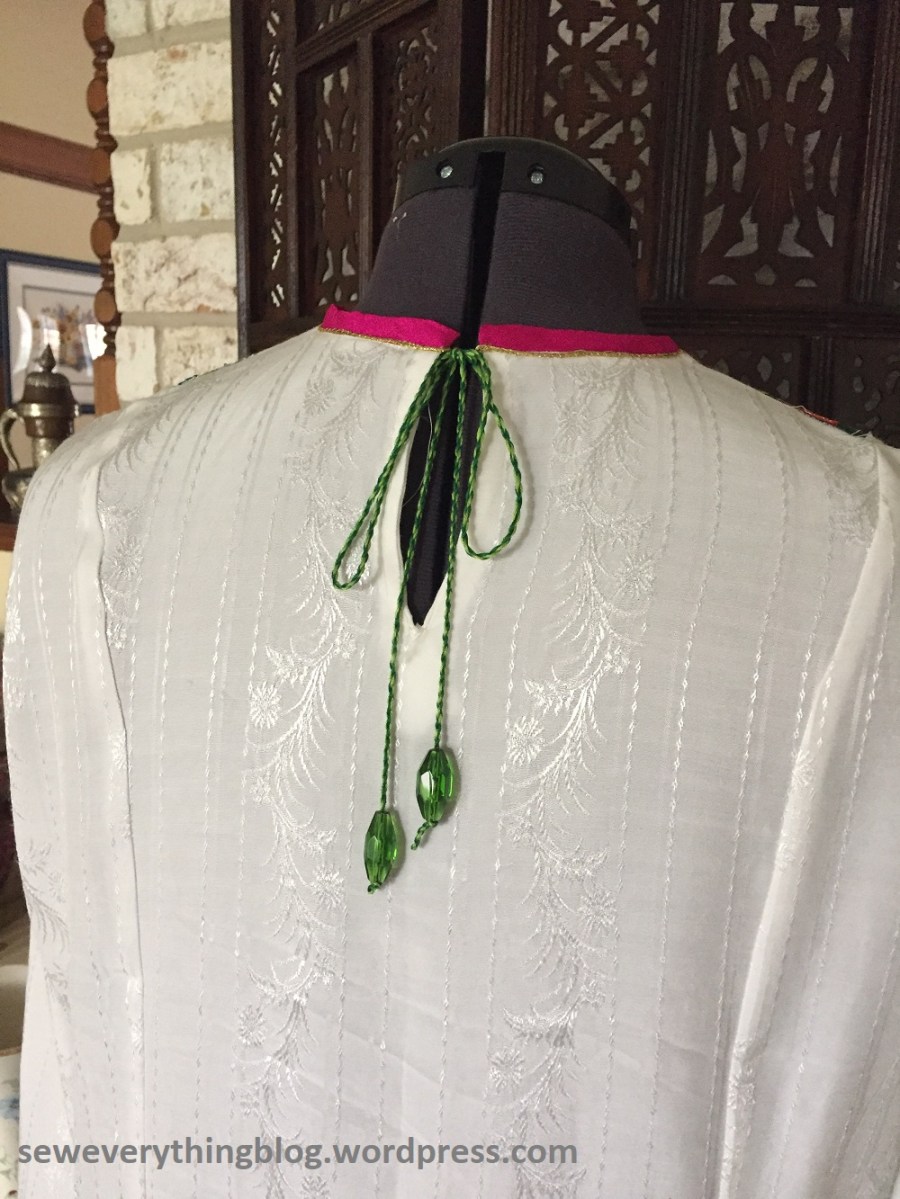
- The neck opening on my tunic had to be moved to the back – for obvious reasons – there is no front opening on the embroidered piece. So, I slashed the back and applied strip facings, and added twisted cords with a bead on each one.
So, I have item two of my Mini-S.W.A.P. – Sewing With A Plan. The photo was taken just before sunset, so there are some light issues, but you get the idea. Look at that great Texas sky…

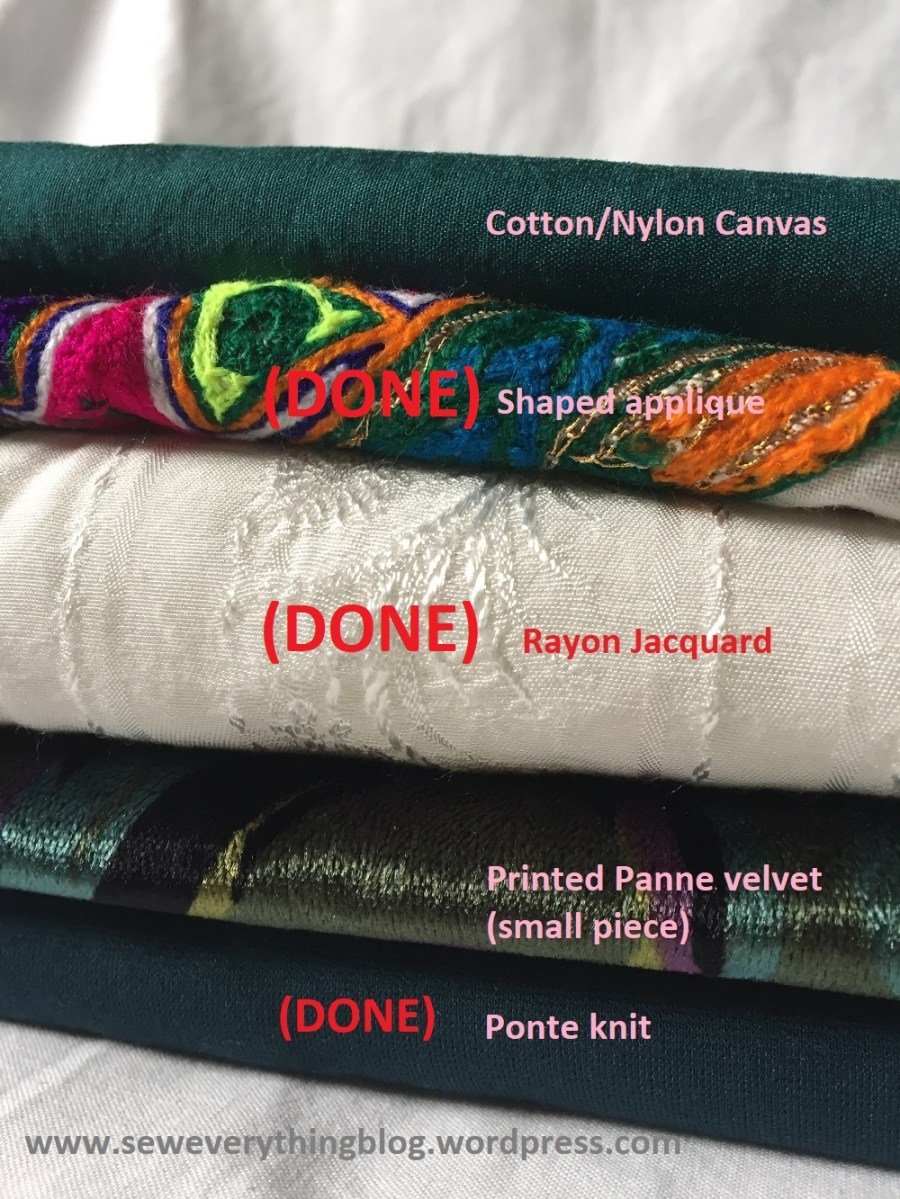
The Minoru jacket (Sewaholic Patterns) in the green cotton canvas is the next garment to complete my mini S.W.A.P. 2018. I will have to think some more about the bonus item with the panne velvet, though.
Love to all,
Samina

Beautiful!!!!
LikeLike
Beautiful!
LikeLike
Very helpful tips! Thank You! Your tunic is so beautiful and so beautifully detailed!
We’ve traveled to Texas often. We love Texas. ;o)
LikeLike
What can I say? Gorgeous as usual!
LikeLike
What a beautiful job 👍
LikeLike