
Hi readers, fellow sewers and fashion enthusiasts! I’ve been vacationing across the Atlantic, had fun, and then came home and suffered some post-travel doldrums – jet lag, sore throat and all that. I’m still recovering, but enough about me….
As promised, I’m revealing the secret in the sleeve of this sweatshirt style tee. If you remember, I left a tease in my previous post about McCalls 6992 . By the way, this shirt became my go-to travel top this summer.
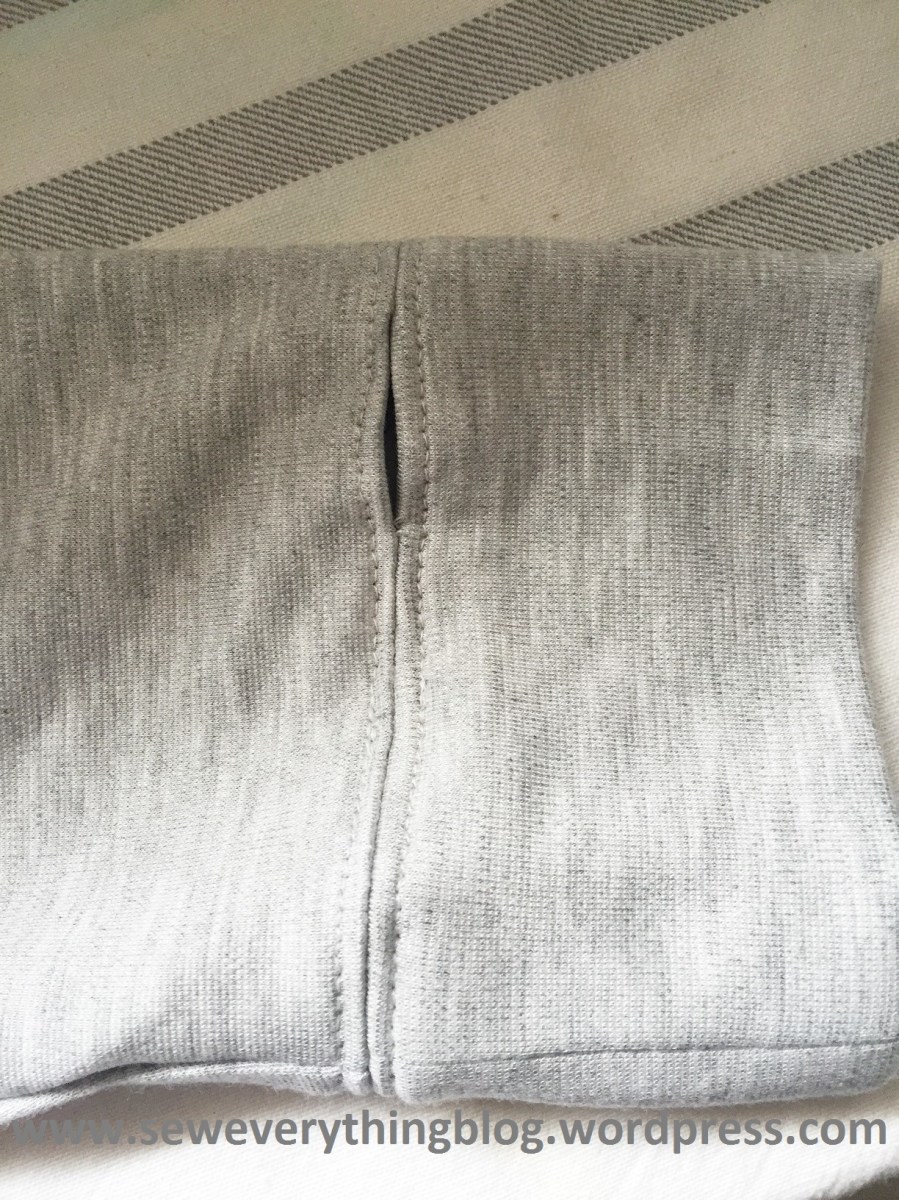
Today, the secret is divulged: A thumb-slit was added to the sleeve/cuff seam. It was a spur-of-the-moment thought to add the “thumb slit”; do you know of an appropriate word to describe it? I don’t quite like the sound of thumb slit or thumb hole. Haha. (Eye roll). Also, I present to you the first ever bathroom selfie on the Sew Everything Blog.


About the cuff, here’s how I did it:
- Lengthened the sleeve so that edge ends at the thumb joint, plus seam allowance. A little lower toward the fingers does not matter, but it should not be higher than the joint.
- Wear the shirt before adding the cuff and mark the area of the thumb joint. I kept my arm comfortable and naturally straight, and put a pin at the thumb joint. My “slit” fell a little left of the sleeve seam for the left sleeve; mirror that for the right. Your thumb slit may fall differently. Mark with tailor’s chalk ¾” on each side of the pin. That made my slit 1 ½ inches long. You can make it larger if you wish.
- Double the cuff, iron it per pattern instructions. Pin raw edges of sleeve and cuff, right sides together. Remember the two chalk marks for the opening? Sew the seam from one chalk mark to the other, which leaves an opening between the marks.

- Press seam open (yes, open). Try it on. At this point you can adjust the hole placement. To make it larger, reach for a seam ripper; to make it smaller, sew a few more stitches in the cuff seam.
- From the right side, topstitch on either side of the seam so that when you put your thumb through the slit, the seam allowances stay inside.
This tweak kept my hands warm (at least halfway up the palm, which felt cozy during air travel). And the fingers were free to tap my devices or hold a soda can.Watch this space because I am developing this idea further.
Go ahead and try this. Where would you find the thumb slit most useful? Travel? Reading in your snuggly reading corner (aka the bed) in the dead of winter? Where?
Go forth and sew up a storm….
Love,
Samina

Thanks!
LikeLike
You are welcome! Thanks for reading my posts, Janet.
LikeLiked by 1 person
Good Morning Samina! This is Awesome! I love the whole thumbslit look. I was actually thinking of making a dress with thumbslits. So now I know how to make it work! Ty
LikeLiked by 1 person
You’re welcome, Siri! If your sleeve has no cuffs, a vertical slit also works well.
LikeLiked by 1 person
I’ve never had a sleeve with a hole. I should try it someday! Your’s looks lovely!
LikeLike
I should have noticed how long the sleeves looked. It reminds me of knitting hand warmers for the same reason. I think teens especially would love the thumb openings to keep their hands covered and to be able to text at the same time.
LikeLike