
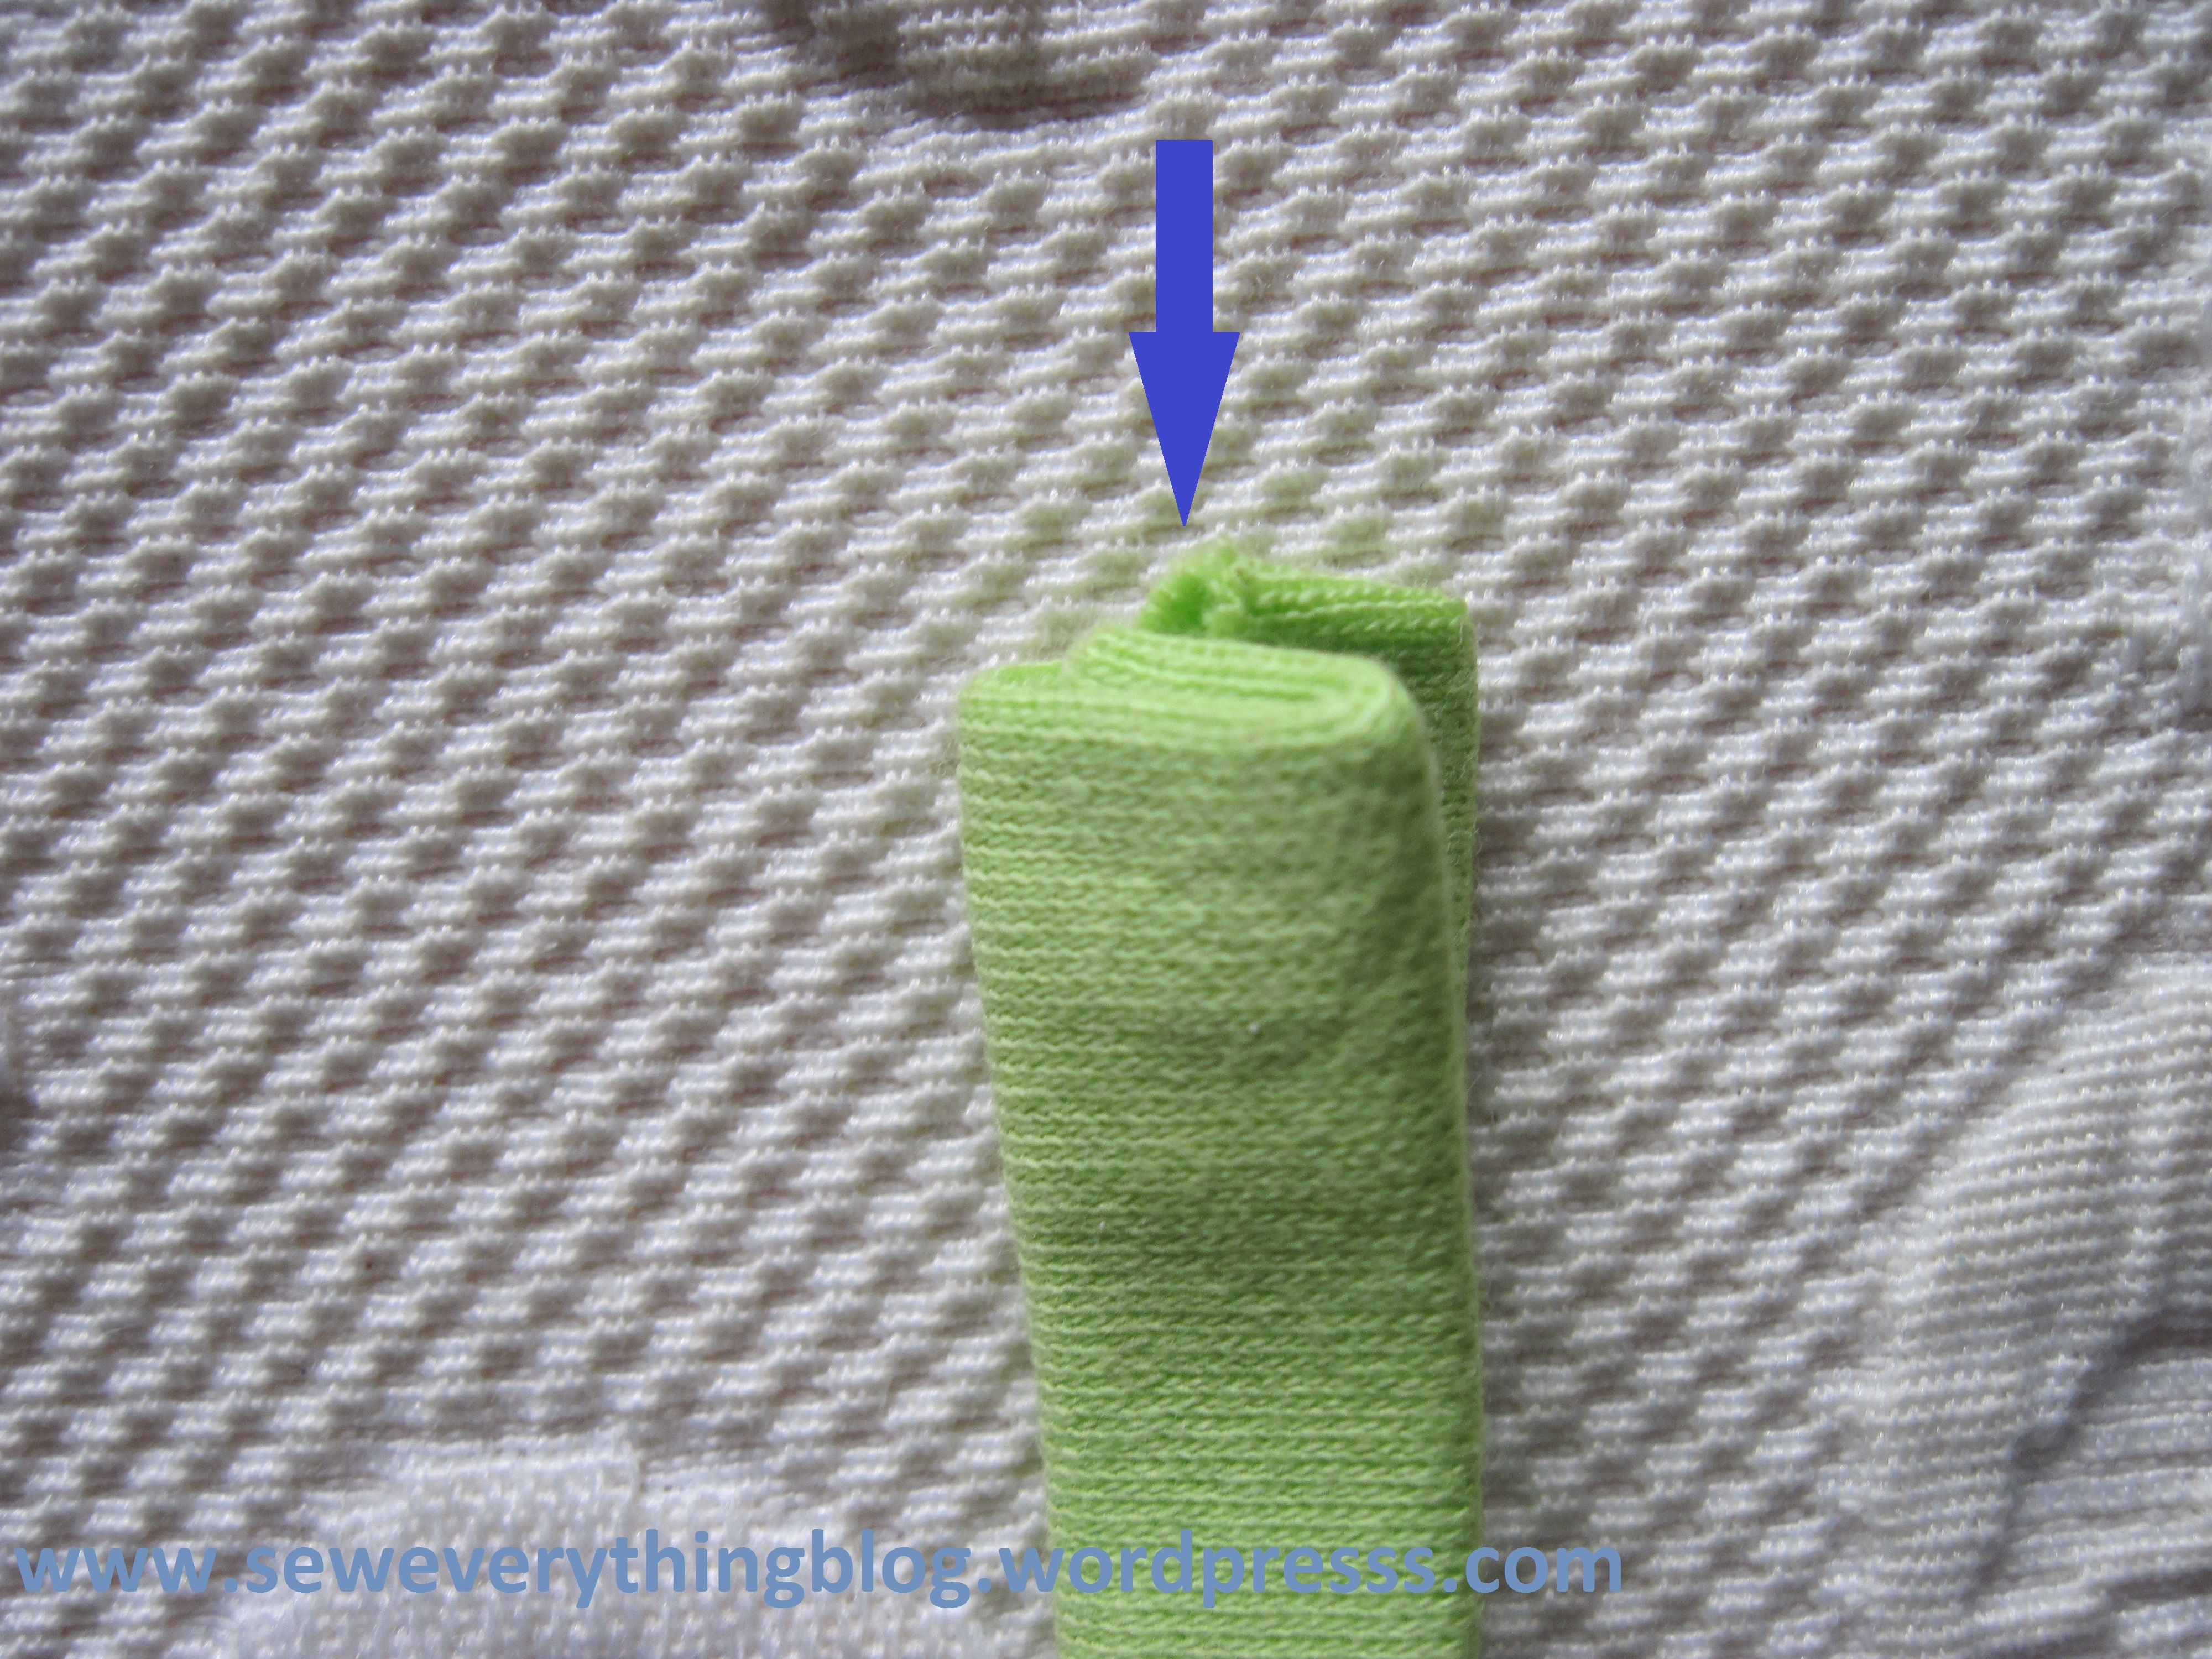
Hi Readers! Today I’ll share a wee bit of sewing information. You know, when the neckline bias binding extends into a tie? Examples include neckline of a baby bib, or maybe shoulder ties on a dress. Well, it’s a really good thing – until you reach the end of the tie and are faced with a bunchy mess. Here is my project for display purposes only, of which I won’t talk much — just excuse the careless sewing.

It happens with any fabric, cotton on the left and knit interlock on the right. The knit looks really bad! And that’s before running the machine on the edges.

To alleviate this irritation, this is what I did:
Fold over the bias tape lengthwise, as usual, and press. While still in the bias creating stage, turn the end of the strips to the wrong side about 1/2 inch (or less) and press. With knit interlock you have the option of not folding over, since knit interlock does not ravel. Less bulk to worry about.

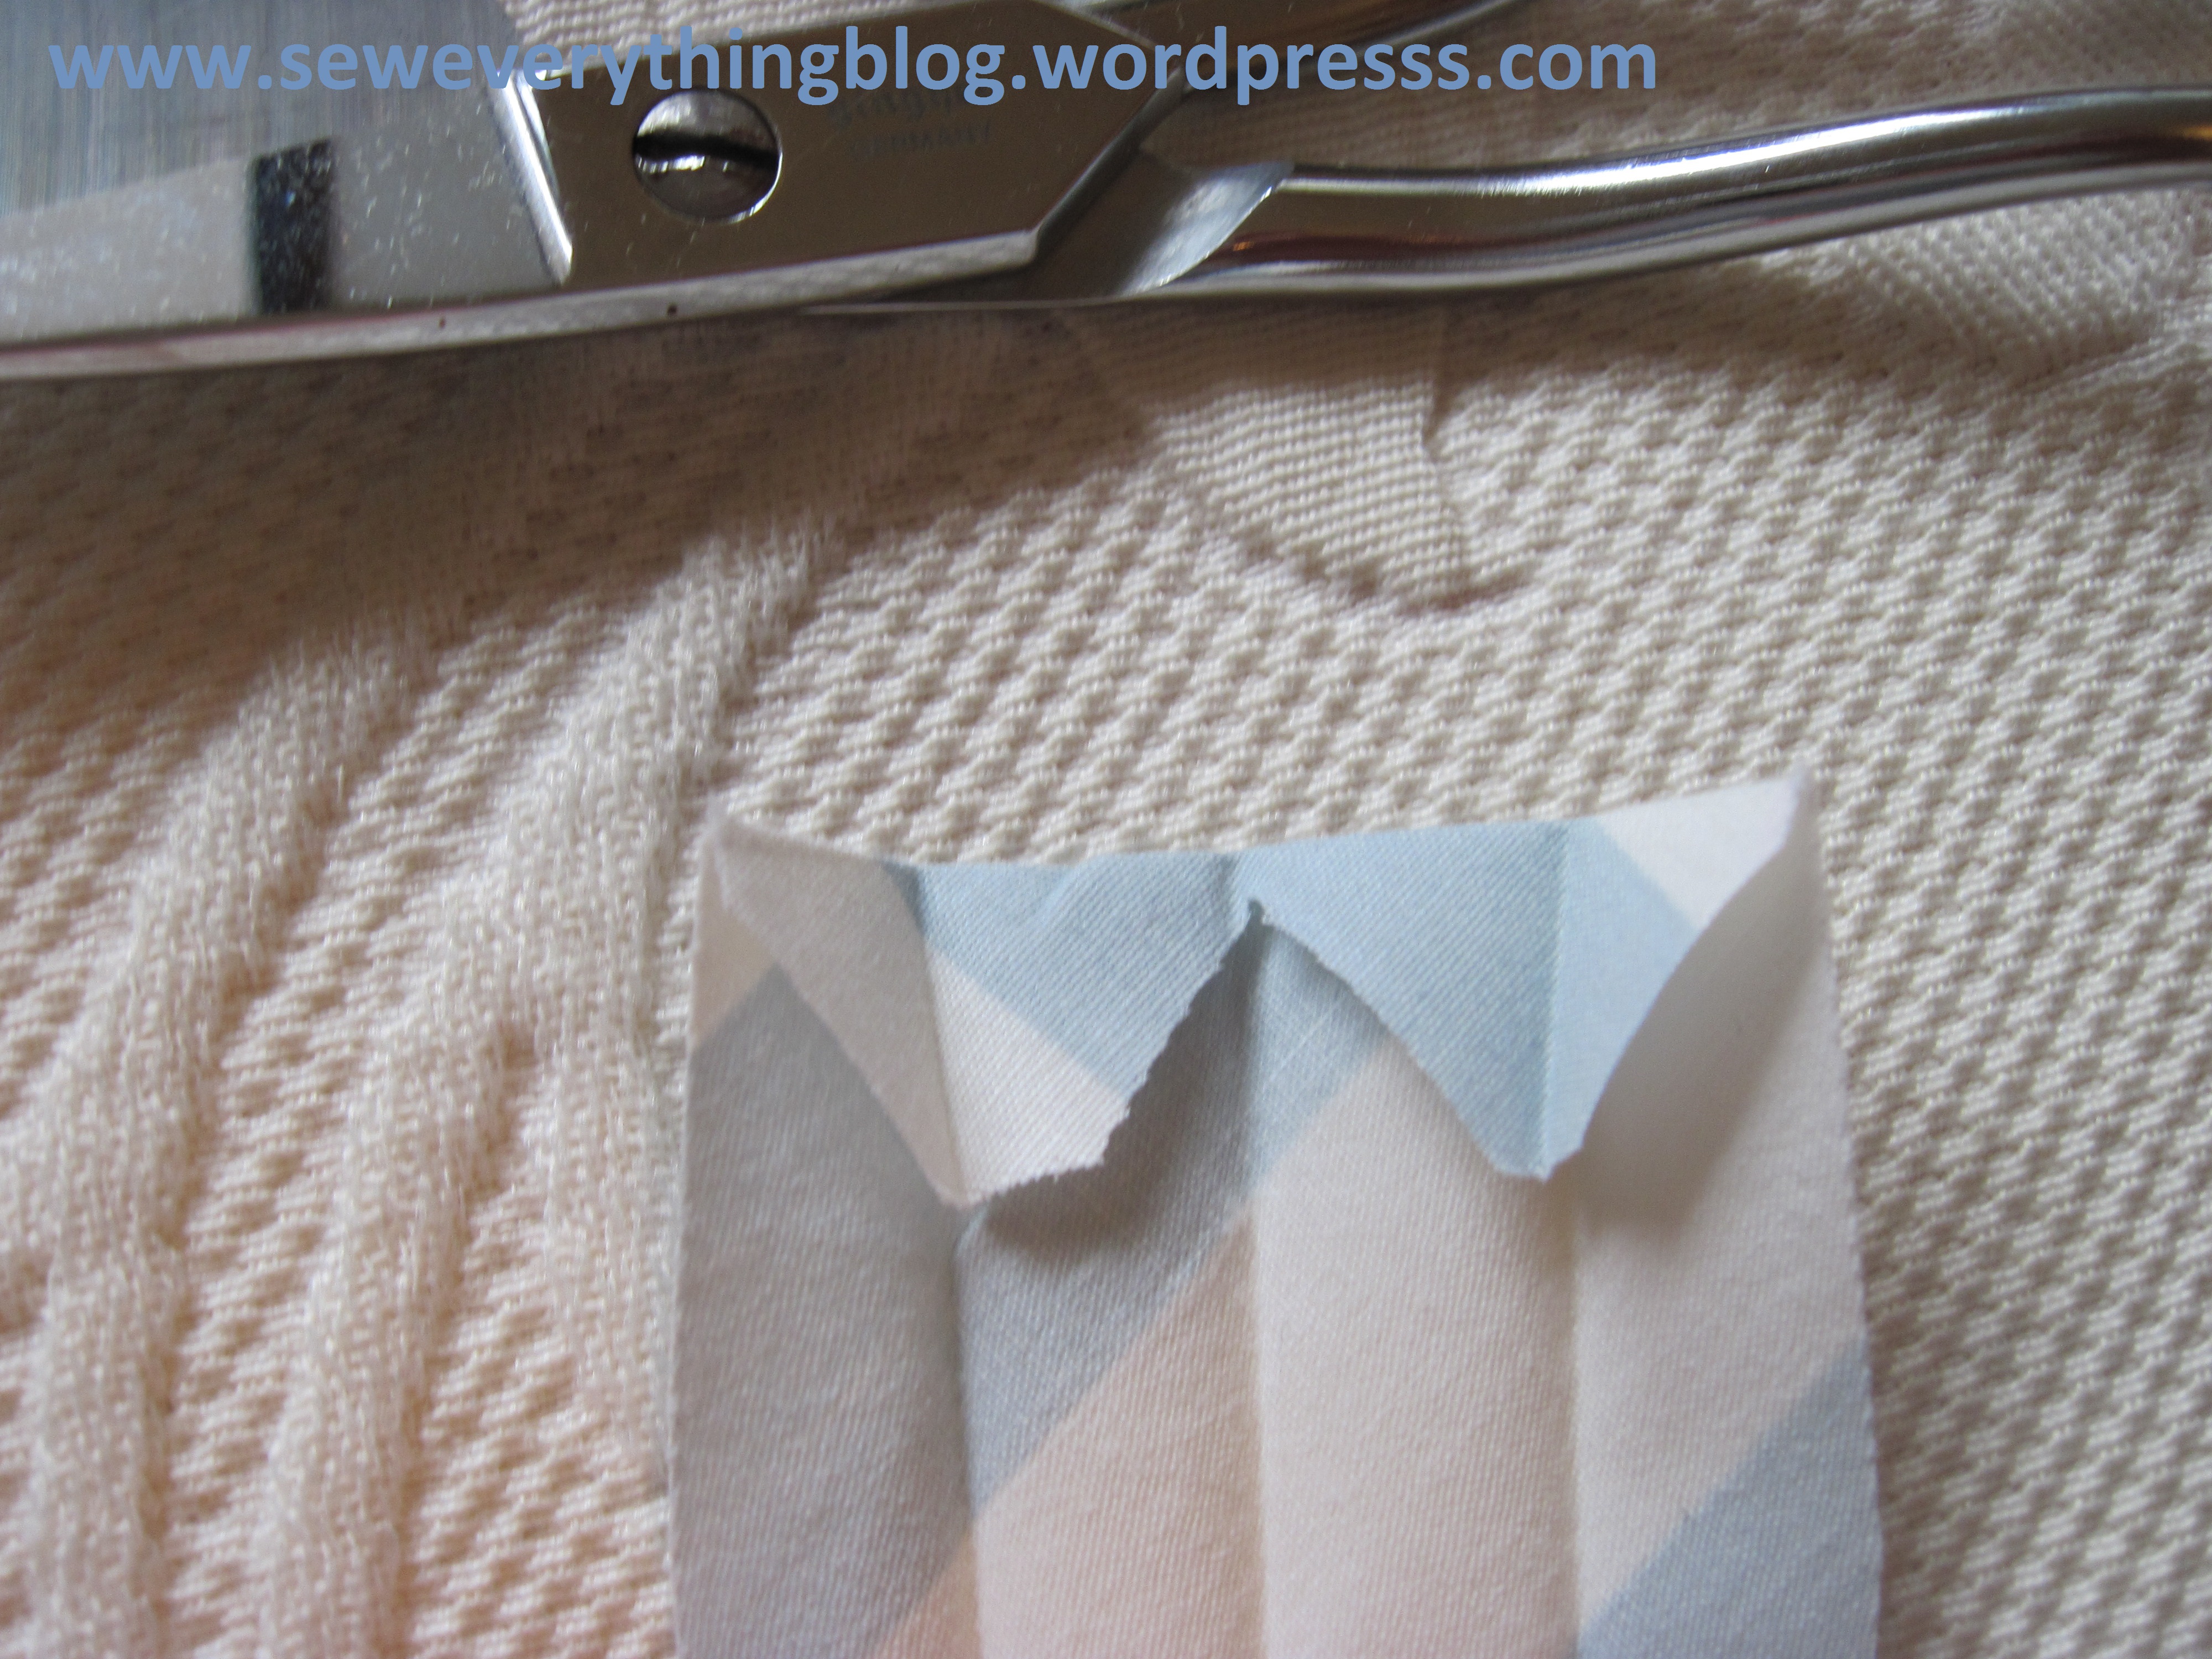
Open out the short ends, so you can see the creases. Snip away a little triangle at the fold being careful not to cut through it, but just short of the crease. Then snip away a triangle on the other side of the folded bias tape (the open edges).

For the knit just the side edges can be snipped away since we will not fold over the top for this little sample. You can, fold over if you want to. I tried both ways (including in my finished project) but prefer the raw edge in the knit.
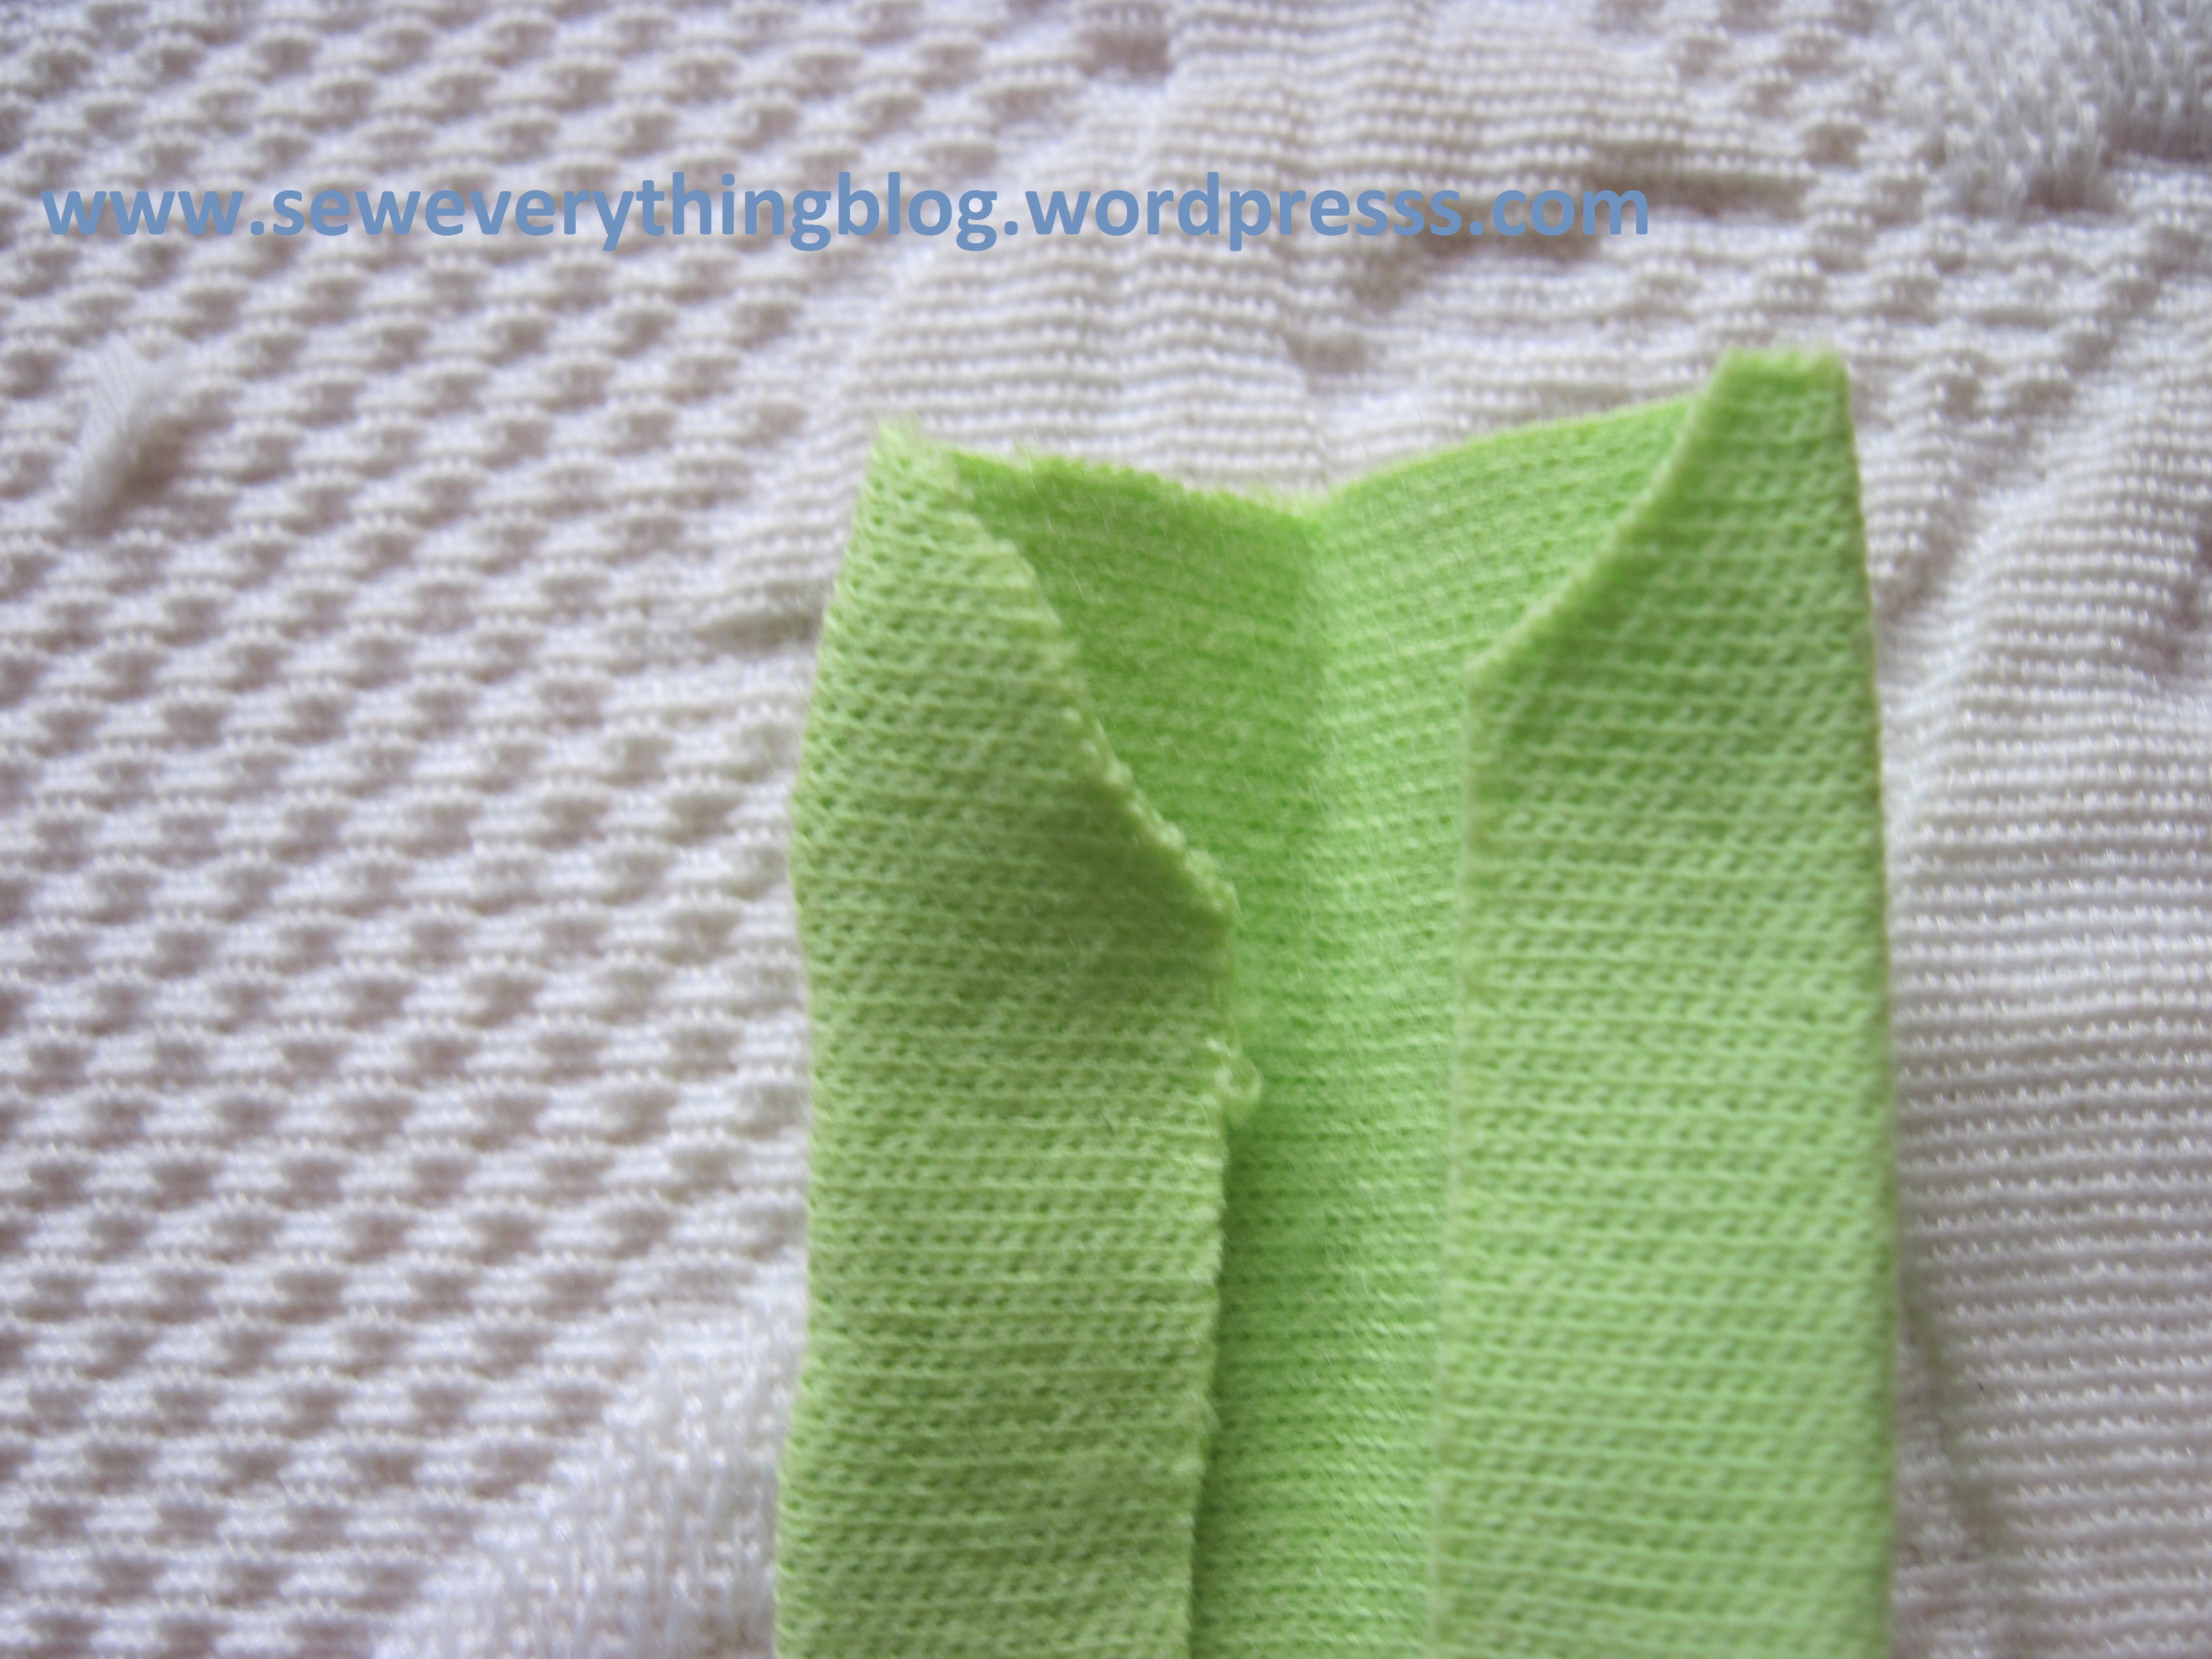
Fold the tape and sew the edges as originally intended. You’ll have a much better outcome because the fabric inside the short end of the bias tube has room to inhabit the space. The cotton on the left has a wonky slanted shape, but that’s ok for this sample (not doing haute couture).
.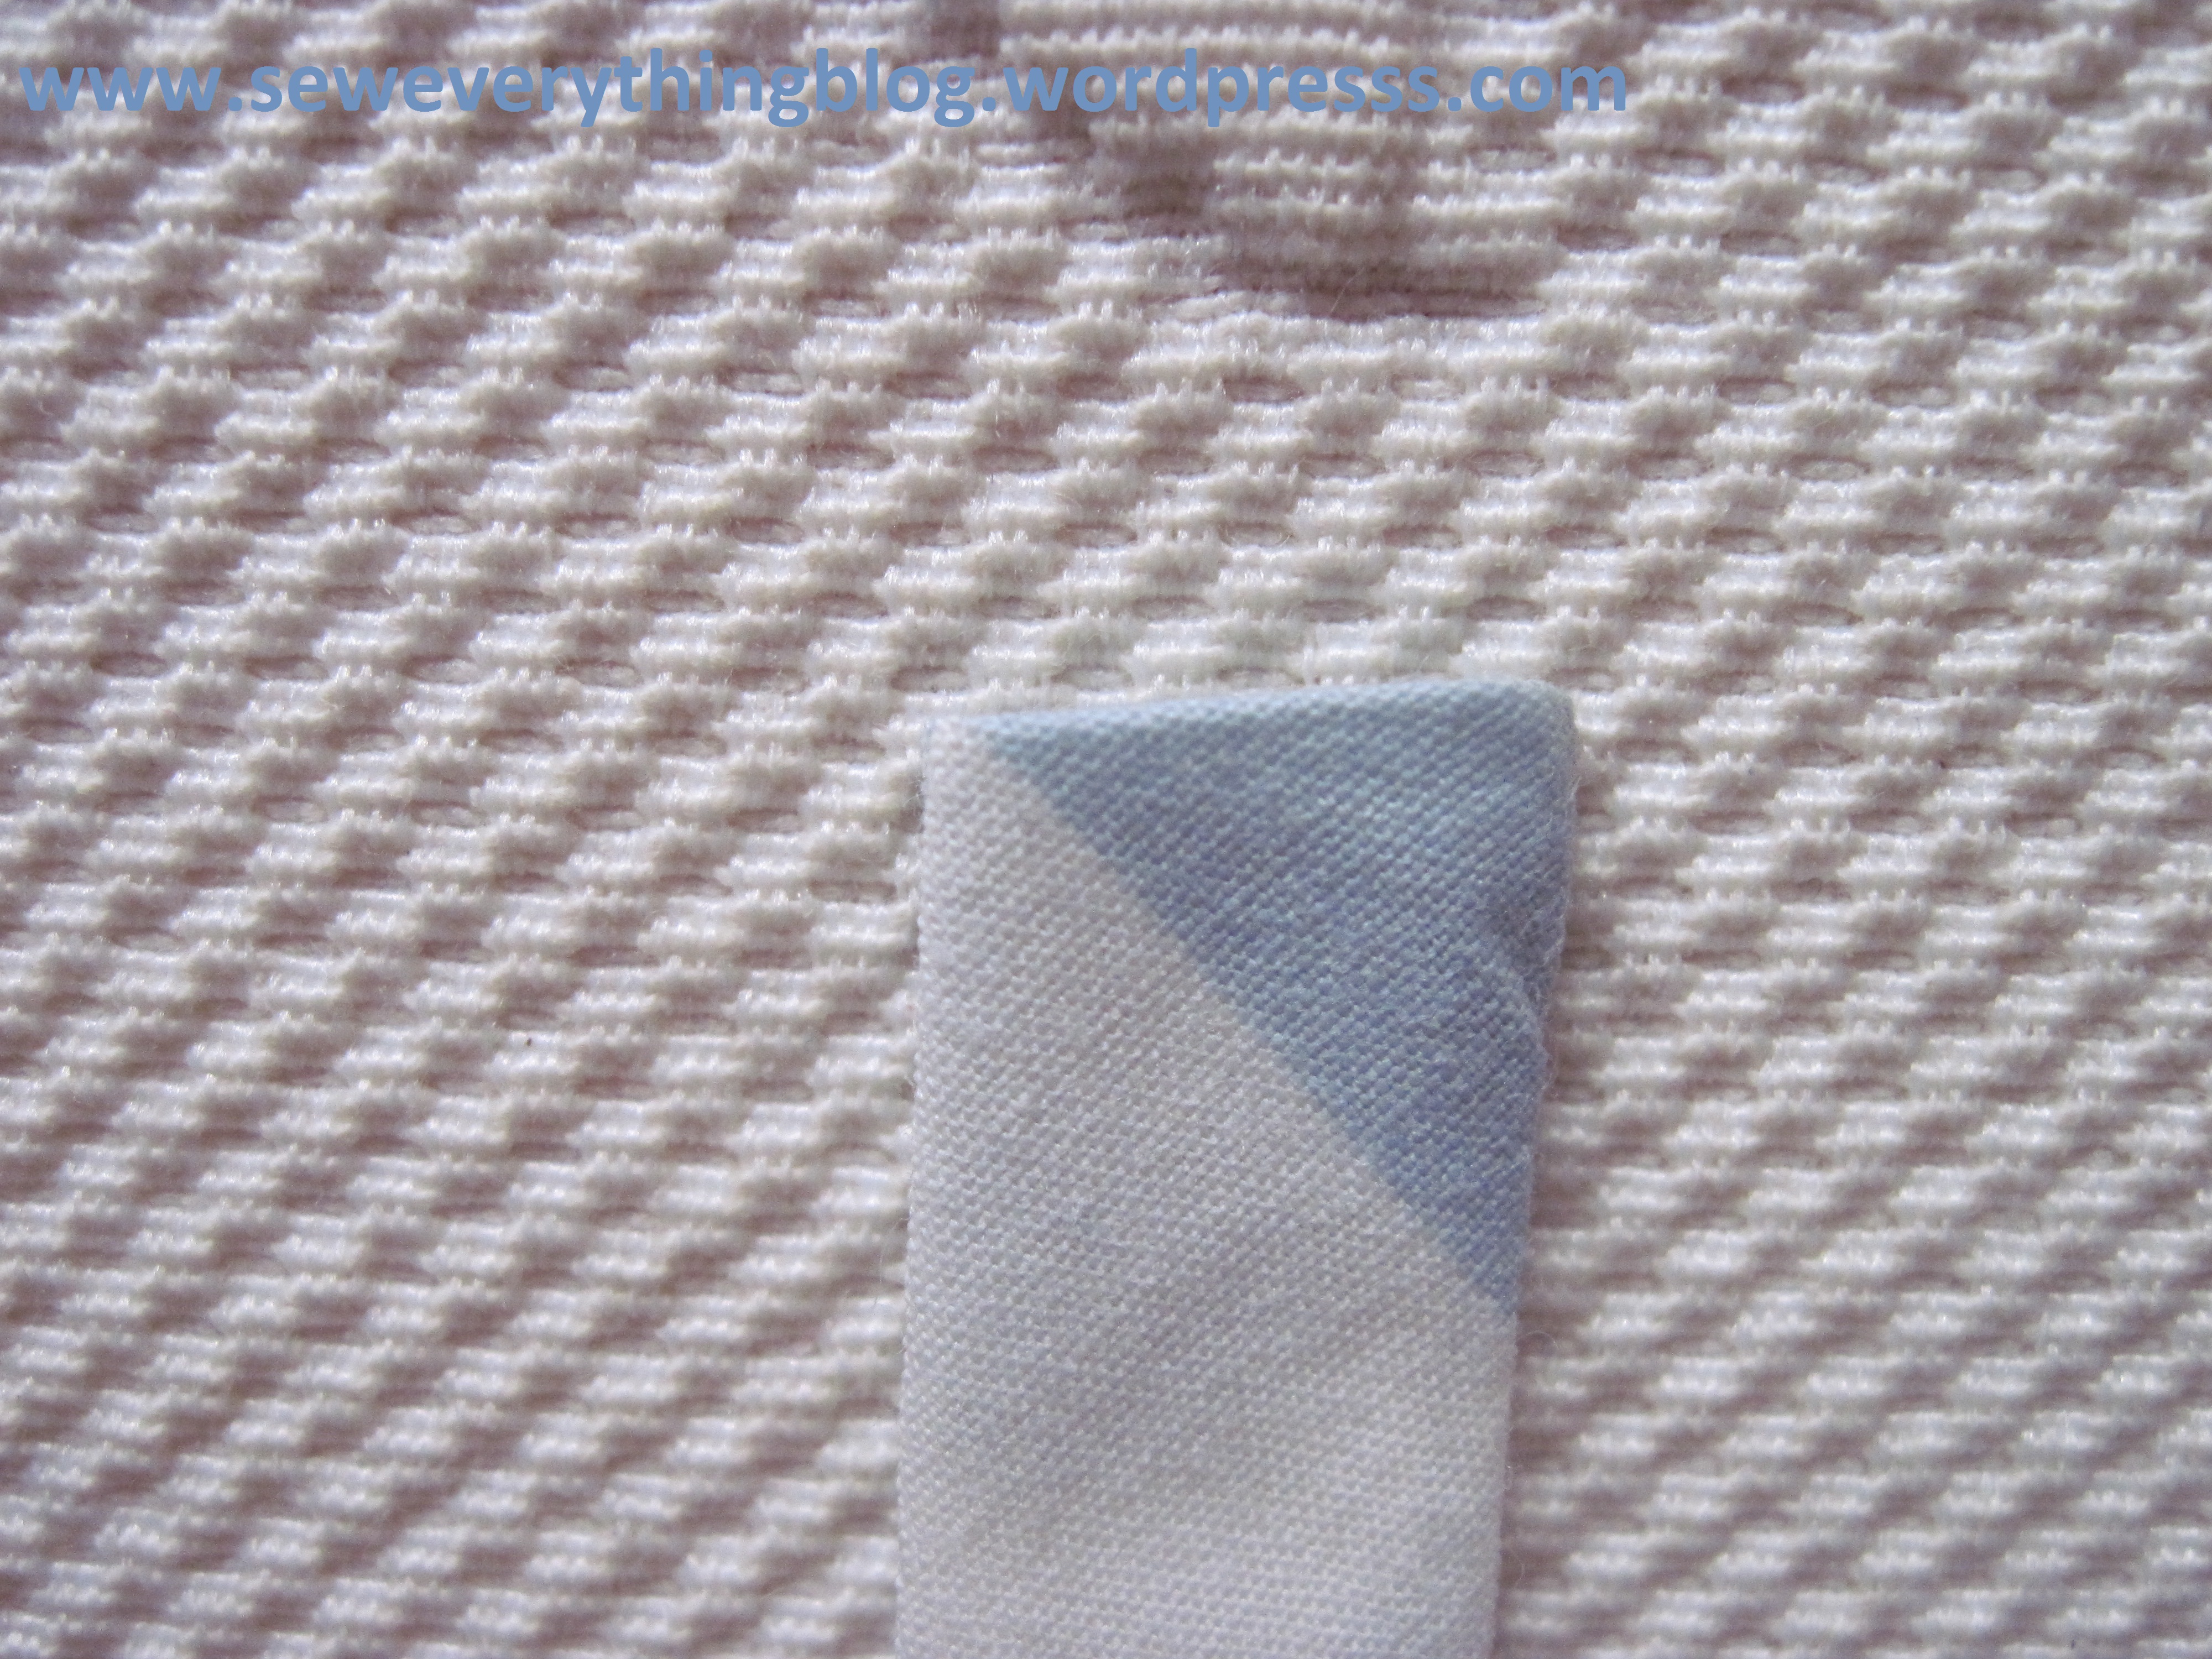

The knit binding has a raw edge neatly in place without any fabric vomit. Photo on the right: the binding on the left was left with a raw edge; on the right is the knit binding where I folded over the edge.


Just want to say: herein lies the concept of “Turn of the Cloth”. It is applied when making collars and other tailoring stuff. When the end of the bias is turned in vertically, and then again horizontally, the inside layer does not have much room because the outside layer of cloth has to fold over it and wishes (if it could wish) that it was wider than the inside layer so it could enclose it all. Hence, with our snipping action, a little fabric is removed from the inside, giving the remaining material some room to snuggle in neatly.
Its such an easy trick, but makes a difference. Well, at least, I usually have a better result with this trick. What about you? Any other tricks to get rid of the bunchy-end-bias-binding dilemma?
Hope you get to snuggle in and sew up a storm this winter.
Samina

I’ve tried sewing the end up like this before I sew the part leading up to it, as if it were a tiny foldover waistband. It works depending on how patient I am.
Come to think of it, that describes most stuff.
LikeLiked by 1 person
Thanks for the tip. I think Judy below details the same technique used by you! Now why didn’t I think of it??
LikeLike
Thanks for the tip!
LikeLiked by 1 person
I sent this to Samina’s personal email but she said to post it here.
I’m realizing that I must be pretty sensitive. When I post something on FB and someone challenges me or contradicts me it hurts. So I’m not commenting in your post. But about that binding that becomes a tie.
When Susan Khalje stayed her she had the most wonderful (because it was hand painted) but simple (because it was a length of fabric folded cross-wise with a neck hole cut out and the sides sewn) from India. I made a few and because it took 3 yards of silk I cut the corners off at the bottom and used bias strips to finish the neck.
What I did was to sew the ends first before topstitching. just fold right sides together sew across and down about an inch then trim and turn the ends. And then topstitch the whole thing. Easy peasy.
Hope you had a nice Thanksgiving, judy
LikeLiked by 2 people
Many, many thanks for the process (thanks to Susan Khalje, too)! Makes perfect sense — why did I not think of this??? (slaps her forehead).
LikeLike
oh so easy… why did I not think of this rather than staring at it for half a day without any result
LikeLiked by 1 person