Dear readers, do you recognize this pattern?

No? Of course not! It is a modification of an existing pattern, the Colette Pattern Company and their Sencha blouse pattern.
(Disclaimer: No affiliation with Colette Patterns) 
The Sencha blouse has a vintage 1940s vibe to it. Even though I avoid most clothing items which fit at the waist, I liked the pattern’s keyhole neckline and the loose shape in the upper bodice — and at the time Colette Patterns was a new-ish independent pattern company. The newness always breaks my resolve. Thus, I bought the pattern and I did make a top with the waist tucks — and I like it.
Somewhere down the line an image of the Sencha top without the waist tucks stayed with me. Then came the time in 2012 when I actually modified the original into a loose and airy tunic with a contrast yoke. The top was featured in a guest post I wrote for The Sewing Loft Blog, on behalf of the American Sewing Guild (I was employed at ASG then). The post was about favorite sewing tools so I did not get to write in detail about how I modified the Sencha pattern into the color-blocked, loose, airy chiffon number with a scenic print… until now.
The modification was easy and worked out well; with a few things to keep in mind.
Let’s begin with the assumption that you like everything about the original Sencha blouse, the fit, silhouette and details.
Analyzing: I looked at the silhouette of the pattern before the waist tucks were sewn, and discovered that was pretty much what I wanted in the modification, except for a longer length.
A yoke was to be added to the pattern. More explicitly, the front and back pieces were each to be separated into an upper yoke and lower bodice. The center back opening was to become a seam; except in the back yoke – more about that below.
Measuring: The important measurement is from shoulder/neck (A) point down to where you want the yoke to end (B). This will help you determine that the contrast yoke ends at the bottom at a preferred location, rather than cutting across, say, right across the apex of the bustline – not a good look unless that is what you’re going for.

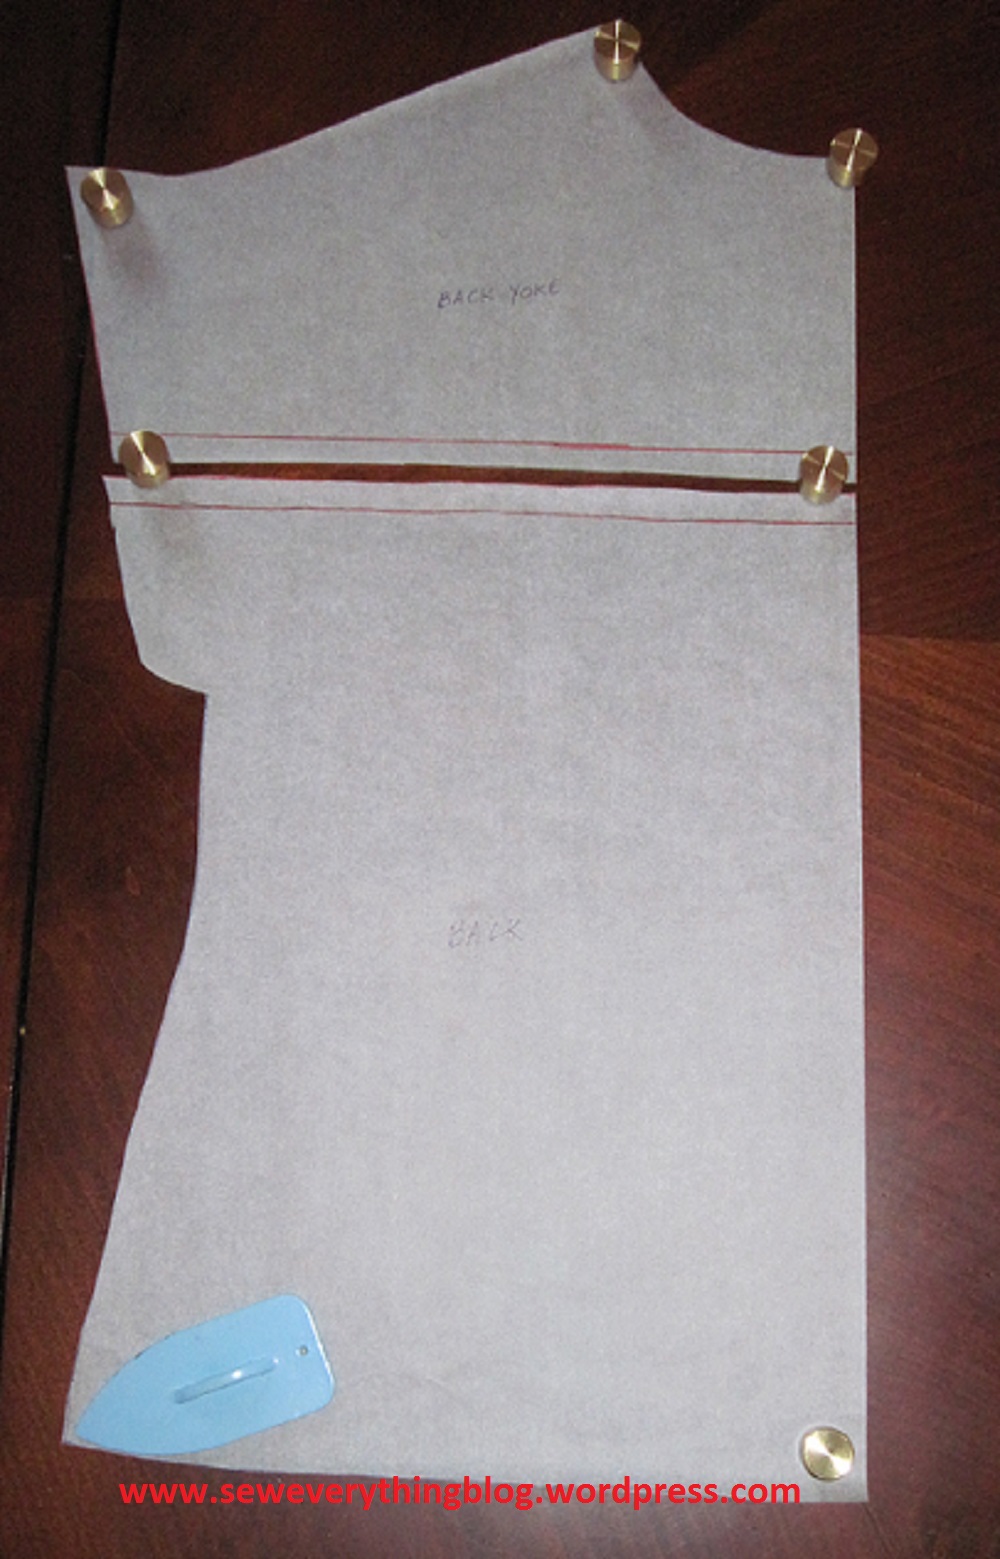
Pattern: I suggest tracing out the front and back patterns rather than cutting up the original. On the tracing, do this: using the AB measurement, draw a vertical line from point A (shoulder/neck) to B (preferred lower edge of yoke). So, do we draw a horizontal line here to separate the yoke and bodice? Not so fast! The horizontal line needs to have a slight upward curve as it approaches the sleeve. See front modification picture above. When you wear it, this line will look straighter. Well, as straight as possible. Since the human body is a curve itself, drawing a straight horizontal will curve sharply downward on the body. After you draw the yoke line, cut apart the top and bottom (on both front and back pattern) and add 5/8” seam allowances to the cut edges, either by tracing the pieces again or just trusting your memory to include the seam allowance when cutting fabric. I do not trust my memory – been burned too many times.
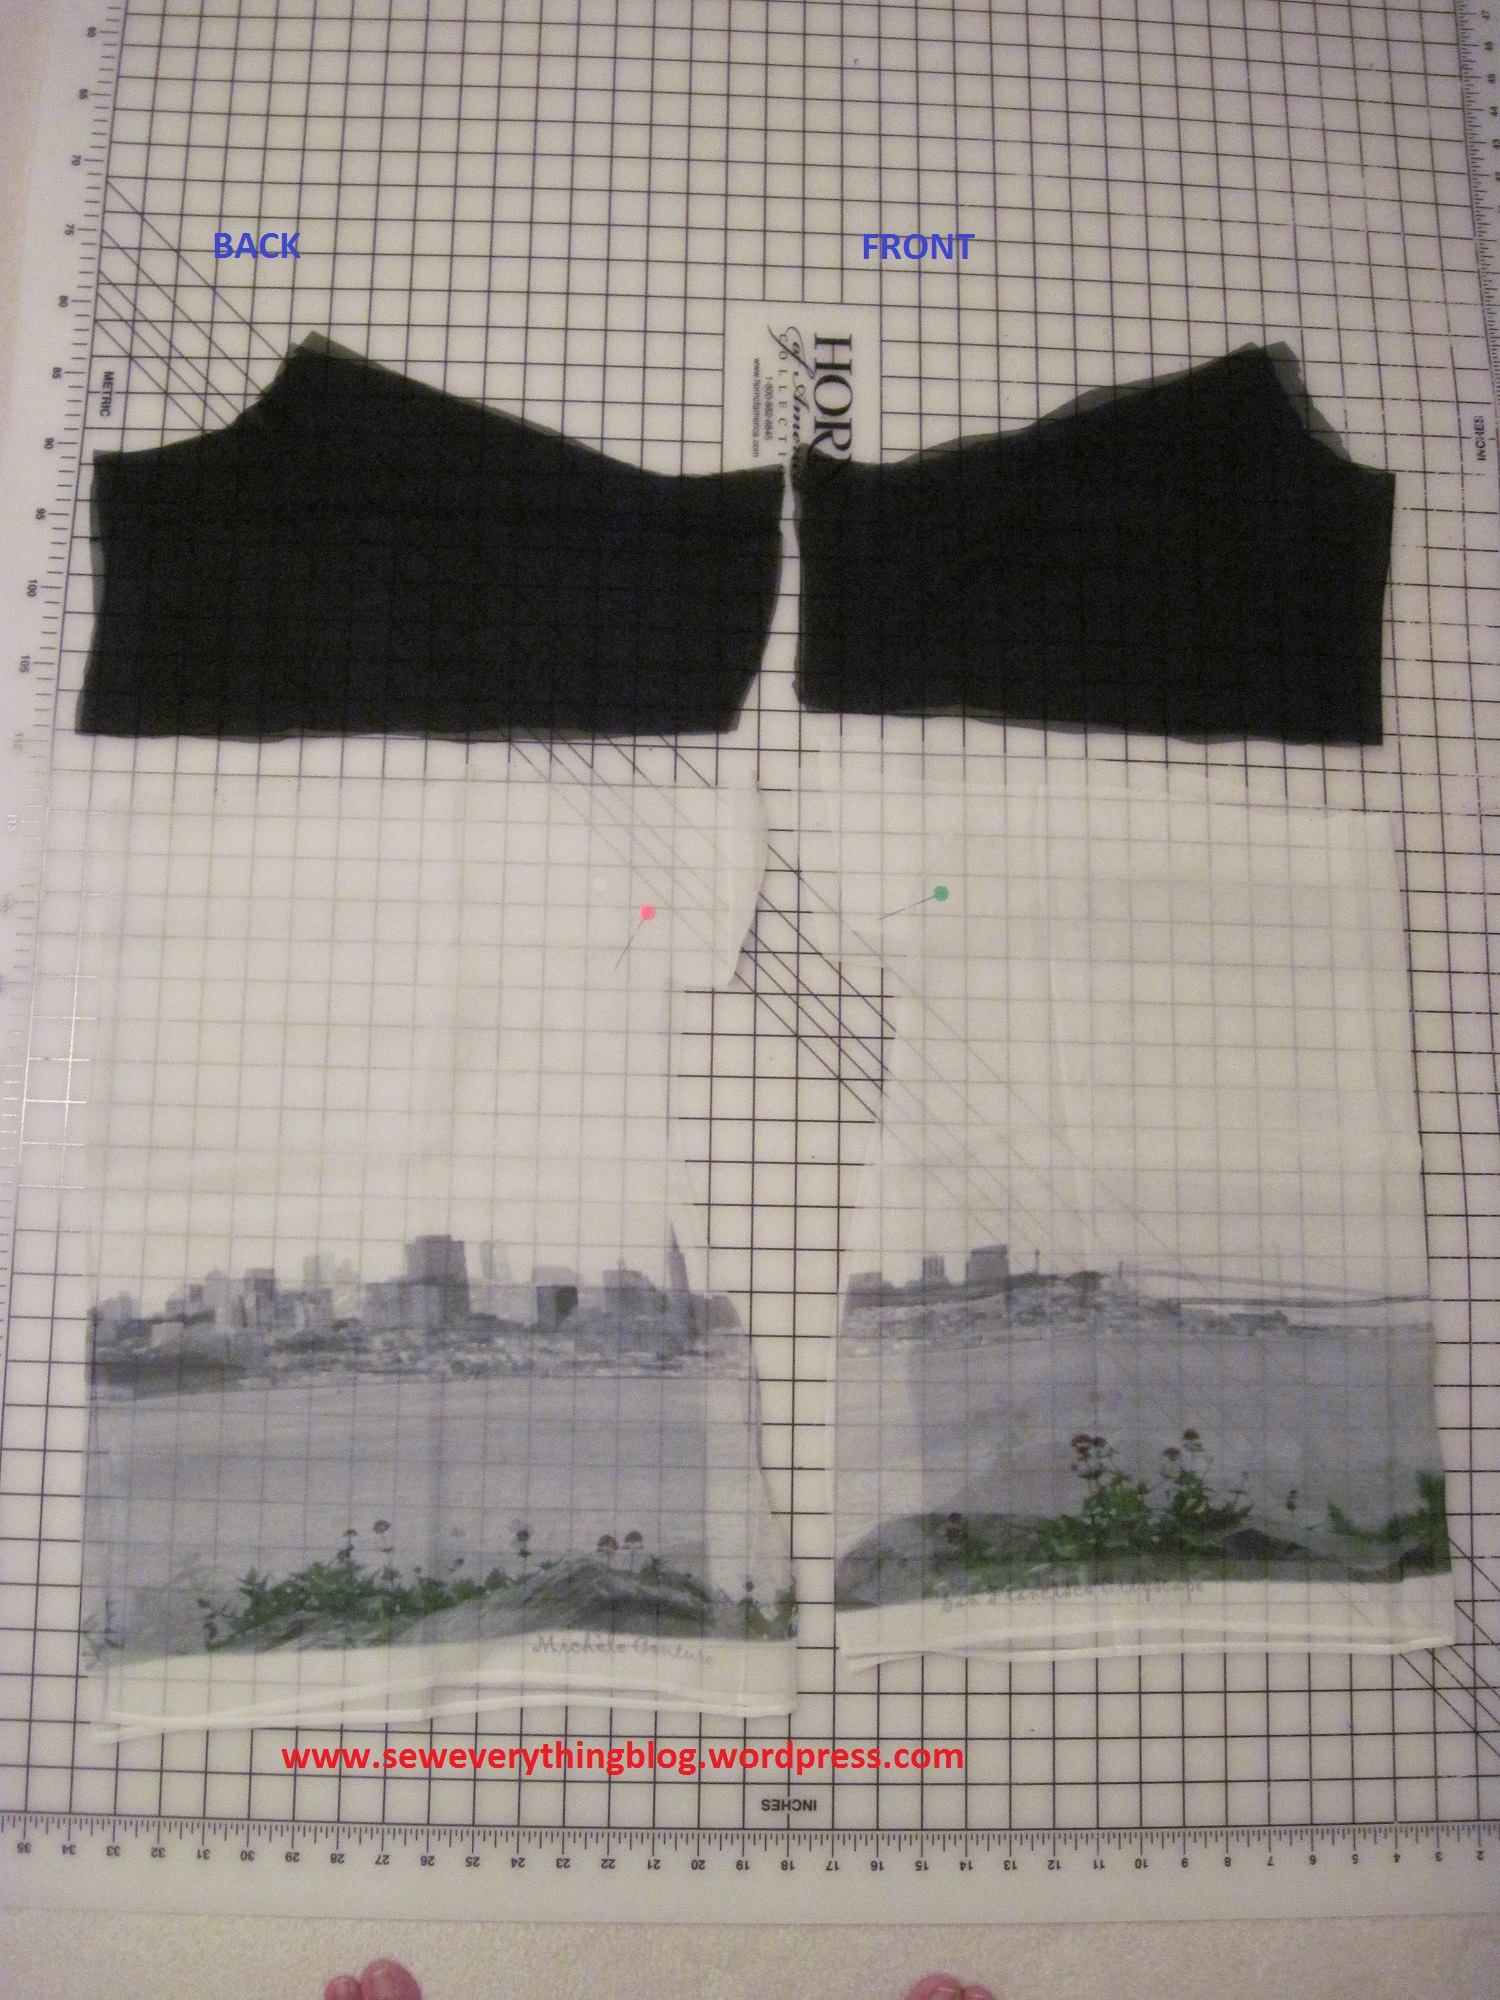
If using a solid or allover print fabric for the bodice portion, use the hemline of the original pattern as a guide which curves slightly upward on the sides, as it should. However, since my lower bodice was a scarf print and I wanted the entire scenic print to be incorporated into the garment, including the white border below it, I left the original scarf edge straight across and used it as a hem. Yes, it droops on the sides a little but still looks good. In my opinion, that is.
Back: I folded the back fold line which is prominently marked on the original pattern, before tracing the back. The back is not cut on fold, but has a center seam. But, do not add a seam allowance here.
Facings: none. This chiffon top is finished with a bias binding at the neck.
Cutting fabric: The front has 2 pieces – the yoke and the bodice. The back has four pieces – 2 yokes and 2 bodice pieces.
Sewing: Sew center back seams on bodice portion, open seams, press and finish. Turn back and finish the center backs of the two back yokes – therein lies the opening. Sew yokes to the back bodice making sure that the finished edges of yokes meet at the center back seam of bodice. Finish seams as desired.

Join front yoke and bodice in a horizontal seam. Finish seam edges together and press down. Join shoulders. Finish seams, and press to back. Sew up the sides (finish seams), hem sleeves and bottom as desired.
My neckline was finished with bias binding with self-fabric – silk chiffon!! No it was not difficult. See picture above. The button loop on the back is an extension of the bias binding, turned back to make a loop.
Note: this tunic was sewn entirely by hand back in 2012. For details on my hand sewing needles post go to The Sewing Loft Blog.
Hope you like my top! Do ask questions about this project. Done any pattern design changes lately? We’d love to know!
Samina
PS: I was thrilled to see a similar tunic on Alida’s blog! It’s beautiful! Go check it out.

Oooh, lovely pattern hack! And, the keyhole opening is so cute. And the scarf? Best use of silk scarf ever! I have several silk scarves that I don’t wear and wont to transform into something beautiful but am afraid to cut into them!
LikeLike
Be brave! Go ahead & cut into the scarves.
I love this chiffon top – it looks better on a real human (me) than my dress form. 🙂
LikeLike