
Let’s take it from the top. A short while ago, both my sergers became non-functional within 24 hours of each other. I tell you, these machines probably converse at night. It would make a good movie script —- “Toy Story — Sewing Stuff Version”. Are you listening script writers? Could be a good project while you are on strike against the movie and television studios.
The Bernette, circa 1989, was my bestie until now. It was a true workhorse and for 34 years, was used constantly without a hitch. Now, it still works, but the foot pedal seems to have had it. The pedal is dead. RIP, my friend. Alas, I put the my mechanical friend out on the curb and let a nice junk dealer (who prowls our neighborhood on trash pick-up days) take it.
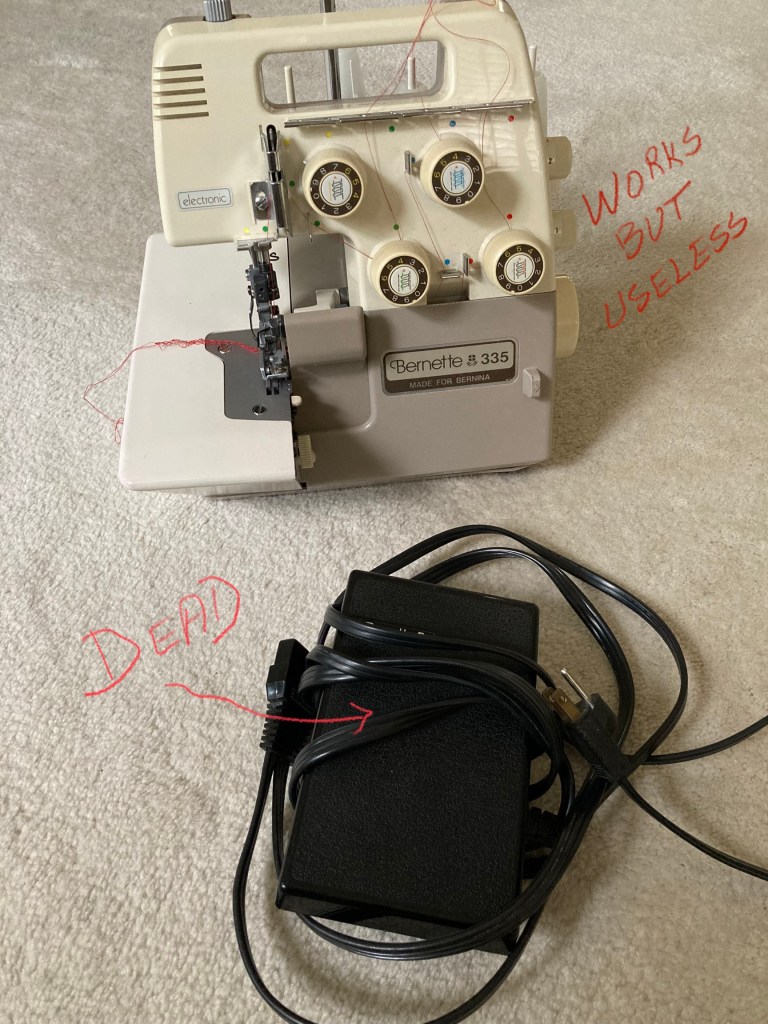
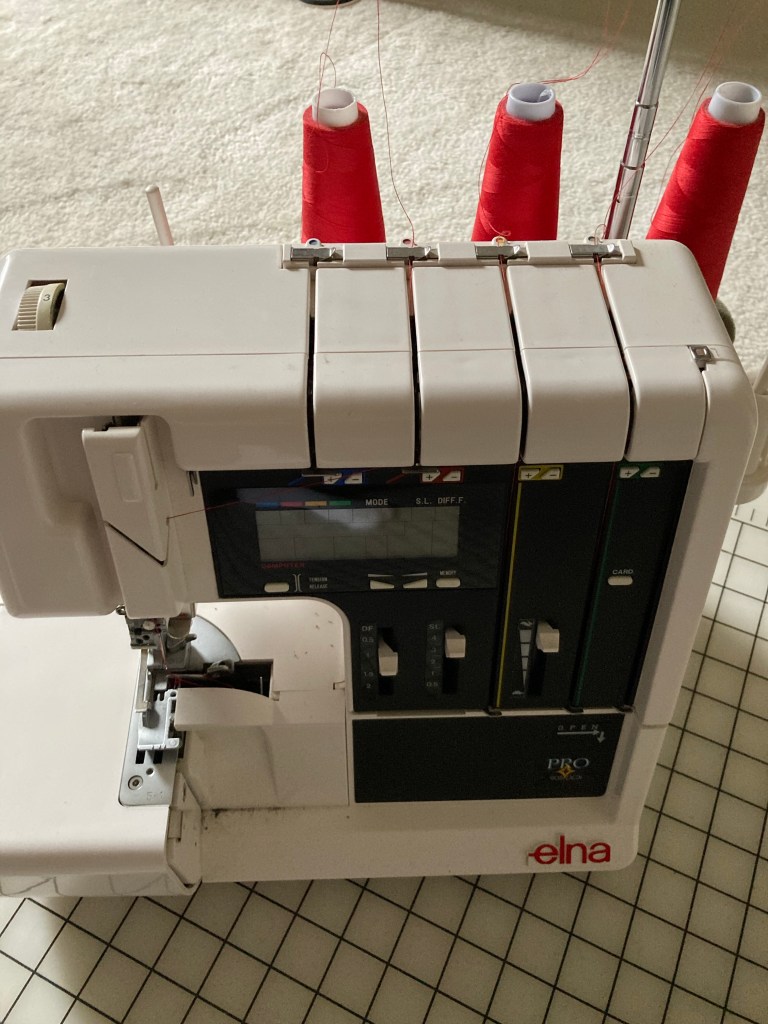
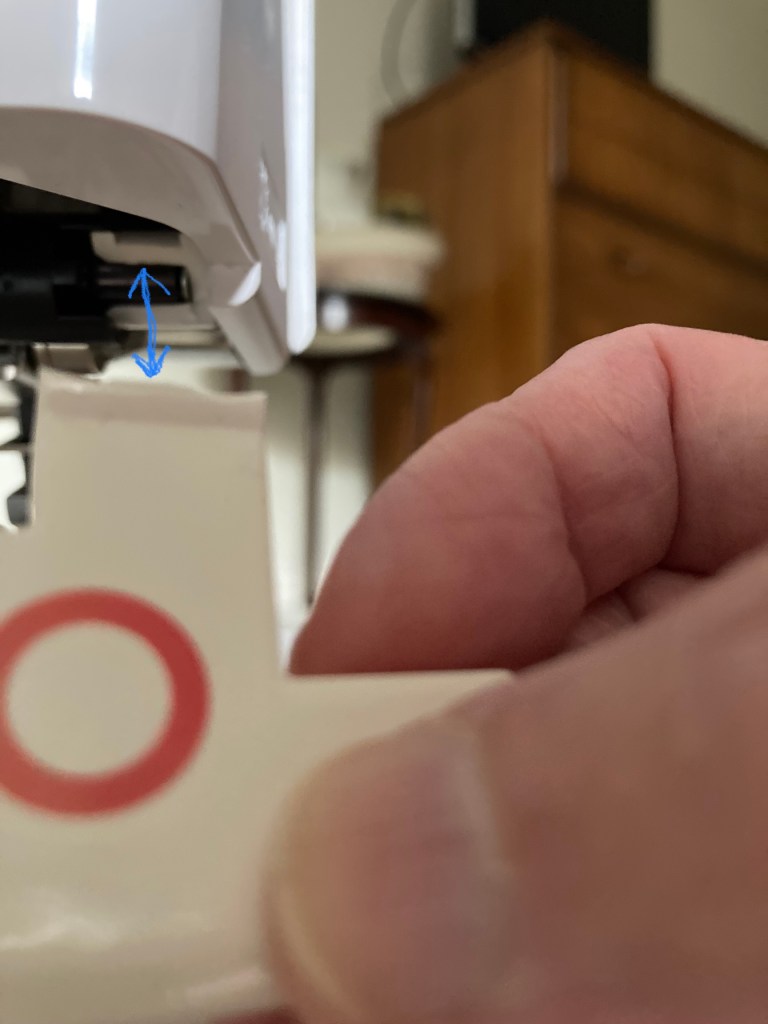
The Elna Pro 905 purchased sometime in the 2000s came into my world because it was one of the first sergers to include a cover stitch. The cover stitch never really worked that well, but the rest of it’s functionality was top notch. A day after the Bernette foot pedal died, the Elna decided to break off it’s take-up lever (which raises and lowers the presser foot) —- why is it made of plastic, anyway? It will soon be on it’s way to the shop where it was purchased — hopefully they can fix it.
Is it possible to sew up nice projects without a serger? Of course, it is! We got so used to the speed and professional look of the serger stitch, we forgot the “before times”. There are many decorative and functional uses of the serger (you can make entire knit garments on a serger from start to finish without using the sewing machine).
Let’s focus on the seam finishing function for now. I’ve included photos to illustrate #3 and #7. For the other seam finishes I used my limited drawing skills in one illustration and numbered them so you can match the seam to the drawing. I didn’t think #8 needed a pictorial depiction. Scroll to the end to find the imperfect drawing. Heh.
1. Pressed open with pinked edges. For very new sewers, pinking is a zigzag edge and is created by using pinking scissors.
2. Seam allowances sewn together, then sewn 1/4” away from the previous stitching. Edges pinked to prevent raveling.
3. Hong Kong seam finish: each seam pressed opened and it’s raw edge bound. Most effective when bound with a soft contrasting bias tape. Photo below

4. Pressed open; each seam allowance turned under and stitched. See the imperfect illustration at the end.
5. Pressed and bound together. Similar to the Hong Kong finish but the seam allowances are not opened; they are bound together with bias tape. See illustration.
6. The flat fell seam! My favorite for clothing with a sportswear vibe. Almost always used on men’s shirts — dress or otherwise. Needs a few steps to accomplish but the result is worth it. See illustration to get the layout of the seam allowances, but you will need to watch a video or look at detailed instructions. Blog fodder for another post?
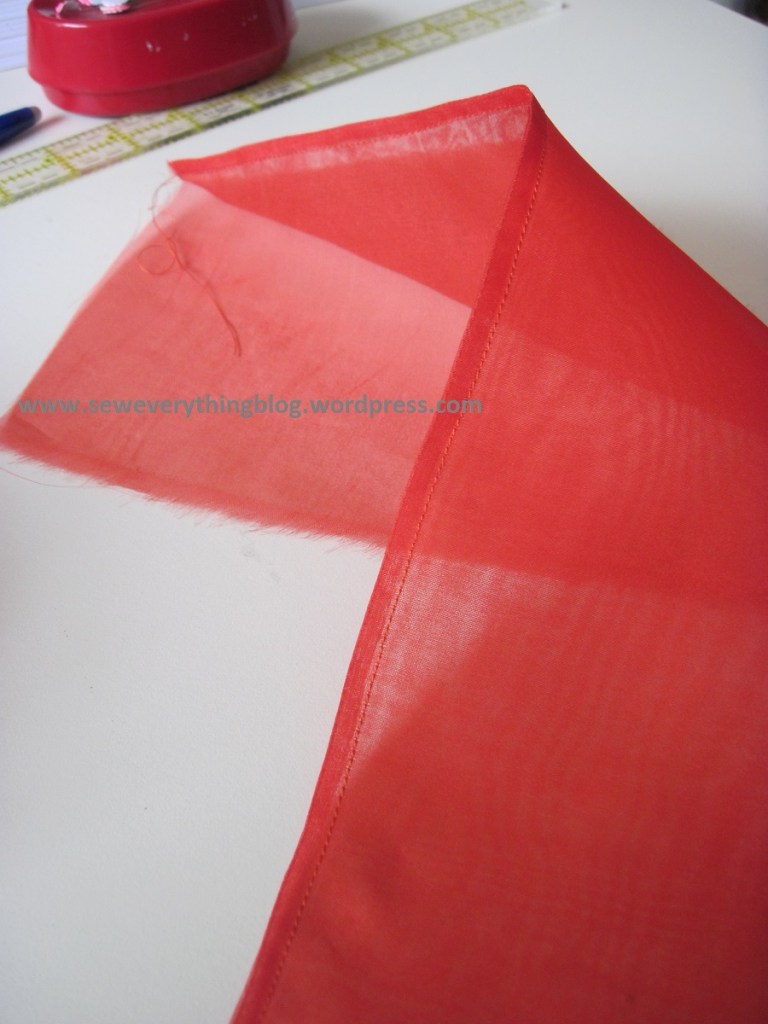
7. The French seam! My favorite for dressier or casual wear, most effective in sheer and/or soft fabric. Take a look at how I did it in my red organza jacket. https://seweverythingblog.com/2013/04/09/sew-a-french-seam/
8. No seam finish. For anything that does not ravel — knits, bias cut seams (yep, bias does not ravel).

Can you think of any non-serger seam finishes I might have missed? Have a great summer, y’all.
Samina.

I’m so sorry about your poor serger! You had it so long; I hope they can fix the second one… but you’re right of course, we were sewing long before sergers came along! I like using french seams on delicate fabrics too, especially when they fray a lot, like organza and chiffon. Well if you can’t get your second one fixed, then there are lots of great models on the market today – I know I love mine! Take care and good luck!
LikeLike
So happy to hear from you, Kasey! I’m kind of glad that I let go of the old serger. The junk man said he can fix it — I hope he can so that someone else can put new life in the old girl. Maybe I’ll soldier along without a serger to see how it goes before looking for a new model. Serger technology has probably gone through the roof since I last bought it.
LikeLike
Love this blog. I rarely use my serger as my sewing machine has an overcast and a double overcast stitch for seam finishing. Long ago sewers would use a small zigzag stitch near the cut edges to prevent unraveling.
LikeLiked by 1 person
Right?? We did pretty well before sergers were marketed to home sewers, I think.
LikeLike
Hi Samina, You CAN replace the pedal of your Bernette, can’t you, given a bit of time?
I forwarded this blog to a young friend of mine who recently started fashion sewing and doesn’t (yet) own a serger. Very good summary of seam finishes without a serger — it brought back memories of sewing in my teens!
LikeLiked by 1 person
Stupid WordPress did not save my comments!
I forwarded this blog to a young friend who has just begun fashion sewing and does not yet own a serger. This post brought back pleasant memories of my teen years (50 years ago!) when I sewed without a serger and had to figure out how to finish seams for each project…
I hope you can readily obtain a foot pedal that works for your trusty (old) Bernette, as well as repairing your newer Elna combi. I purchased a combi Babylock machine 10 years ago and really was too unskilled at serging to switch back and forth from serging to coverstitch. Last year, I bit the bullet and purchased separate machines, and it is much easier for me. A combi is great for people who are skilled at changing settings on their serger. But otherwise, it is much more straightforward to learn how to use separate machines (space and pocketbook permitting).
LikeLike
Joan, thank you for sharing my blog with your friend. I’m certain the young shall go forth and glorify the art of sewing clothes. I might spring for a separate cover stitch machine —- well, at least research it some more before emptying my wallet yet again. What are your thoughts on using a cover stitch machine?
LikeLike
Before I bought a new, large BL coversitch machine, I thought it was essential bc I wear almost only knit T shirts. But I attended a fun Palmer Pletsch camp last summer and learned that Pati Palmer just fuses all of her hems! That actually works if you aren’t sewing a closely fitted @ the hem garment, as stretching the hem would stress the fusing. I almost always fuse then coverstitch, but last year, when time was very short before traveling, I fused a hem and haven’t coverstitched it since then. All that said, I think having a standalone coverstitch machine makes hemming easy and more pleasant only changing thread rather than doing multiple steps on a combi machine. The only real ‘downside’ is that the machine does just one thing (though very easily and well), not numerous things like sewing machines and sergers can do.
LikeLike
My serger is still working but the tension is messed up and I can’t seem to get it back (I think something is wrong with the tension wheels) so I have been getting more creative with my seam finishes as well!
LikeLiked by 1 person
Glad to hear that! As long as there is no raveling on the inside and it looks neat, no need for serging.
LikeLike
Samina, the foot pedal might be able to be repaired or replaced and there might be nothing wrong with the serger itself.
LikeLiked by 1 person
Cathy, the old serger did work; I did think about getting a new foot pedal, but decided to toss her into the arms of the local junk collector who told me he will make it work. Hopefully he can make it functional again for someone who can put it to use again.
LikeLike
Sometimes it’s time to upgrade and get a new/newer serger or machine, isn’t it? You deserve it. I know you do a lot of sewing and you got a lot of use from your serger. When I upgraded mine, I donated my older model to someone who did a lot of charity sewing.
LikeLike