
If your sewing machine brand offers a variety of specialty presser feet, try and find a button sewing foot. Fair warning: it’s not a necessary accessory to have but it is fun to use and yes, for the hand-sewing haters it’s useful. Fair, fair warning: someone has come up with a trick (hack?) to sew on buttons by machine without a specialty foot involving sticky tape and a toothpick. I have not tried it. Fair, fair, fair warning: this is not a sponsored blog post. Bernina is not paying me for touting the foot. (For those who’ve asked, this blog is not monetized. I actually pay money to own this domain.)
Lets focus on the Bernina button-sew-on Foot #18: It’s a funny looking critter but each little feature has a purpose. Another disclosure: my button foot was purchased many years ago. Bernina has since changed the design and added a useful feature to the foot. (That useul feature was already there in the old version) More on that below.
How to:
Select your buttons. Obvious, huh? Just stay away from buttons with a built in shank. The #18 is used to attach buttons with 2 holes or 4 holes. The size of the button will depend on how wide a zig zag stitch your machine can make. I have attached 3/8” shirt buttons, and 1” buttons with varying degrees of space between the holes.

Attach the button-sew-on foot to the machine, replacing the regular presser foot. The foot has a center pin and two side flat-bottomed, tiny feet on either side of the center pin. These will hold down your buttons. The useful feature on the #18 is the center pin; it is vertically adjustable according to the thickness of your fabric because thicker fabric will need a longer shank (that little vertical thread formation under the sewn button which accommodates fabric thickness when buttoned up). I’d say this would also be a boon for the areas where a button might have to be sewn onto multiple layers of fabric. The new model has non-slip “tiny feet” on either side of the center pin. For now, I am happy with my old #18.
(The above paragraph has been edited 7/23/21. I will mention why in next week’s post).

Place your button on the marked spot on fabric. Lower the foot so that the center “pin” is between the holes and the two “tiny feet” are holding down the button.

Machine (Bernina 1230) adjustments:
Stitch: zig-zag where length is 0 and width according to the space between holes in the button.
Feed dogs: lowered.
The instructions on my old Bernina 1230 ask me to move the needle position to “half left” before starting the actual zig-zag. I’m not sure why but I do it anyway.
Start with a long thread tale – 4 or 5 inches. You’ll see why later.
Adjust the zig zag width by manually lowering the machine needle in the holes without hitting the button – this is done in just one zig and one zag with the manual turn of the side “wheel”. Once that is established, feel free to zig zag using the foot pedal — three or four times.
To release the project from the button foot, pull it out towards yourself. Be sure to leave long thread tails at the end of the process.
For 4-hole buttons, use the same steps. After sewing on one pair of holes, pull out the project just enough to release from the center pin, turn the project around and slide the button back under the foot into position to sew the other two holes.
Repeat above process until all buttons have been sewn on.
Finishing up:
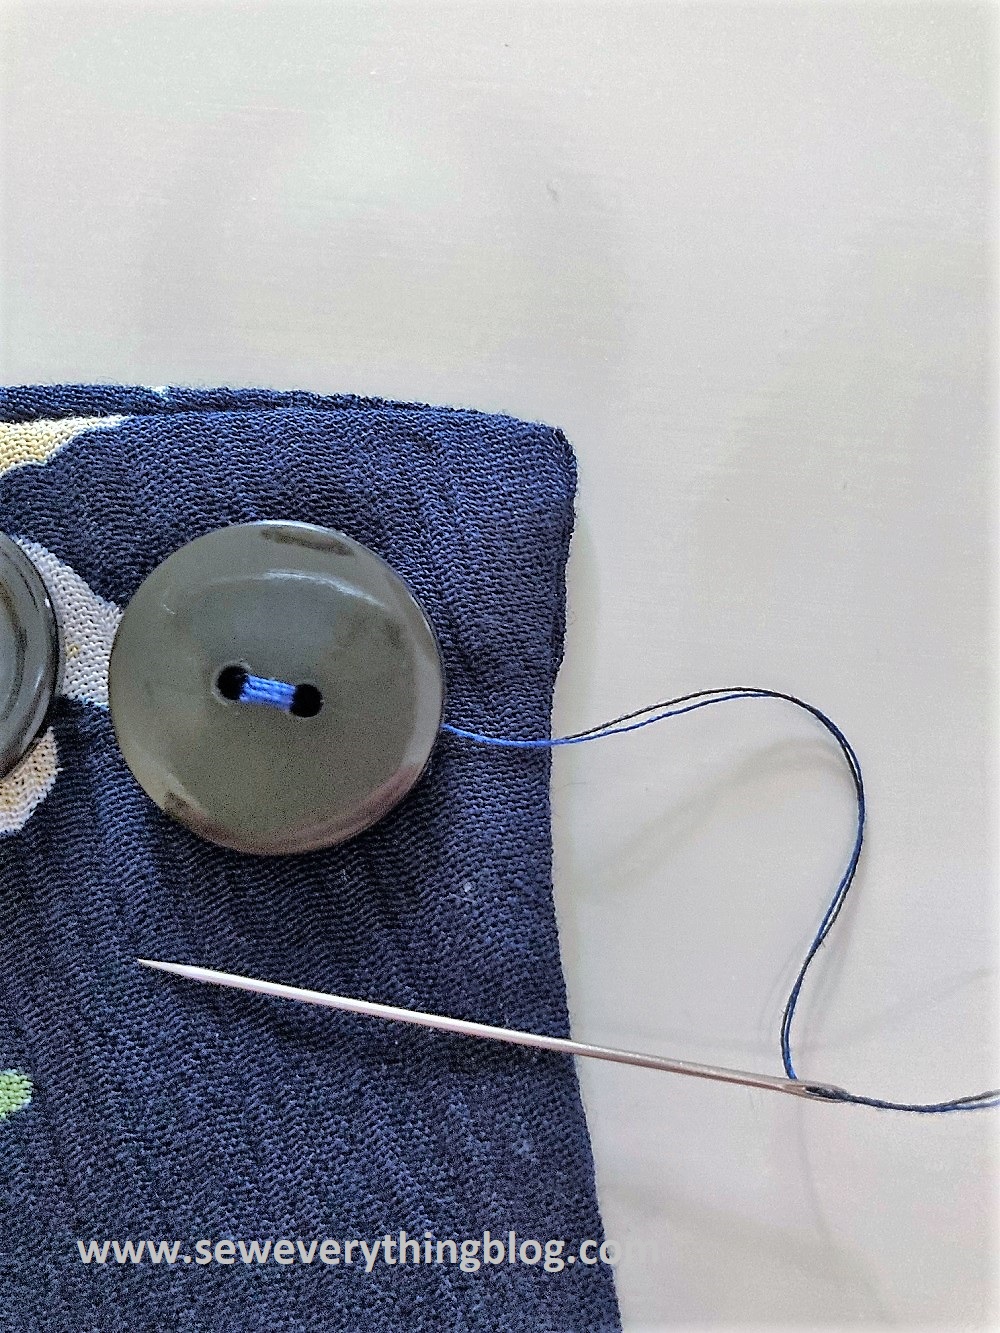
Thread a needle with the long thread-tails and bring them through to the back. Thread needle again (stay with me here) with two tails, bring back up but stay under the button. Wrap around the thread shank at least three times, making a loop knot with the last one. Bring the needle and thread tails back to the wrong side. Yes, again — to finish off on the back, see below.
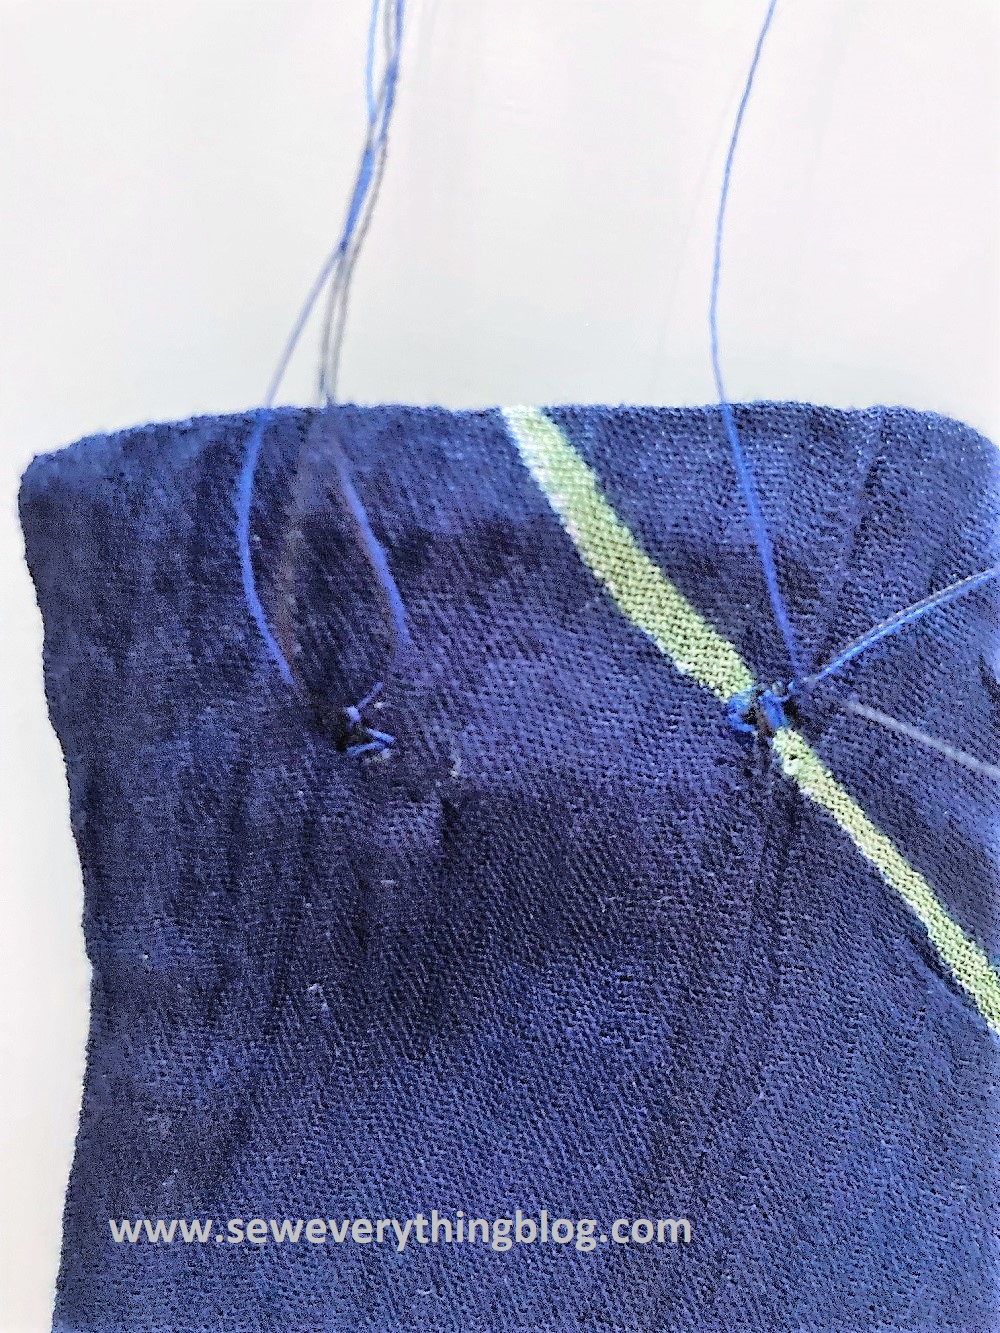
Tie a knot with all the thread tails to secure and cut away the extra thread. It is quicker and easier than I’ve made it sound but I think you understand.
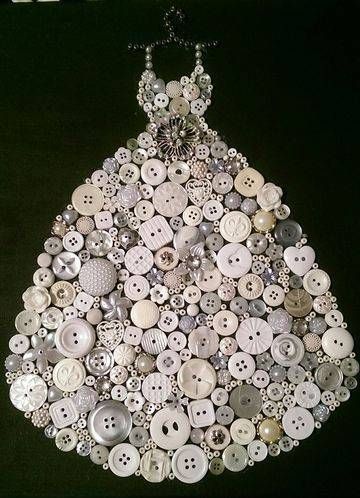
Once you get the hang of it, you can go to town with your buttons stash! Wheeee! Take a look at my small button craft Pinterest page where I’ve pinned stuff like this.
Now, what about the rounded buttons with a shank? Let me know as soon as someone has invented a button-sew-on foot for a shank button, or developed a “hack” to attach a shank button by machine.
Stay cool, my friends. See you in the next post.
Samina

Morning Samina! I love my button sewing foot too; it really is wonderful for those of us who cannot or don’t want to sew on buttons. A dress shirt can have twelve or more – that’s a lot of hand sewing! A quick tip for bringing the threads to the back: try a self-threading hand needle – yes, they have those! And it works pretty well. The only disappointment with the button sewing foot is, no fancy thread patterns on the buttons! You could manage it on the machine I guess, but I do like to try crows feet, squares and other little patterns when I hand sew buttons – just makes it more fun!
No tips on the shank buttons I’m afraid – just patience!
LikeLike
This is a great tutorial for Bernina machines. I have a much more basic foot to do this, just with a wide space, but managed to sew on the buttons without breaking them or the needle. But from long habit, my first thought is to sew them by hand,
LikeLike