
Oh, hey! Look! I’m finally giving the Eyelet Embroidery Set a try for refreshing the sewing muse. Do you have this tool or something similar, and have you used it yet? Or, have you successfully used other means of creating eyelets (different from the small metal grommets) by rigging your machine in some way?
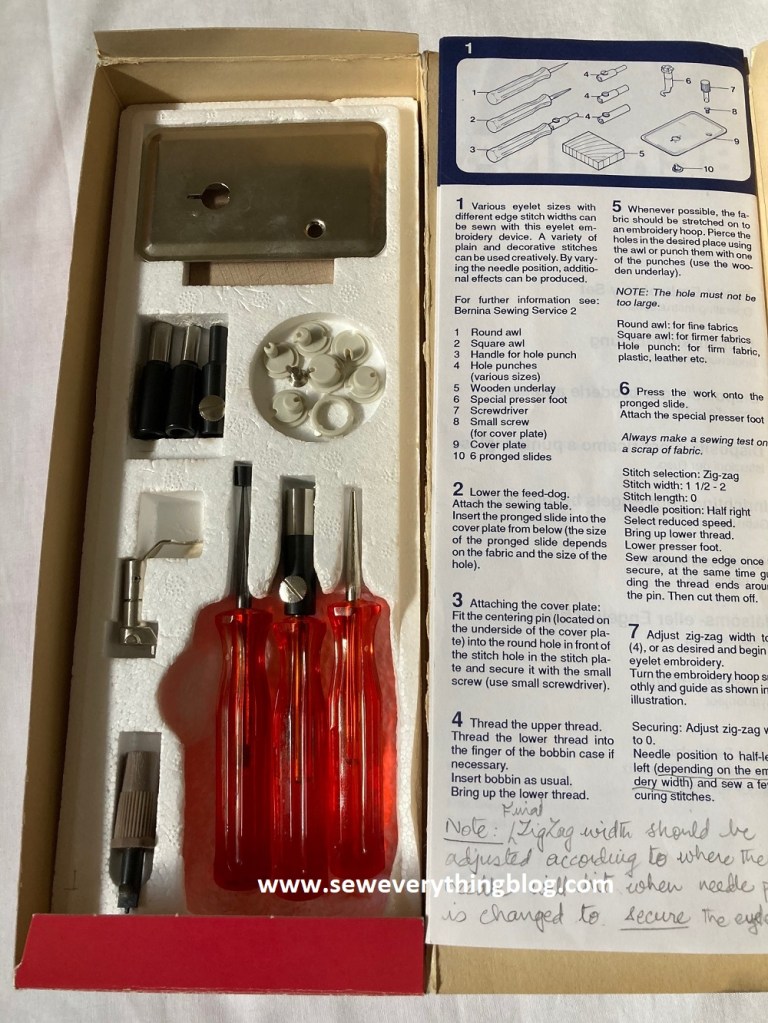
It is a terrifying moment when you open the box and view the many contents, and it seems complicated when you read the instructions. But, follow the booklet information in the box, watch YouTube videos and you’ll find inspiration and courage (yes, courage) to try it. I believe that the multiple parts are partial reasons for this tool to be hidden, unused all this time. Courage, my people.
Once you actually understand and do it for the first time, it is a liberating experience.
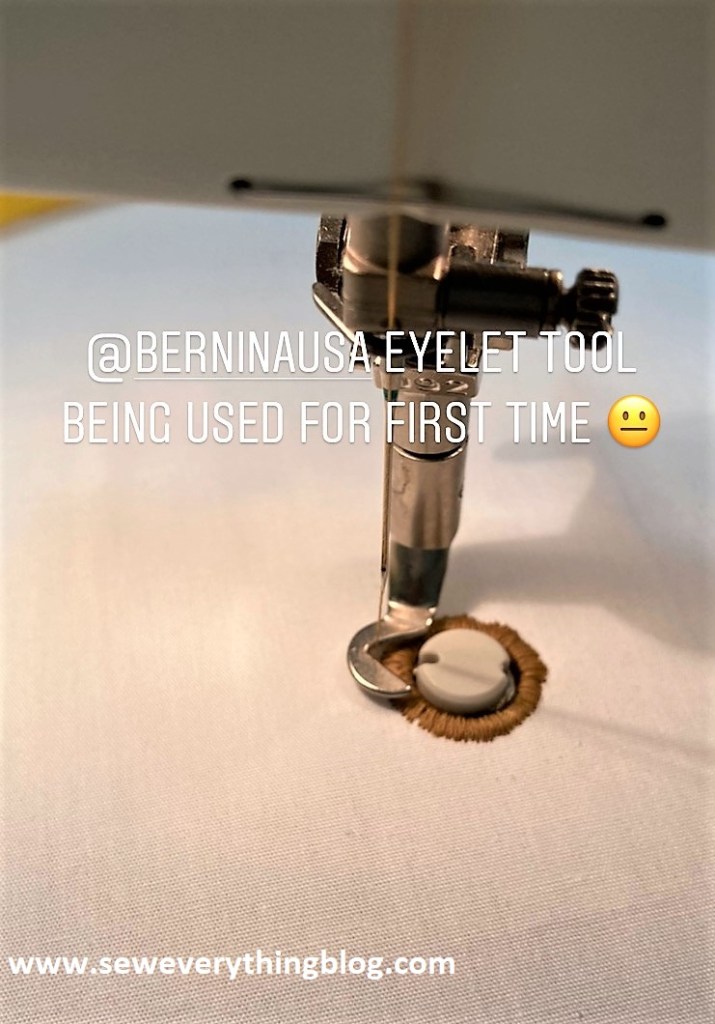
A tiny summary of how it works: a small plastic disc with a prong of your choice (depending on size of eyelet) is set into the opening in the special throat plate; the special throat plate is screwed on top of the regular plate, feed dogs are lowered; needle position is moved to half right; fabric is hooped, holes are punched into the hooped fabric at the desired eyelet location, the hooped fabric is slid in place with the holes snugly fitting around the disc/prong; presser foot (included in set) is attached; zig-zag stitch is selected, and away you go!! Turn the hoop as the stitching is in progress — that’s freehand sewing. Note: before inserting the bobbin, thread is run through the bobbin-finger for those who have it.
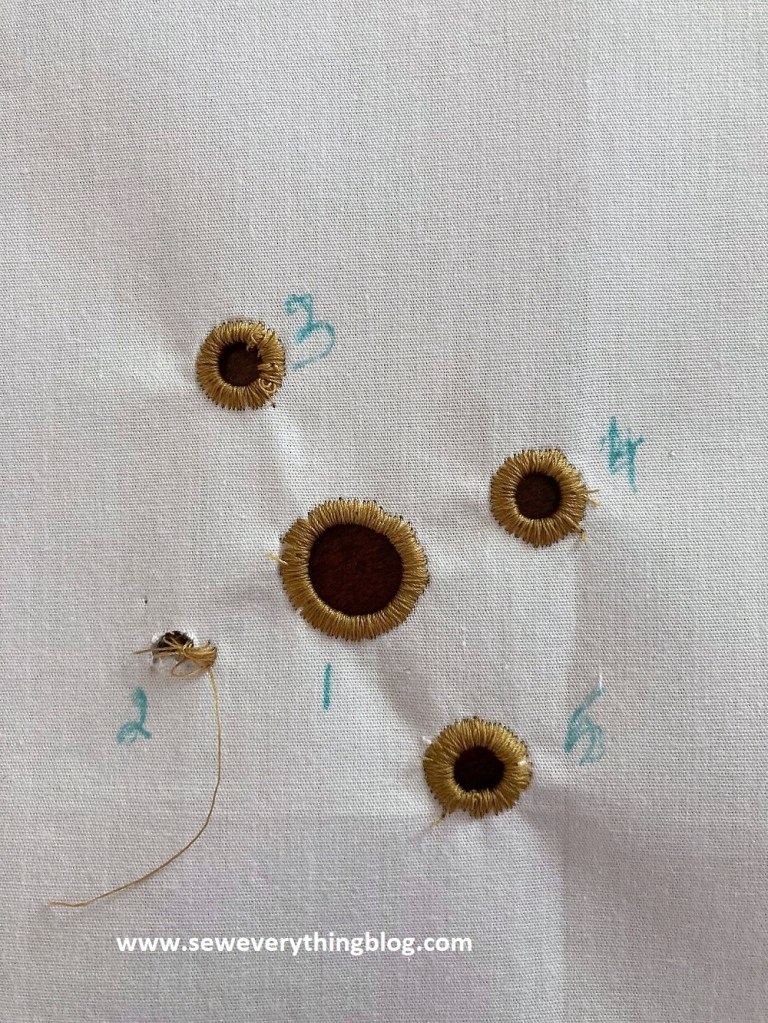
Here are some notes on my initial sample trial.
What’s involved:
a) Freehand sewing (lowering the feed dogs and using your hands to move the fabric) may intimidate some sewers who haven’t done it before. No big deal, since the hoop and the tiny plastic discs will guide you easily. We’re not doing fancy freehand embroidery.
b) the provided specialty throat plate sits on top of your normal throat-plate. Easy to apply.

c) Select a stable fabric and fuse a stabilizer on the back; I used muslin and used a fusible non-woven interfacing as a starter just to play with. The samples in an information booklet shows it used on fine linen, and the YouTube people are using a sheer fabric (with solvent stabilizer)! So far, I’m staying in the cotton realm until I really get a hang of this.
d) Embroidery Hoop issues: Whether you use a spring-release or the screw-in kind, there are some things I discovered which may or may not be an irritant for you, depending on your patience quotient.
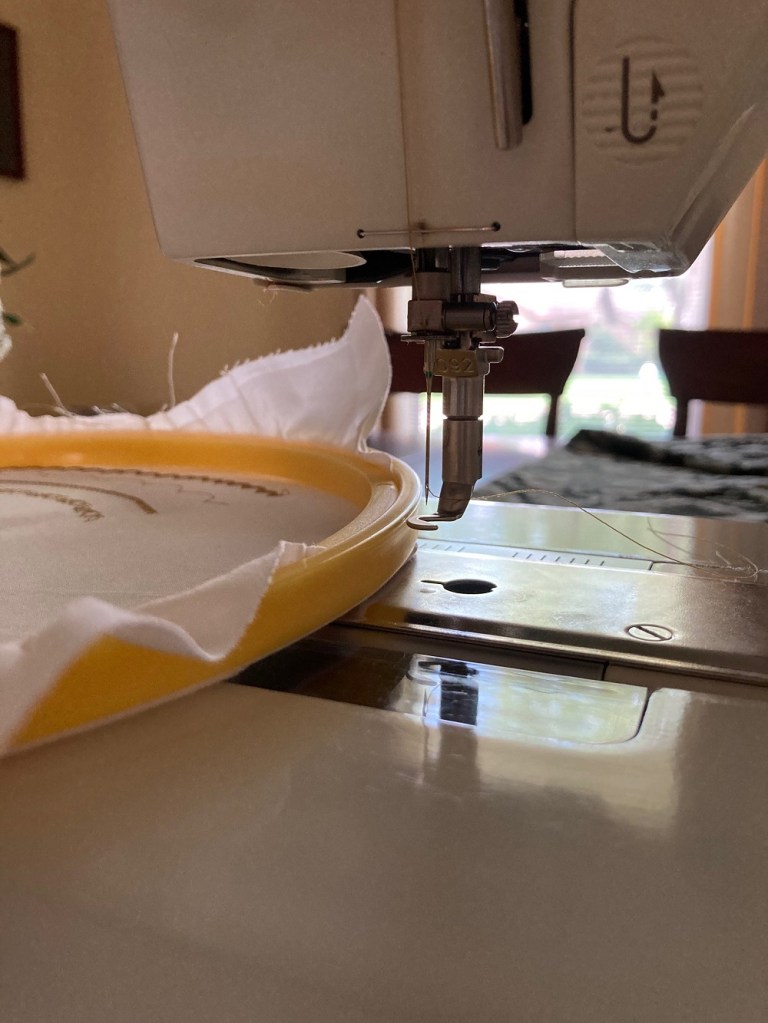
First: Select a hoop which has a relatively narrow rim. Here’s why: my yellow hoop rim is 3/8 inch high. After installing the specialty plate the level of the throat-plate area is raised by 1/8 inch. Then, the plastic prong which snaps into the plate and into the fabric hole, is an additional 1/8 inch; add the presser foot and you’re reducing the vertical area further. Therefore, my hoop rim has no room to slide smoothly under the presser-foot and needle. Each time I needed to remove or slide in the hoop, I would have to remove the presser foot and the needle, slide back the hooped fabric, and re-install the needle and presser-foot.
Second: Select a hoop with a small enough radius which will let you turn it without getting blocked by the right side of the machine (the motor housing side). The half-radius of the hoop should be less than the needle-to-motorhousing area – with your eyelet in the center of the hooped fabric. If you’re making an eyelet a little bit toward the edge of the hoop, at some point it may hit the motor-housing as you turn the hoop around. Keeping that in mind when selecting hoop size, may allow you to dismantle the eyelet-making assembly each time you move the eyelet placement.

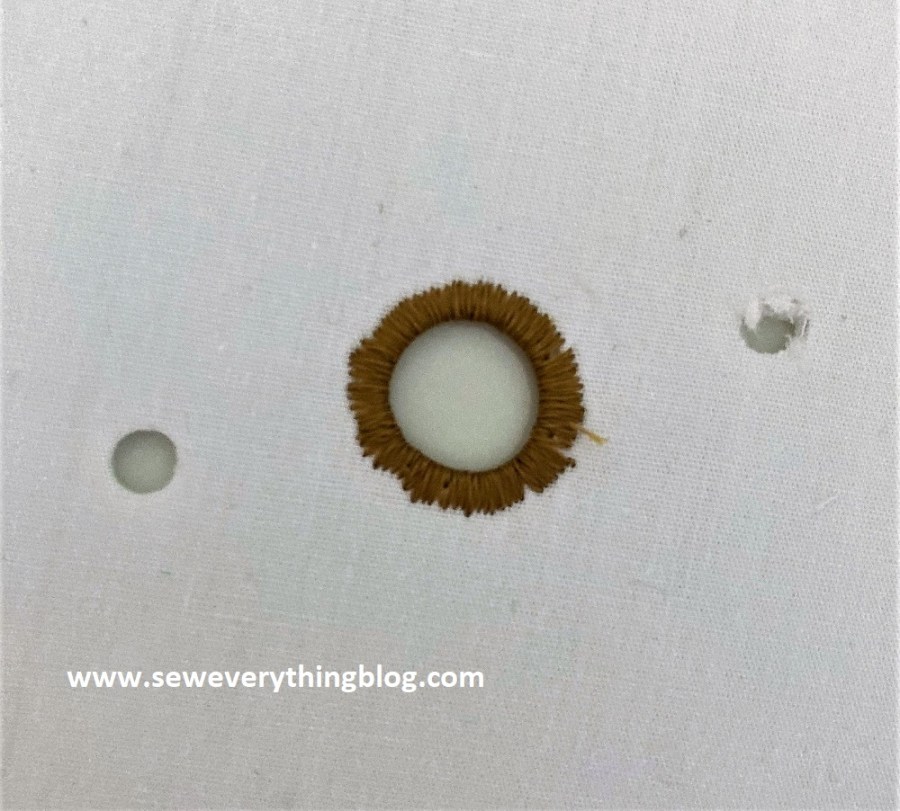
e) Make sure you lower the presser foot – ask me how I know. Since the shape of the foot is a little different, it’s easy to forget, and you can locate the result in the image.
Whew! Worth it, and it’s not difficult when you get into the rhythm of turning that hoop. See some Gucci inspiration below from their Pre-Fall 2020 collection. There can be just a few strategic eyelets inserted into other embroidery — brava, Gucci! Go here to see the entire pajama-like outfit.. Perfect example of wearing jammies in public.

Stay cool and safe, friends.
Samina

Hi Samina! What a fun accessory – I love sewing machine accessories! I always get as many as I think I can use. And what lovely eyelets it makes; so much better than the in-machine ones. My new, top-of-the-line Babylock came with all of two, and my previous Janome only had five; none of which stitched out as nicely as yours. Of course, mine is also an embroidery machine, so I can purchase a design to use instead.
You’re right, now is a great time to try out and make samples with all of our machines and gadgets and attachments. Who knows, maybe your next set of napkins will have lovely eyelets!
I’ve always wanted to ask you, where do you keep tabs on the fashion designers? Do you just watch their individual websites, or do you have an aggregate site you use? You always seem to find the best inspiration!
LikeLike
Hi Kasey! I am now obsessed with finding ideas on where to use the eyelet tool set! I was thinking of something on a stable fabric like maybe a cotton pillowcase, and maybe the hem of pajama bottoms.
I zero in on VogueRunway.com — there is a huge amount of inspiration there and I can’t keep up with it all. My subscription to In Style magazine sometimes has an editorial image that I like and I go to Vogue Runway if it’s a high end design house. That is how I found the Gucci pink outfit in this post. For the lesser well known designers, the magazine usually includes a website in the caption. But inspiration comes from many places — maybe that’s a blog post in itself. Lol!
LikeLike
Interesting! Thanks for the tutorial.
LikeLike
You’re welcome! I’m sure I’ll have more tips as I use this tool more and more.
LikeLike
Wow. I would have admired this and put it right back in the box. I am thrilled you stepped up and gave it a whirl (or a turn? You’re doing the turning!)
This is pretty dang cool. No way I’m going to find this and try this, but I’m looking forward to seeing where the eyelets turn up.
LikeLiked by 1 person
I did the looking, admiring, getting intimidated and putting-away for years. Now, it has become the shiny new thing I must try. It’s actually not hard or fiddly after the first time, and I love the results. I have a “beginner” project sorted out to use this gizmo, then we’ll see where else it takes me.
LikeLike
Great readiing your blog
LikeLike
Thank you! So glad you enjoy my sewing and writing escapades.
LikeLike
hi. X do you know if this foot is compatible with bernina 1008 ?
thank you
x
LikeLike