
….and there are always more.
After geeking out on pocket math in a previous post, I have now added a patch pocket to a pocket-less jacket. I learned more things — yeah, me who’s been sewing for 100 years. We’re going beyond slapping on a patch pocket by machine-stitching it on your summer dress.
WHEN THE POCKET IS AN AFTERTHOUGHT:

Let’s begin with the premise that the jacket is already made complete with lining or underlining, seams bound and everything done – and with no option (or willingness) to rip out said linings. Therefore, this is only way I could add a patch pocket to my jacket :
Complete the pocket piece: Cut the fabric and lining; in my case I lined the wool crepe with black silk organza to maintain the ‘lightness”. I machine-stitched the lining/pocket pieces, right sides together in a ½ inch seam,, and left a 2 inch opening at the bottom; turned it inside out through the opening and hand stitched said opening closed.
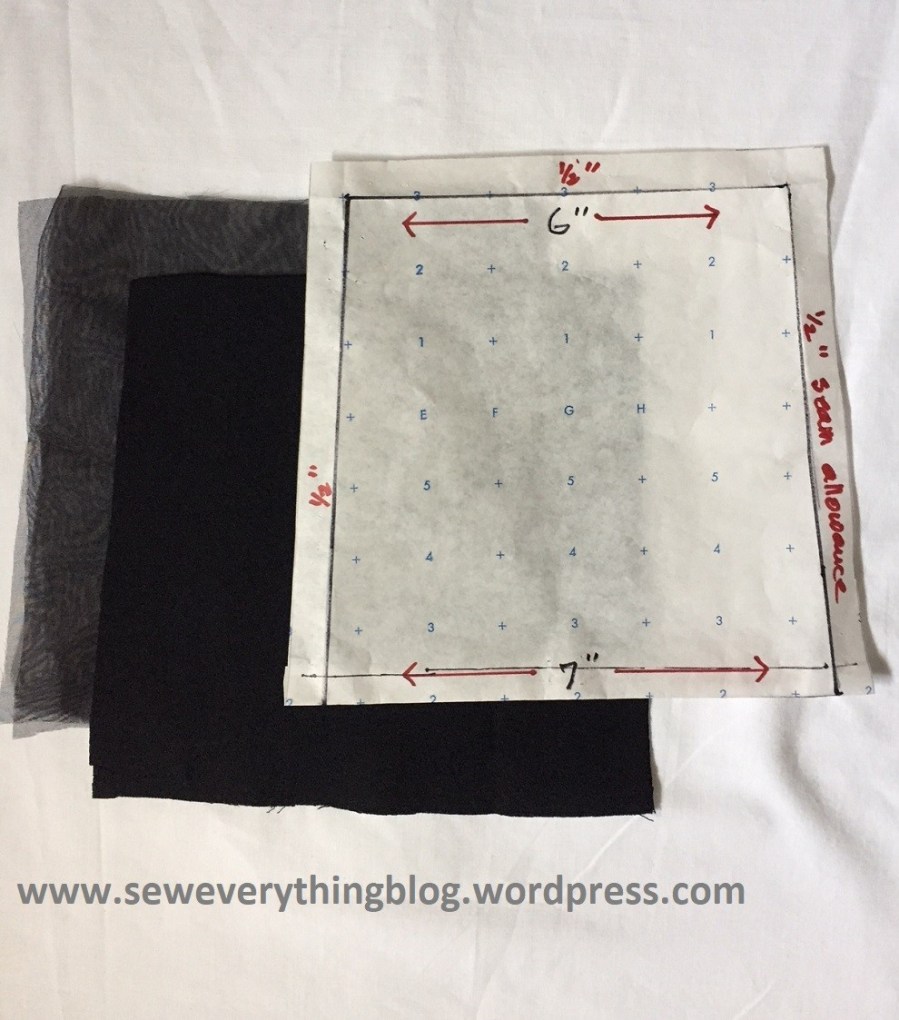
Now the white running stitch is done to match the rest of the jacket; mind you, I caught just the wool and the seams allowance with the white thread and did not catch the organza lining. Press well.

Pin and hand baste finished pocket onto the pre-determined area — remember the placement formula? Double thread your hand-sewing needle with matching polyester thread and run it through beeswax; beeswax makes the thread strong and keeps thread tangles to a minimum. Start stitching by hand in as small a slip stitch as you can, trying not to catch the lining or underlining of the jacket (if one or two stitches are sewn through to the lining, it’s okay. We’re not curing cancer). Test by running a finger along the inside of the pocket to see if it comes through a slip stitch. It means that that particular stitch was larger than intended — it happens. Please fix that.
I attached both pockets this way, which made me happy as a clam. It beats trying to reflexively search for pockets when there aren’t any.
ATTACHING POCKET WITH HAUTE COUTURE TECHNIQUES TO AN UNLINED JACKET FRONT:
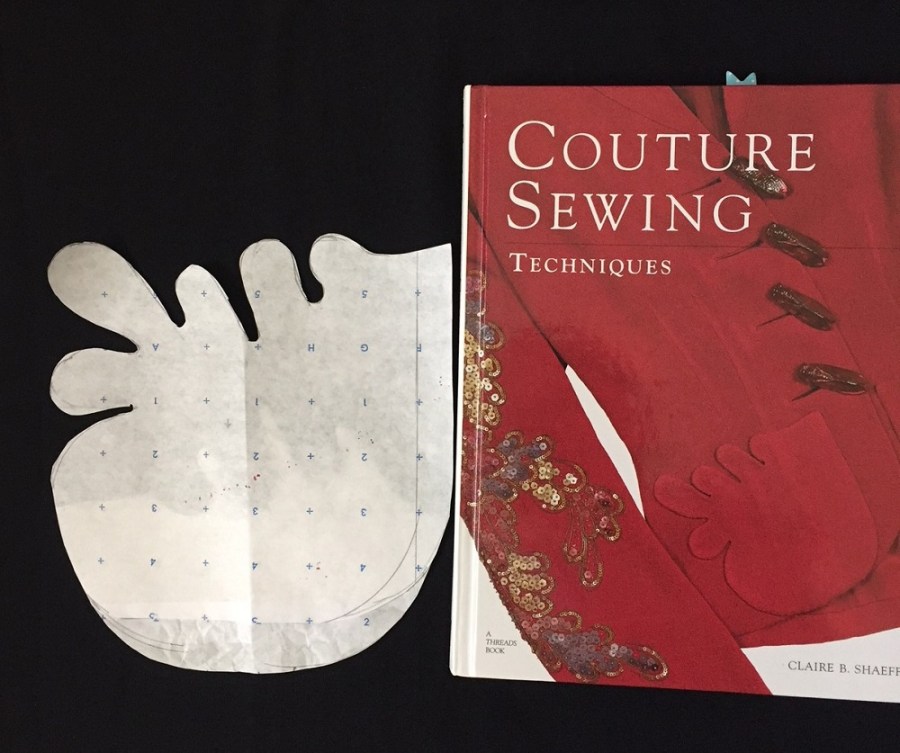
Let’s go all haute couture with this one. I have no images of my own, but the text should be sufficient. Again, my thanks to all the Haute Couture specialists, including Claire Shaeffer whose books I consulted.
- Interface the back of the jacket front lightly in the pocket area, especially the top corners; this is important if this is going to be a well-used pocket.
- Complete the lined pocket piece as above.
- The placement lines should be marked accurately on the right side, preferably with thread tracing.
- Double thread hand needle, and run it (thread, not the needle) through beeswax. Start stitching from the wrong side (yes, I typed that correctly) close to the edge (you’ll have to “feel” it as you go along); use a small running stitch, catching the jacket layer, lining layer and seam allowance, but not the pocket front layer. The stitching must not show through to the right side of the pocket.
SEMI-COUTURE WAY TO SEW ON A PATCH POCKET:
This is not my invention, but I cannot recall the author/teacher from whom I learnt this genius way. All I can do is offer you this graphic; is it depicting what I’m trying to say? I will be using this method with the next patch pocket application.

Begin by sewing up the patch pocket and lining only at the top opening edge. See red words in graphic. Just for a change, I’ve depicted a semi circular pocket in the graphic.
- Machine sew the pocket lining only, on right side of the jacket front beginning from one corner of the pocket/lining seam, down and up again, ending at the other end of the seam. Remember it’s wrong sides together.
- Press all seam allowances to the inside, including those of the main pocket piece.
- Flip the main fabric pocket piece down over the machine-sewn lining part and hand sew “invisibly” but strongly.
- Use a slip stitch to make sure no stitches are visible.
After all this, I’m even more obsessed with patch pockets. The more I research, the more information and inspiration I find. Here’s a pocket pattern I drew using inspiration from a 1938 jacket by Elsa Schiaperelli, which I love.
We’ll see if I love or hate my own application. Wish me success!
Samina

Thanks for the great pocket tips! Your jacket upgrade looks cool…
I’m sewing the Wiksten Haori jacket, using a cotton sweatshirt material – warm and cozy for fall.
I added huge pockets, but have a problem with them hanging (gaping) open when I put it on. They are nice and flat when laying on the sewing table. Any ideas on how to avoid this for the next one I sew?
LikeLike
You’re welcome, Chris! About your pockets gaping when worn, my first thought was to add interfacing to beef up the sweatshirt fabric – the fact that its a knit may have contributed to the flopping and stretching. Another solution is to gather up the pocket opening with a pull cord, like it was meant to be that way. Large pockets are best made in woven, non-stretch fabric. These are just my quick thoughts. Please let us know how your next one turns out.
I am anticipating the same flopping issues when I begin to make that amoeba shaped pocket in my post at the end. One of the tentacles is sure to flop over. But this one is small and the fabric is wool crepe so I will add interfacing for stability of the tentacle. Let’s see what happens…
LikeLike
hi, Samina – Thanks for your quick reply and good tips!
I will be using interfacing, or some other stabiliziing on the next Haori(s). I know I’ll make more than one, in different lengths. Love this pattern so much!
🙂 Chris
LikeLike