


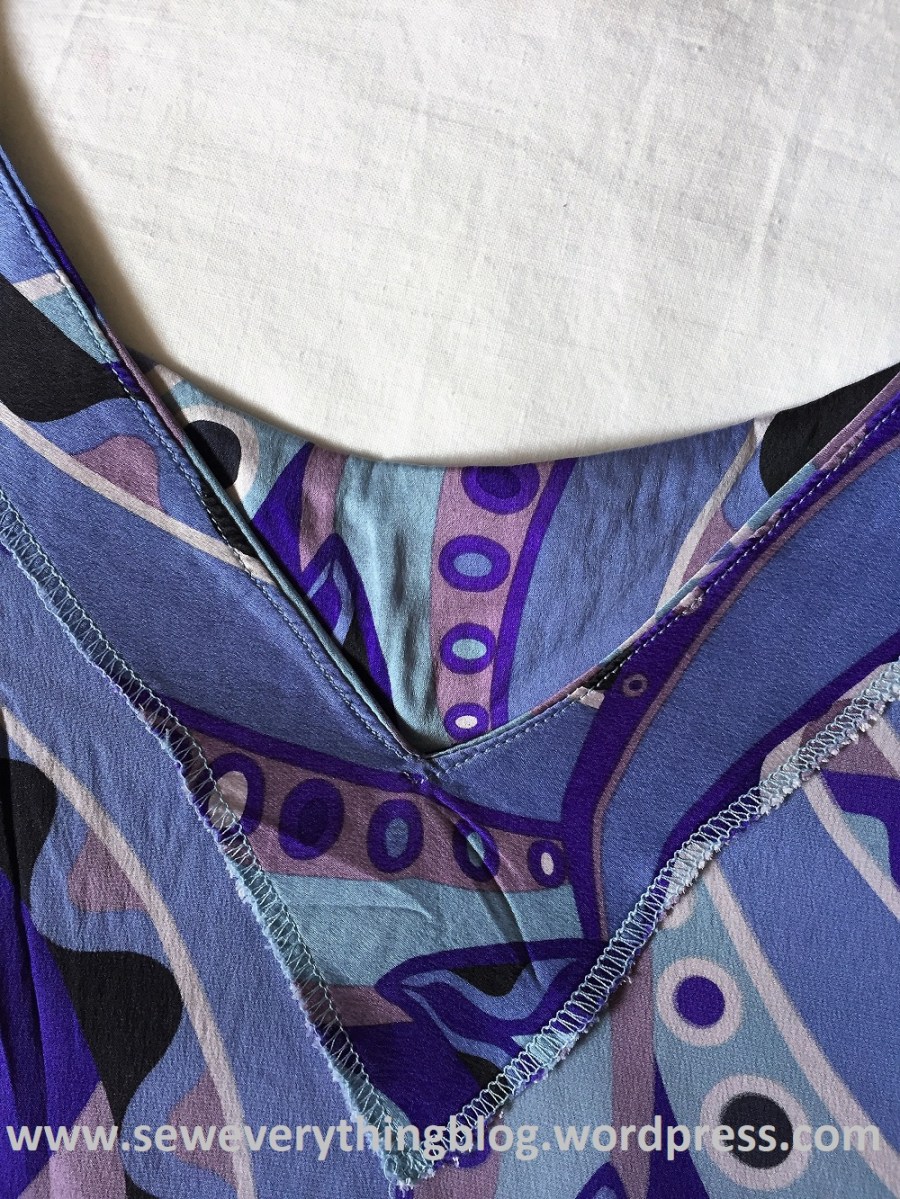
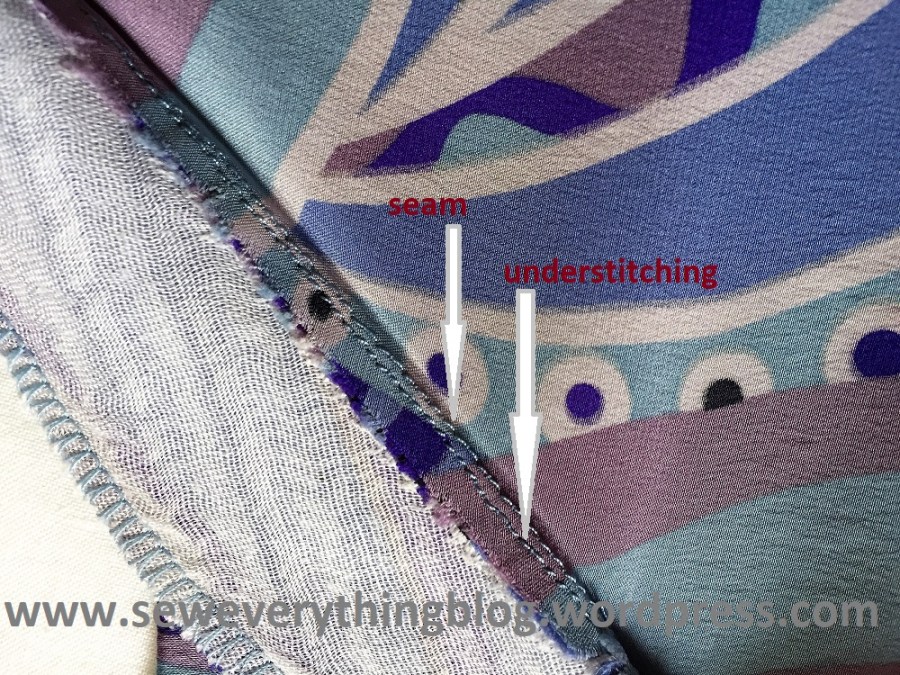
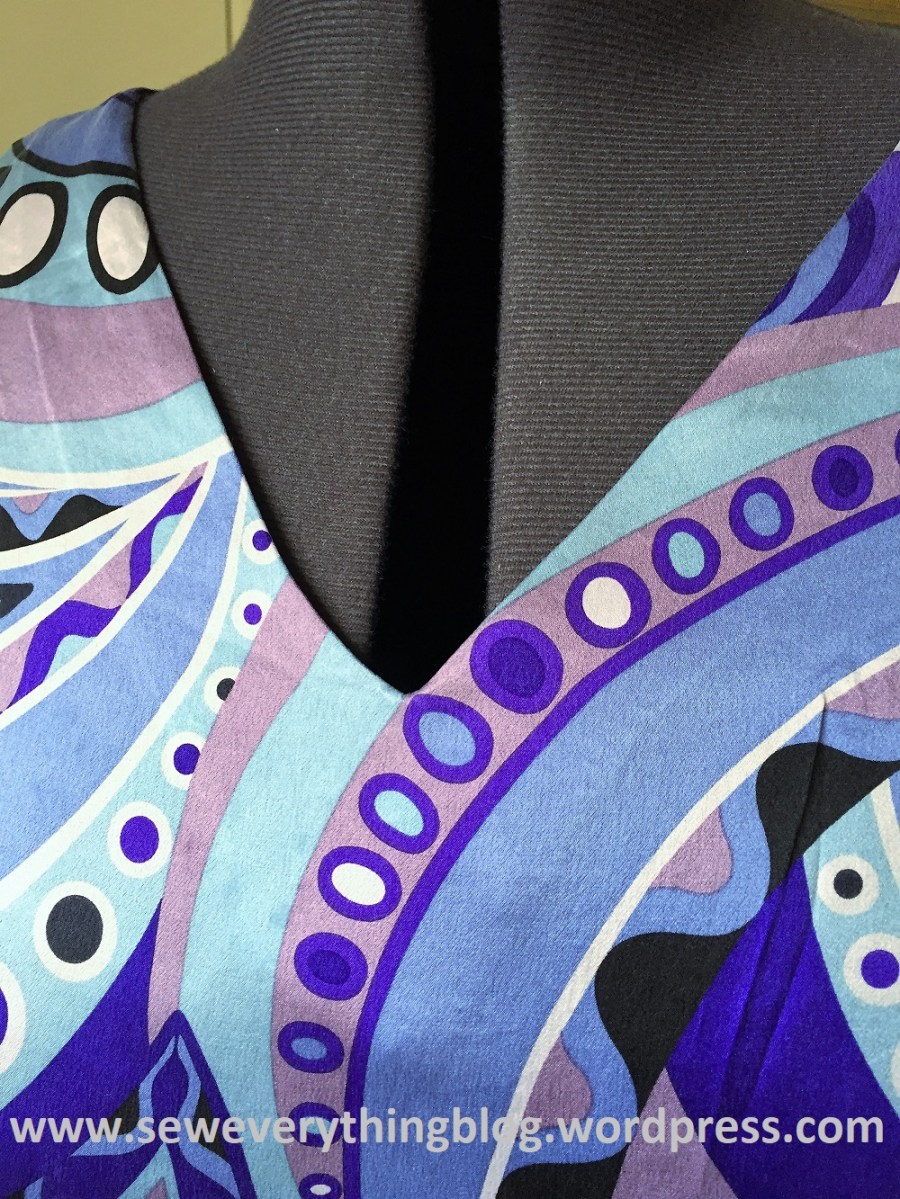
Under-stitching is an easy sewing technique; it’s a necessary technique if your garment has facings (versus bindings) on the neck, armholes, pant waistband, or the hem. Under-stitching keeps a facing from peeking out on the right side – that is it’s job. The images of my purple printed tunic show straightforward under-stitching at the neckline; it becomes difficult when the facing is a one-piece for the neck and armholes as in the black/white tunic. Wrong sides pictured below so you can see the facing up close.

Basic under-stitching instruction:
Let’s take neck facing as a simple example. Sew the facing and garment together at the neck. From the wrong side, trim seam allowance and press it toward the facing. On the right side, lay it out flat and stitch as close as you can to the first seam – on the facing side, and through the seam allowance. This keeps the facing from peeking out on the right side.
The story changes with a one-piece facing
Under-stitching can become difficult – almost impossible to do – in certain conditions. Like this one, where the front and back facings are actually one piece. Know what I mean? My purple printed tunic has a strip facing (which is much easier to do), whereas Vogue pattern 1550 (the black/white print) is an “all-in-one” facing. It means that the neck and armholes are faced with one whole piece – this one’s a different animal. The V1550 pattern sewing guide has minimal instruction for the understitching step, as you can see in the image below.

Let’s “unpack” this cryptic instruction, then see what can be done to reduce the stress you may be feeling at this point.
If you follow the instructions on the guide sheet, you would sew up the entire, “all-in-one” facing to the neck and then the armholes, and try to under-stitch the seams from the right side; except, the shoulders area is narrow, thus very difficult to get the seam under the presser foot – on a smaller size, this area is even narrower than my size 16 shoulder. Ok, I agree that you can under-stitch as far as the presser foot will let you go, and stop midway. But, I managed to do it all around.
How I Under-stitched….
Below, I’m recapping how I managed to understitch all the seams, including those narrow areas.
- Apply facing to the neckline only, (front and back) all around. Under-stitch this as detailed above under basic instruction, before sewing the facing/armhole seam.
- Sew up the armhole/facing seam, press as is. Turn the all-in-one facing inside out through the shoulder and back seam, as in pattern instructions.
- Now the tricky part: press the seam allowance toward the facing from the right side with a Clover miniature iron which is small enough and has a long handle to poke into the shoulder “tunnel”. If you do not have this miniature iron, do not stress. Use a regular iron as far as you can go. You can also finger press if your fabric is crisp and will respond to some finger pressing action.


- Open the area by bunching up from the bottom of the facing to the shoulder seam; place under the presser foot (it gets bunchy behind the presser foot, but its do-able), and stitch a line on the facing as close to the seam as possible, starting from the shoulder seam and ending the side seam (side seams have not been sewn together yet). Go slowly, and manipulate with fingers to keep the sewing area flat. You’ve just under-stitched one side of the armhole; turn around the top and do the same bunchy thing – starting from the shoulder seam and ending at the side seam. Be sure that the under-stitch line is on the facing and the seam allowance underneath it. Repeat on the other armhole. Is that clear as mud??
Well, I’ll leave you with an image of the complete black/white tunic. One day, I’ll write a review of this pattern.
Have a great summer!
Samina


Hi Samina, Great post! Explaination and photos are easy to understand. I already liked it and post a link to your blog on mine. I’m going to translate texts in french if you don’t mind.
LikeLiked by 1 person
Thank you, Anya! I would love for you to translate my words to French 🙂
LikeLike
Your tunic is beautiful. I am totally following you…Looking forward to learning new things. Thank you kindly for sharing your expertise! Have a lovely day! Koko 🙂
LikeLiked by 1 person
Thank you, Koko! I’m thrilled that my posts are informative and enjoyable for you. Also, thanks for following me!
LikeLiked by 1 person
🙂
LikeLike
I understand the purpose of understitching and what I’m supposed to do; it’s the execution which can be hard and awkward. Great instructions! That iron is a nifty little thing.
LikeLike