

Are you tired of my “sharks teeth” obsession, yet? I made two samples with linen scraps – just to get my hands used to the folding and fiddling. In the interest of not wasting those small scrappy trials, I sewed them together and made – this. You can call it a mug rug, a square doily…… as long as it has a use and a purpose. I can also say that my pinwheel doily had a baby!
If you possess, or can get your hands on any of the books mentioned in the last post, you should be good to go. There are no demonstrations available on YouTube, but a Craftsy class by Susan Stewart for French Heirloom sewing is another visual option. However, here’s a short recap of the “sharks teeth” process. I apologize in advance if there are repetitions from the last post.
Mark and sew tucks
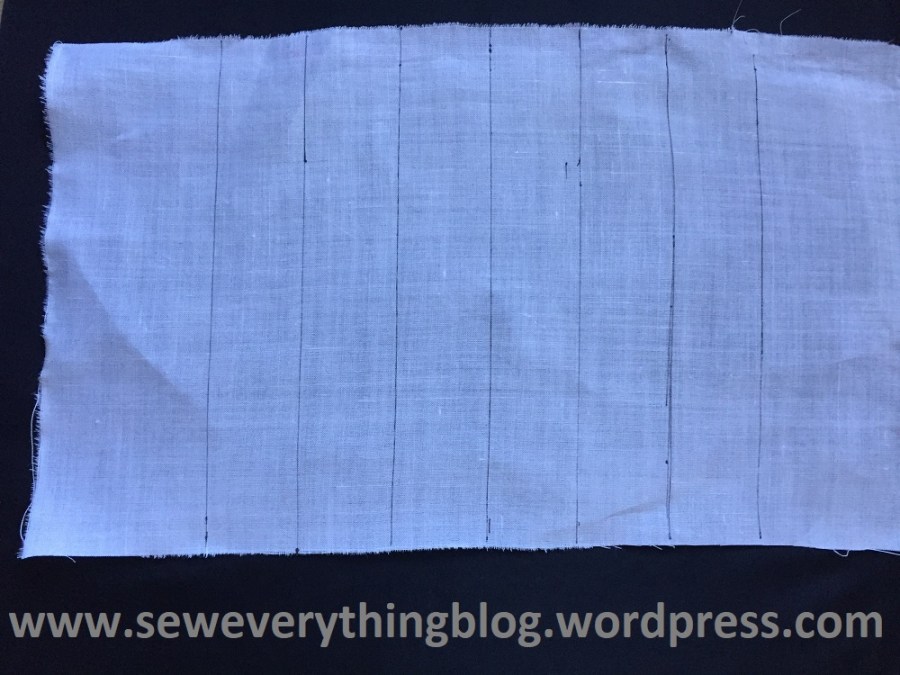
The key to success lies in the accuracy and uniformity of the tucks. Mark tuck lines (they’re actually fold lines) perfectly on grain, using this formula (from Linda Chang Teufel, author of Fabric Origami): width of tuck x 3 + 1/8”=distance between lines. Therefore, to create ½” tucks, the distance between the lines should be 1 5/8 inches. This assures a ½” tuck plus a bit of “turn-of-the-cloth” ease, and allows the fold of the tuck to barely reach the bottom of the next tuck (after pressing down). Fold on the line and sew ½” away from it – there’s your tuck. Repeat on other marked fold lines. Press well.
Mark, snip and fold to make “sharks teeth”

On each folded tuck, mark a small line perpendicular to the fold on the tuck you just made, then mark again 1” away, which is double the size of desired “tooth”. Continue to mark all the way to the other side of the tuck. Snip on the marked lines just up to (but not through) the stitches. Fold two corners of the “tooth-in-making” diagonally, all the way down, and press; open up the diagonal folds and apply a dot of glue on the inside (don’t freak out about the glue, just do it), fold again and press to dry the glue. The other small cut edge will be folded for the next tooth, and so on. Repeat the snip/glue/fold process until the tuck becomes a row of teeth. There are variations to this, which you can see on the red side of the doily where I snipped further along the tuck, which forms what I call a “dental bridge”. Might I suggest that you complete the teeth on each tuck first before moving on to the next one. Press.
Sew decoratively
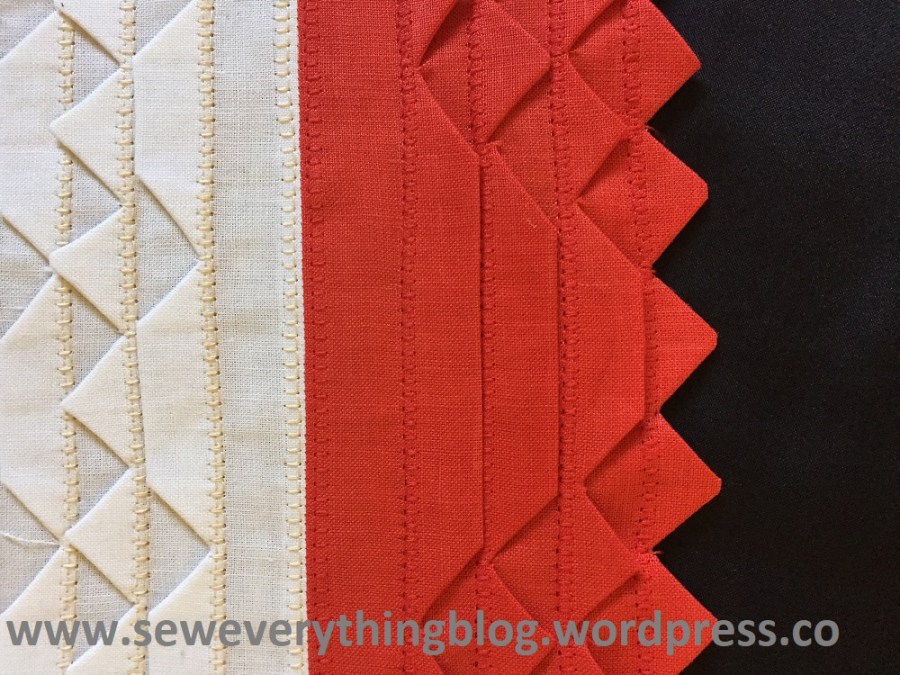
Sew a line of decorative stitches over the first line of straight stitches, moving the lower tuck out of the way; select a decorative stitch which straddles over the first stitched line, and lightly catches the lower edge of the teeth. Either a narrow satin stitch or a blanket stitch is appropriate. I like the look of a blanket stitch because I’m not a proponent of too much thread in a small space (except embroidery).

Put the samples to good use….
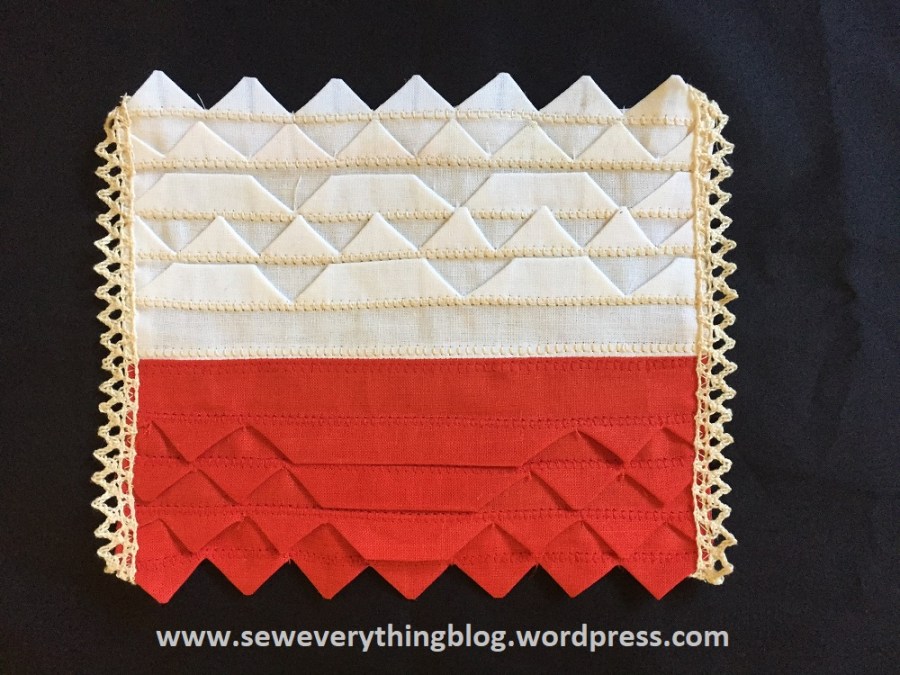
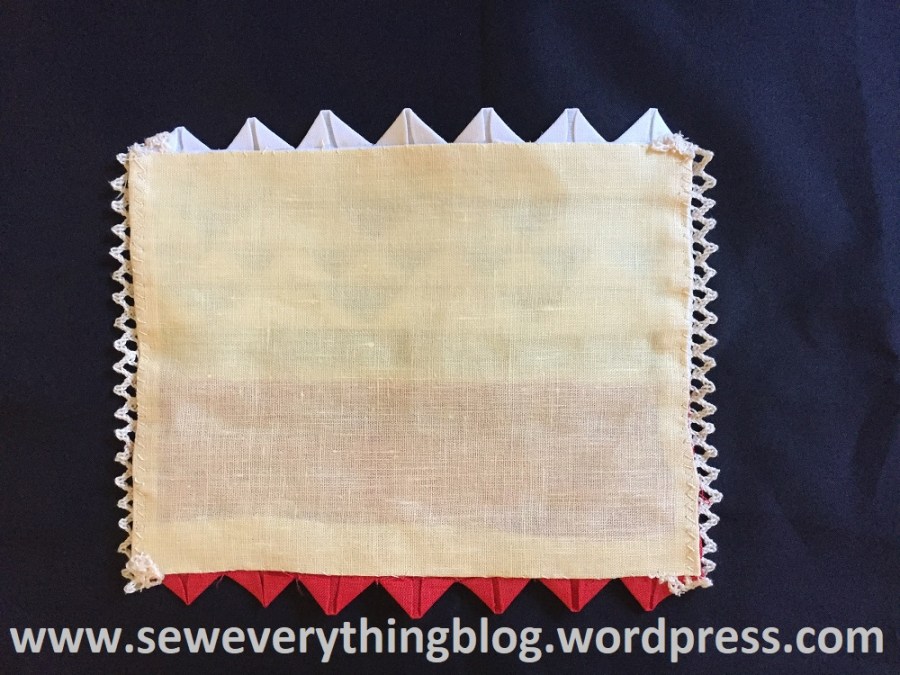
Complete all the “teeth” as above, making variations (that’s a whole other blog post). There’s your sampling of sharks teeth! I joined the two trial samples together at the center and ran a blanket stitch on each side of the joining seam with the appropriate color thread. The “sharks teeth” edges on the top and bottom show their shapes because I folded down the extra fabric to the back, inside the yellow linen backing. The backing and doily are sewn on the straight sides, turned inside out with some lace action going on there, and the backing is hand sewn to the back of the “toothy” edge. Whew, I think I’ve played “sharks teeth” puns ad nauseum, but that’s a writer’s prerogative.
Now, I have to sort out the ideas of where to apply this in adult clothing…… maybe follow Susan Stewart’s linen jacket idea? I’m thinking a sleeve edge. Stay tuned….
I highly recommend that you try this technique; you’ll have fun learning a new thing! You’ve sewn everything else, haven’t you?
In addition, I’ve partially completed my plan to learn new embellishment techniques in 2018 (partially, because it now needs to be applied to a wearable); remember that it’s not a “resolution”, just a plan. Plans might change…..
My friends, may 2018 bring you lots of creative opportunities!
Samina
