
This post was originally titled “Making the Impossible, Possible”.
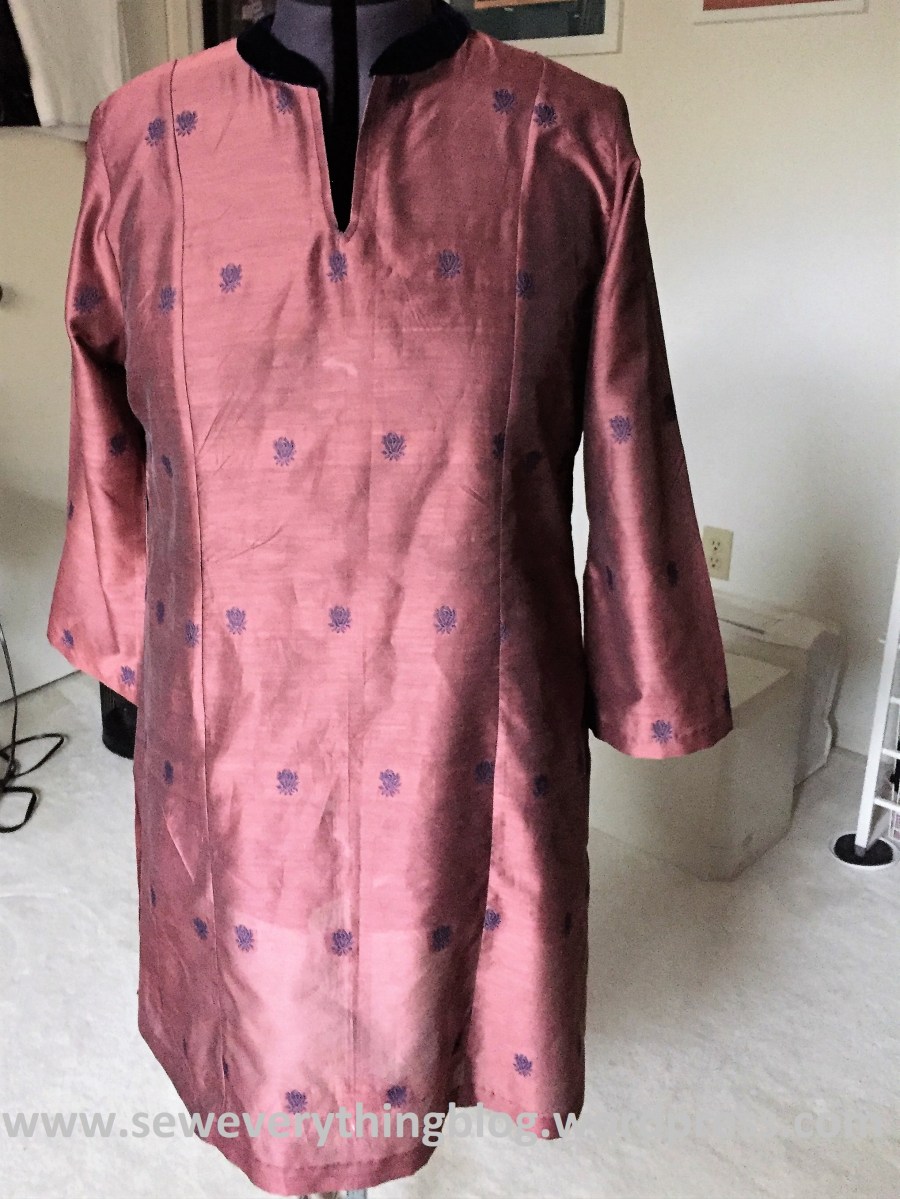
Say you’re sewing up a see-through, diaphanous, loosely woven and therefore ravel-prone item. You’ve decided to use French seams throughout. Good! But hold on; there are side slits in this here garment. A French seam and a side slit do not mix – not really. Impossible situation, given the enclosed nature of the French seam! That, of course, means that the geek in me has to attempt it.
To avoid the conundrum, I might have gone two ways:
- Stayed away from the French seam. I could have used a plain seam and pressed it open so it can easily diverge into a slit at the bottom of my tunic.
- Eliminated the slit and sewn up the French seams all the way to the hem. Nope. I like my side slits.
Are you beginning to see the picture? I thought extensively about how I could use a French seam on the sides AND get it to separate in a slit, neatly and easily. Well, I accomplished the impossible, sort of.
The structure of the French seam is well documented in this previous post. I know you are familiar with French seams, readers; just in case there are new seamstresses reading this, please refer back to said post to see the way they are made.
Moving on to the end-of-seam and beginning of slit—which is literally the “point of contention”.
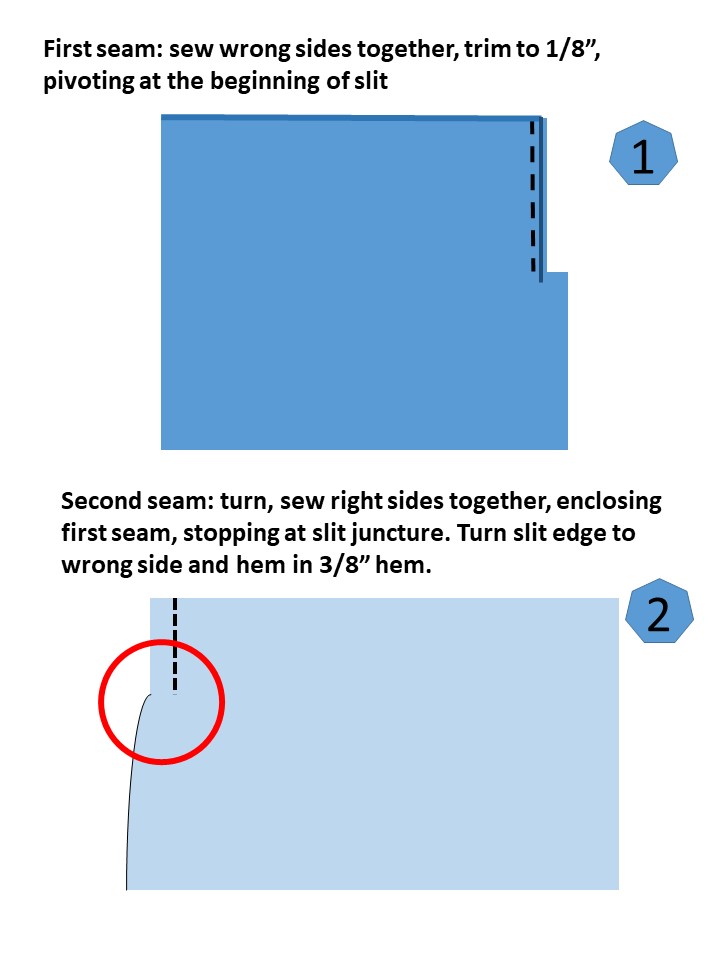
Does the graphic above explain it? After the second line of stitching, ending at the slit, there will be two raw edges already cut – from the time you trimmed the first seam. Press and turn around, wrong sides together and sew a 1/4″ seam, enclosing the previous seam.
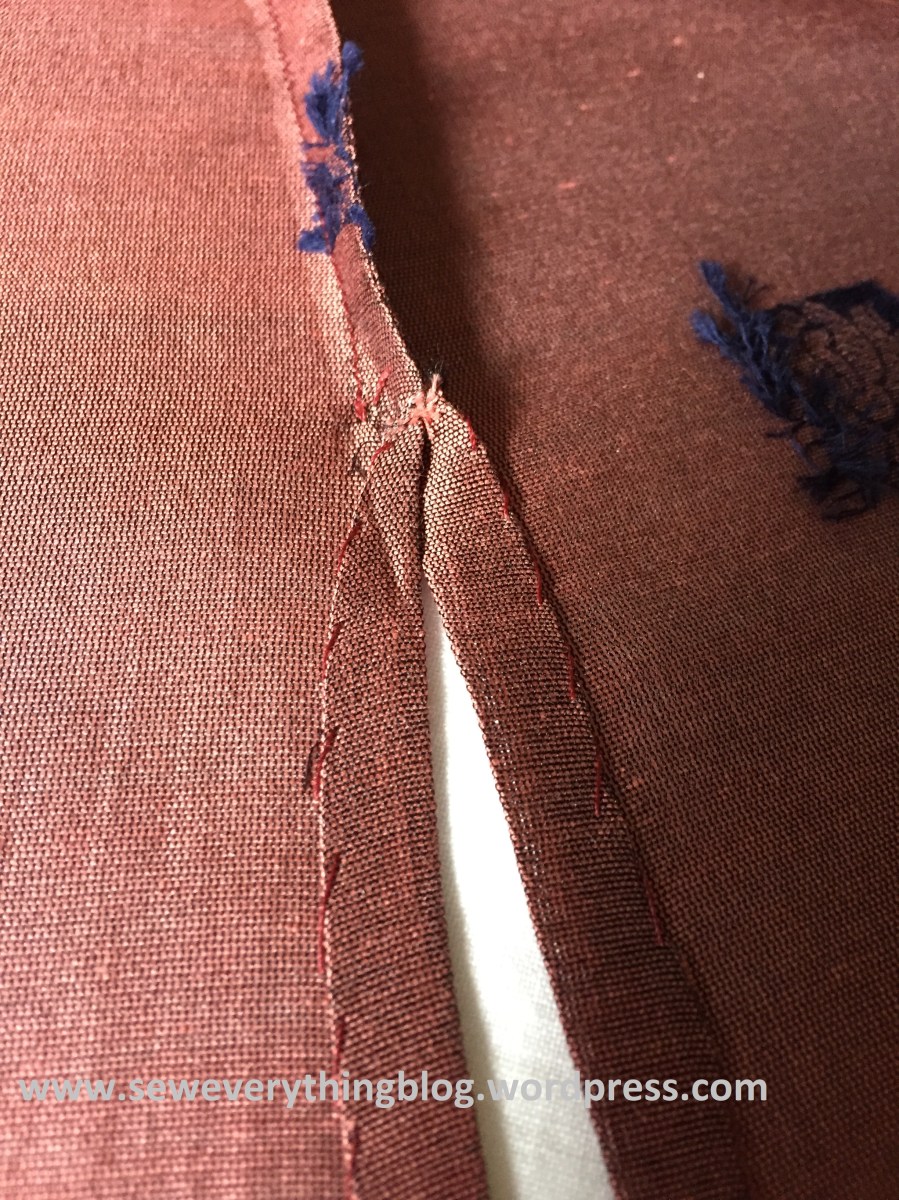
I created 3/8 to ½ inch hem back onto the garment slit edges by turning and pressing twice. The “point” still looks messy on the wrong side. Maybe I should have clipped the seam further. But that would have made that area weaker. Not that this garment is going to be worn every day, but still.
I turned and hand hemmed the pointy part as best as I could. There is just a teeny bit of raw edge remaining, which cannot be helped. Should I add a “patch” on the raw, ravelly point on the inside?
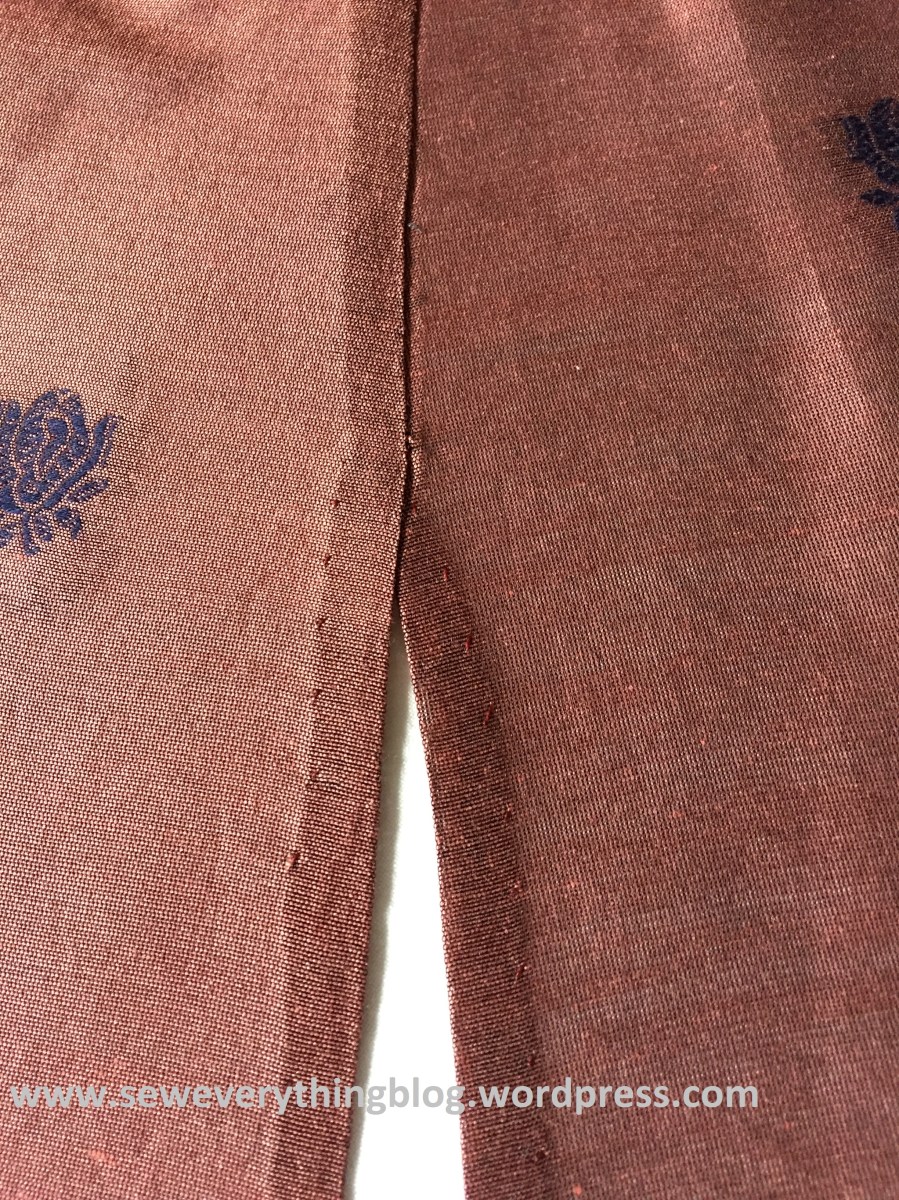
The outside looks pretty good, in my humble opinion.
If you’ve accomplished this impossible feat successfully, please share! Give me your ideas.
Samina

It looks really good! French Seams are lovely, but they can create some real conundrums!!
I’ve done this with a tunic but the outcome isn’t quite as neat. I sewed up the French side seams like normal, then clipped the allowance just below the stitching (as close to the seam stitches as possible). This frees up the slits so you can press the side seam to the back and still hem the slits.
After hemming, for strength, I do a row of zig-zag stitches from the outside that catch the raw edges above the slits and below the seam.
LikeLiked by 1 person
Thank you for input. I thought about clipping the seam after the final row, but didn’t. Next time I will.
LikeLiked by 1 person
Not that it means anything, but the method you showed is how I finish off my french seams when I have a slit. I have the point of rawness also – never thought about a patch – maybe it needs to be something better than a patch? Ribbon/lace motif?
LikeLiked by 1 person
Hi Lynn! By patch I meant a small gusset-like thing on the inside. But then, I would have to add it so the outside doesn’t look messy. Love the ribbon or lace idea – maybe continue it down the hem of the slit to make it look “intentional”.
LikeLike
Beautiful work, as always, Samina! I recently used the same technique on a Kathryn Brenne for Vogue oversized blouse that I made in a very slippery, crepey polyester fabric. Pretty, but a real bear to sew.
In my blouse, I resorted to making decorative barracks at the junction of the slit with the French seam. It worked very well, covered the tiny bit of wonky joins and strengthened the areas that sometimes receive movement stress while wearing.
Your gorgeous top is elegant and functional – a total winner. Brava!
LikeLiked by 1 person
Annie! I didn’t think of bar tacks, either. I love all the solutions coming this way. Your creative expertise is much, much appreciated.
LikeLike
Had a similar problem recently: french seam with placket… (dumbass sleeve should have never been in two parts to begin with).. Now I have to go look at it to see what I did…….. still haven’t done the buttonholes either…..
LikeLiked by 1 person
Samina, thank goodness you understood that I meant bar tacks and not barracks in my post! Silly Auto Correct . . .
I also liked the lace detail idea. Must make mental note for future project.
LikeLike
I usually do pretty much the same, seam, snip, press, stitch opening, sometimes making the french seam stop higher than the top of the opening and having a plain seam for an inch or so, folding the turnings under.
LikeLike
Another idea – changing to a plain seam for a bit! Thank you for your input. I will try all the ideas coming across 🙂
LikeLike
Gorgeous tunic! I’ve wondered about this! I (and my hips) love slits, but it seemed too complicated to combine with french seams. I’m bookmarking for future reference.
LikeLike
Embroidered arrowhead bartack at junction and Hong Kong finish slit seams
LikeLike