Someone please tell me; did the “miter” show up first in sewing, or in carpentry?

I see impressive work by the technical (i.e. sewing) staff at the House of Fendi in their Spring Summer 2013 line. The “miter” seems to be a dominant feature. I love their interpretations, and will follow up in a future post with my own version of how they used the mighty miter. For now, let’s start with this…..
Staying true to the statement made in an earlier post, I am bringing out not only unfinished projects, but tools and notions which were purchased and never used. Weak moment? You had to be there……
I’m letting the Zip Bind System by Martelli Notions have the honor of being explored in this post. I commend Martelli Enterprises for design and innovation for a niche market. Their ergonomic rotary cutter sees a lot of use in my sewing life. The focus seems to be more on quilting, but there’s nothing that a fashion sewing enthusiast (that would be me) can’t use.
Usual disclaimer applies: I’m not paid to say good things about the company. The opinions here are mine alone.
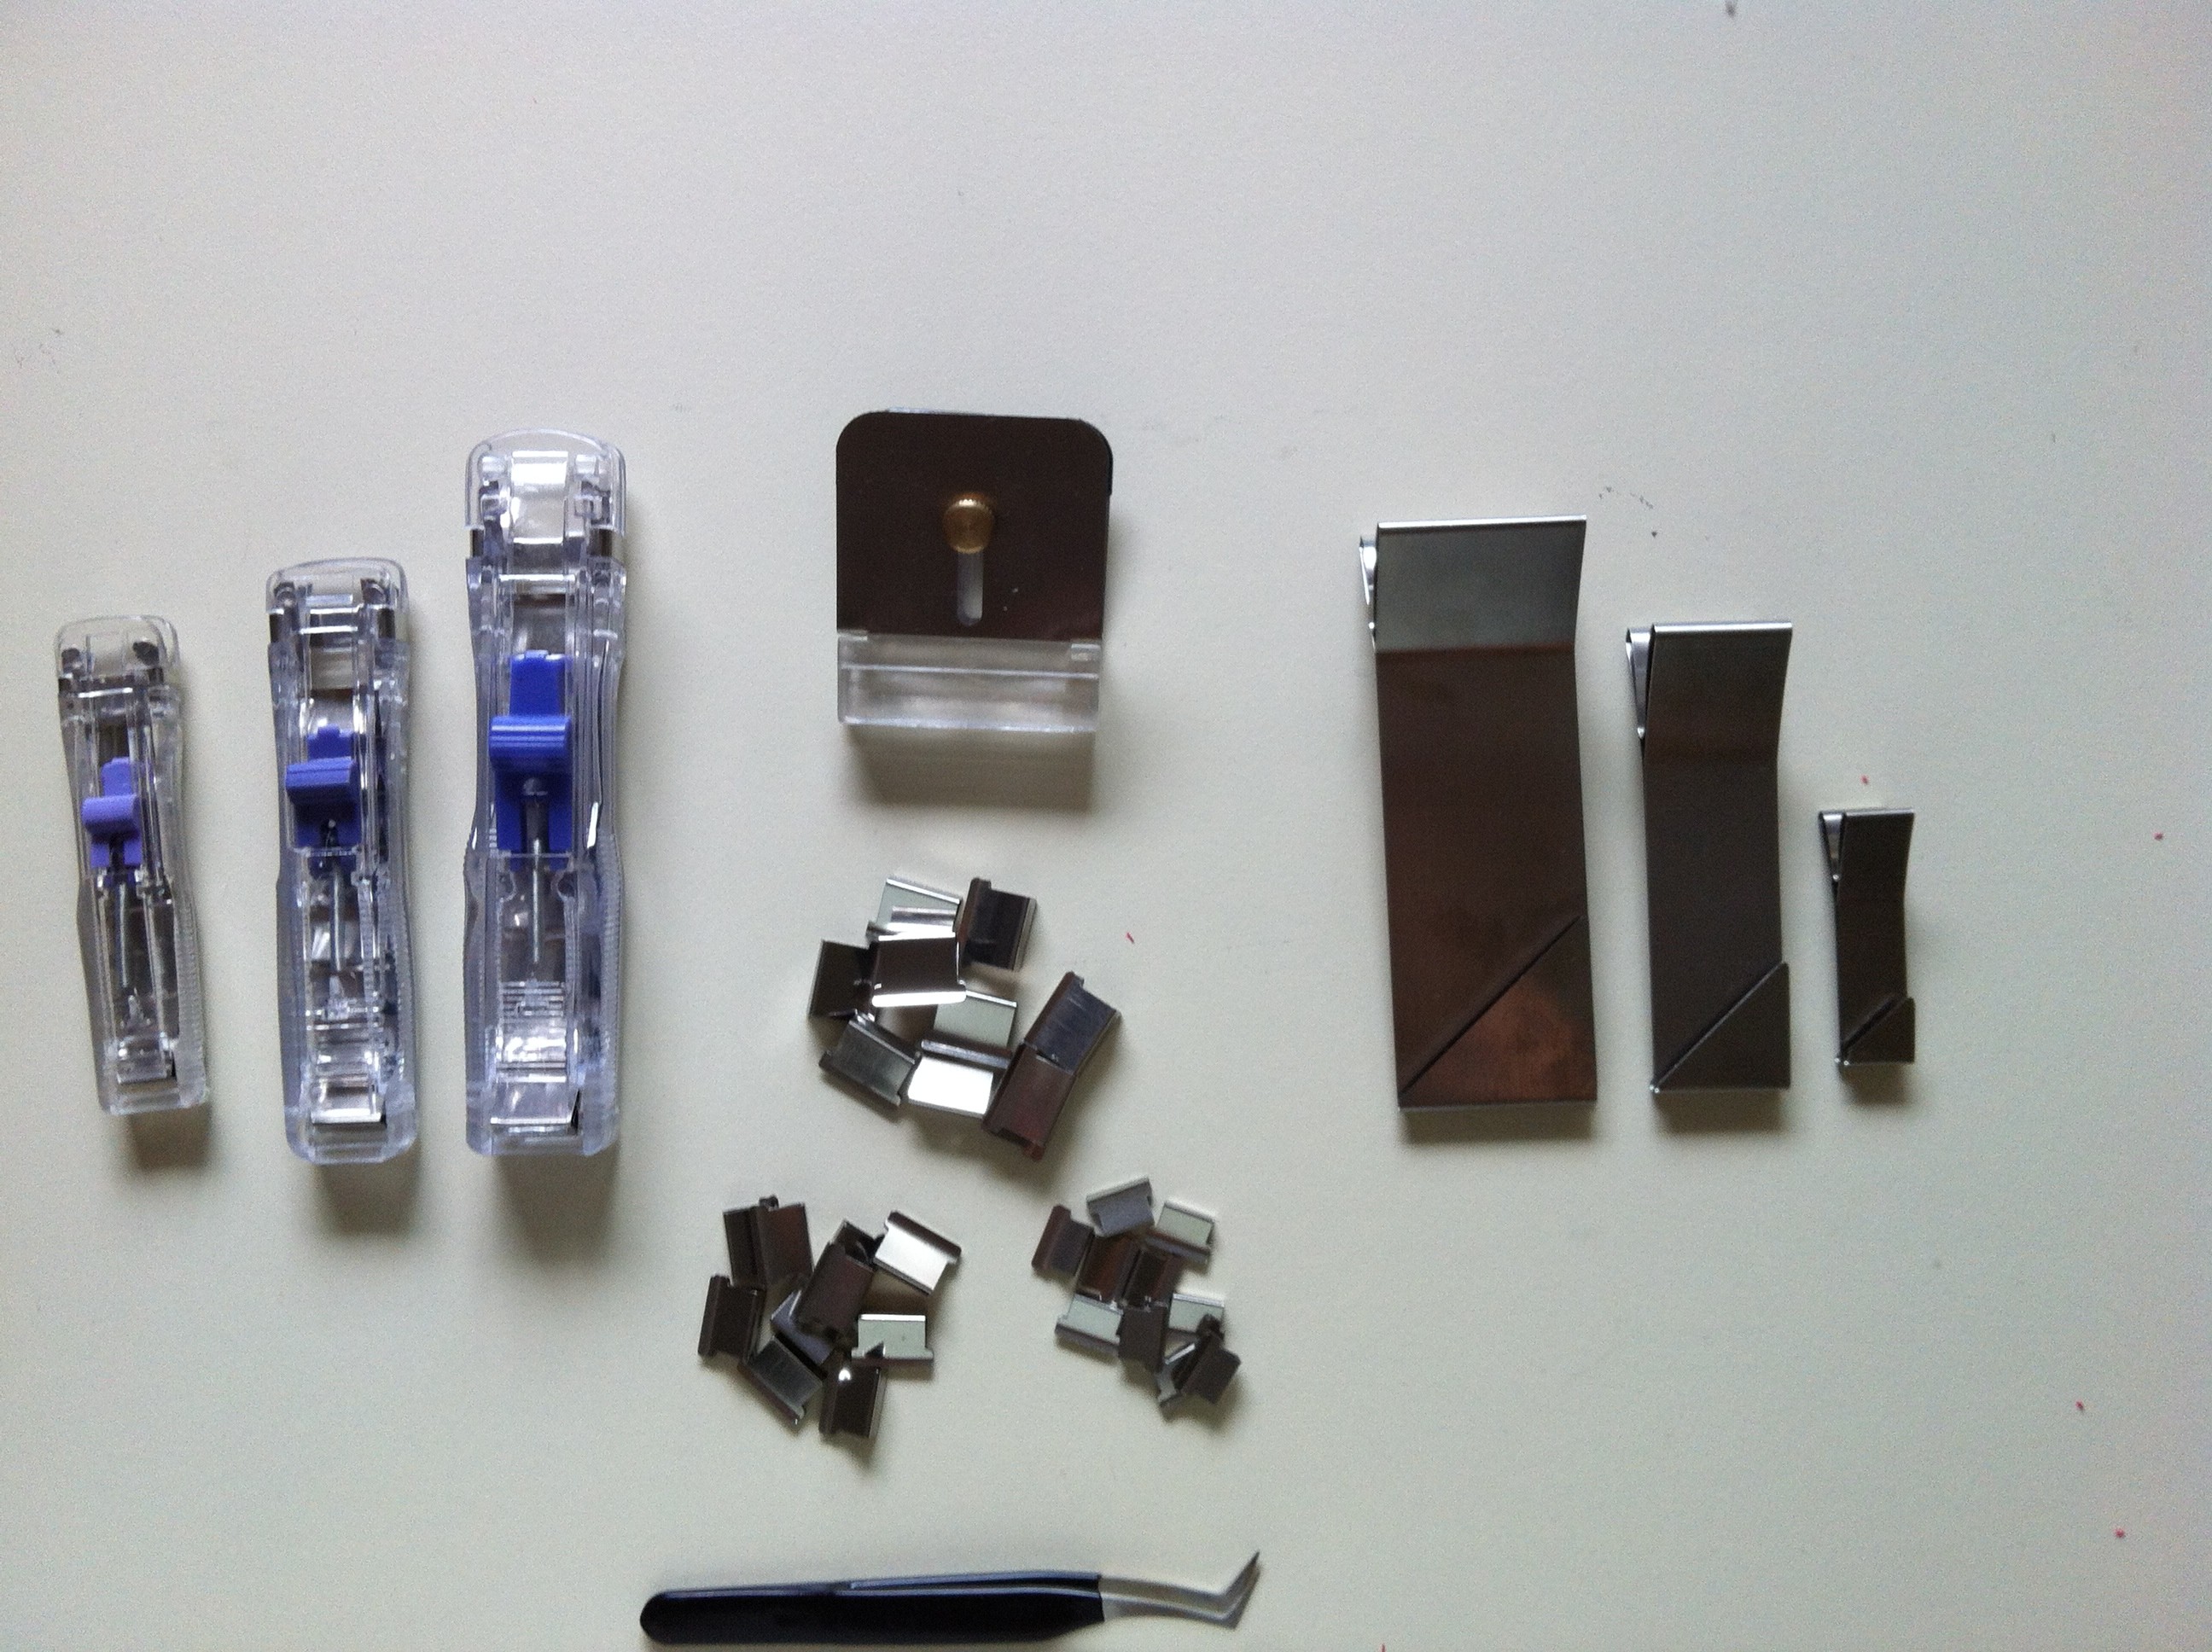
The packet has been hiding in my sewing stuff for years. Yup, years. Not months or weeks. Above are the contents after opening the package in 2013. At first glance the parts look similar to an engineer’s tool kit. More power to the nerds, I say. I watched the included DVD, but also recommend the instructional videos on the Martelli website. Following instructions, I tried each and every part of the system on the following project, but found only one which was easy to use – the miter tool which is named “minute miter” by the company.
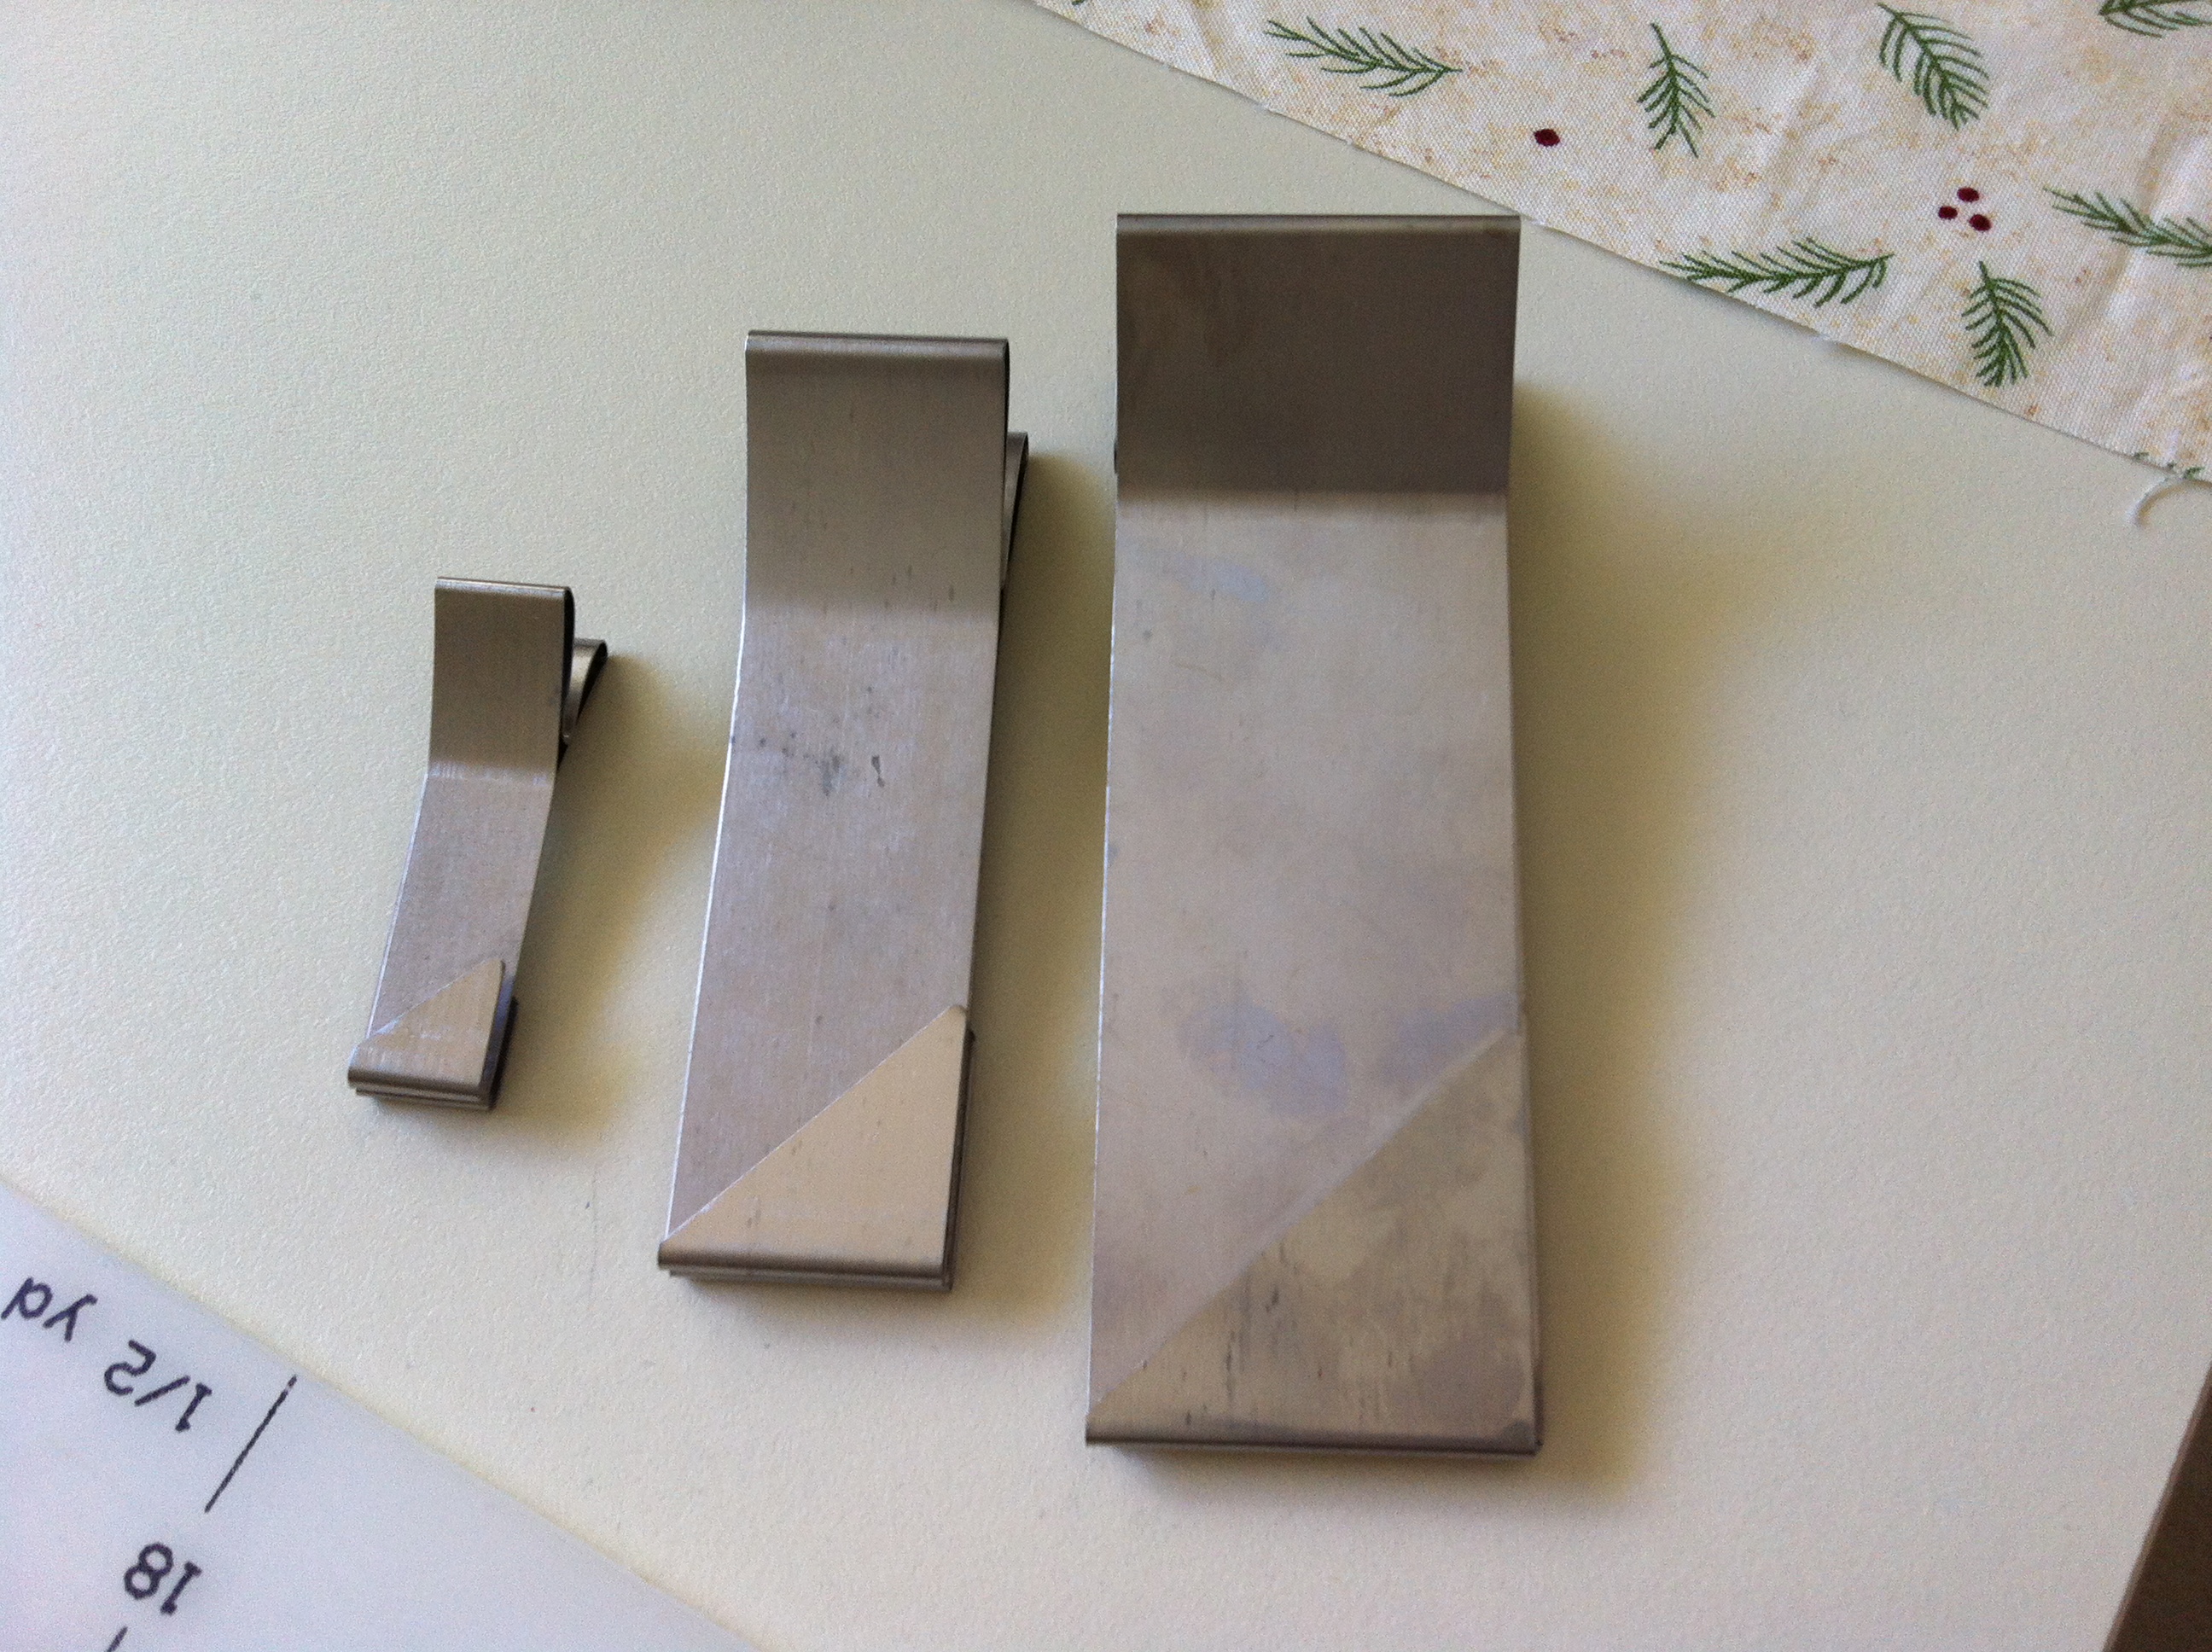 Lets just say I need more practice with the other parts: zip clips, clip dispensers, and the gizmo Martelli is calling the “zip bind” tool. I used the mitering tools in graduated sizes, seen above, to finish a couple of long pending sewing projects, and will surely use it again – in a non-quilty project, please.
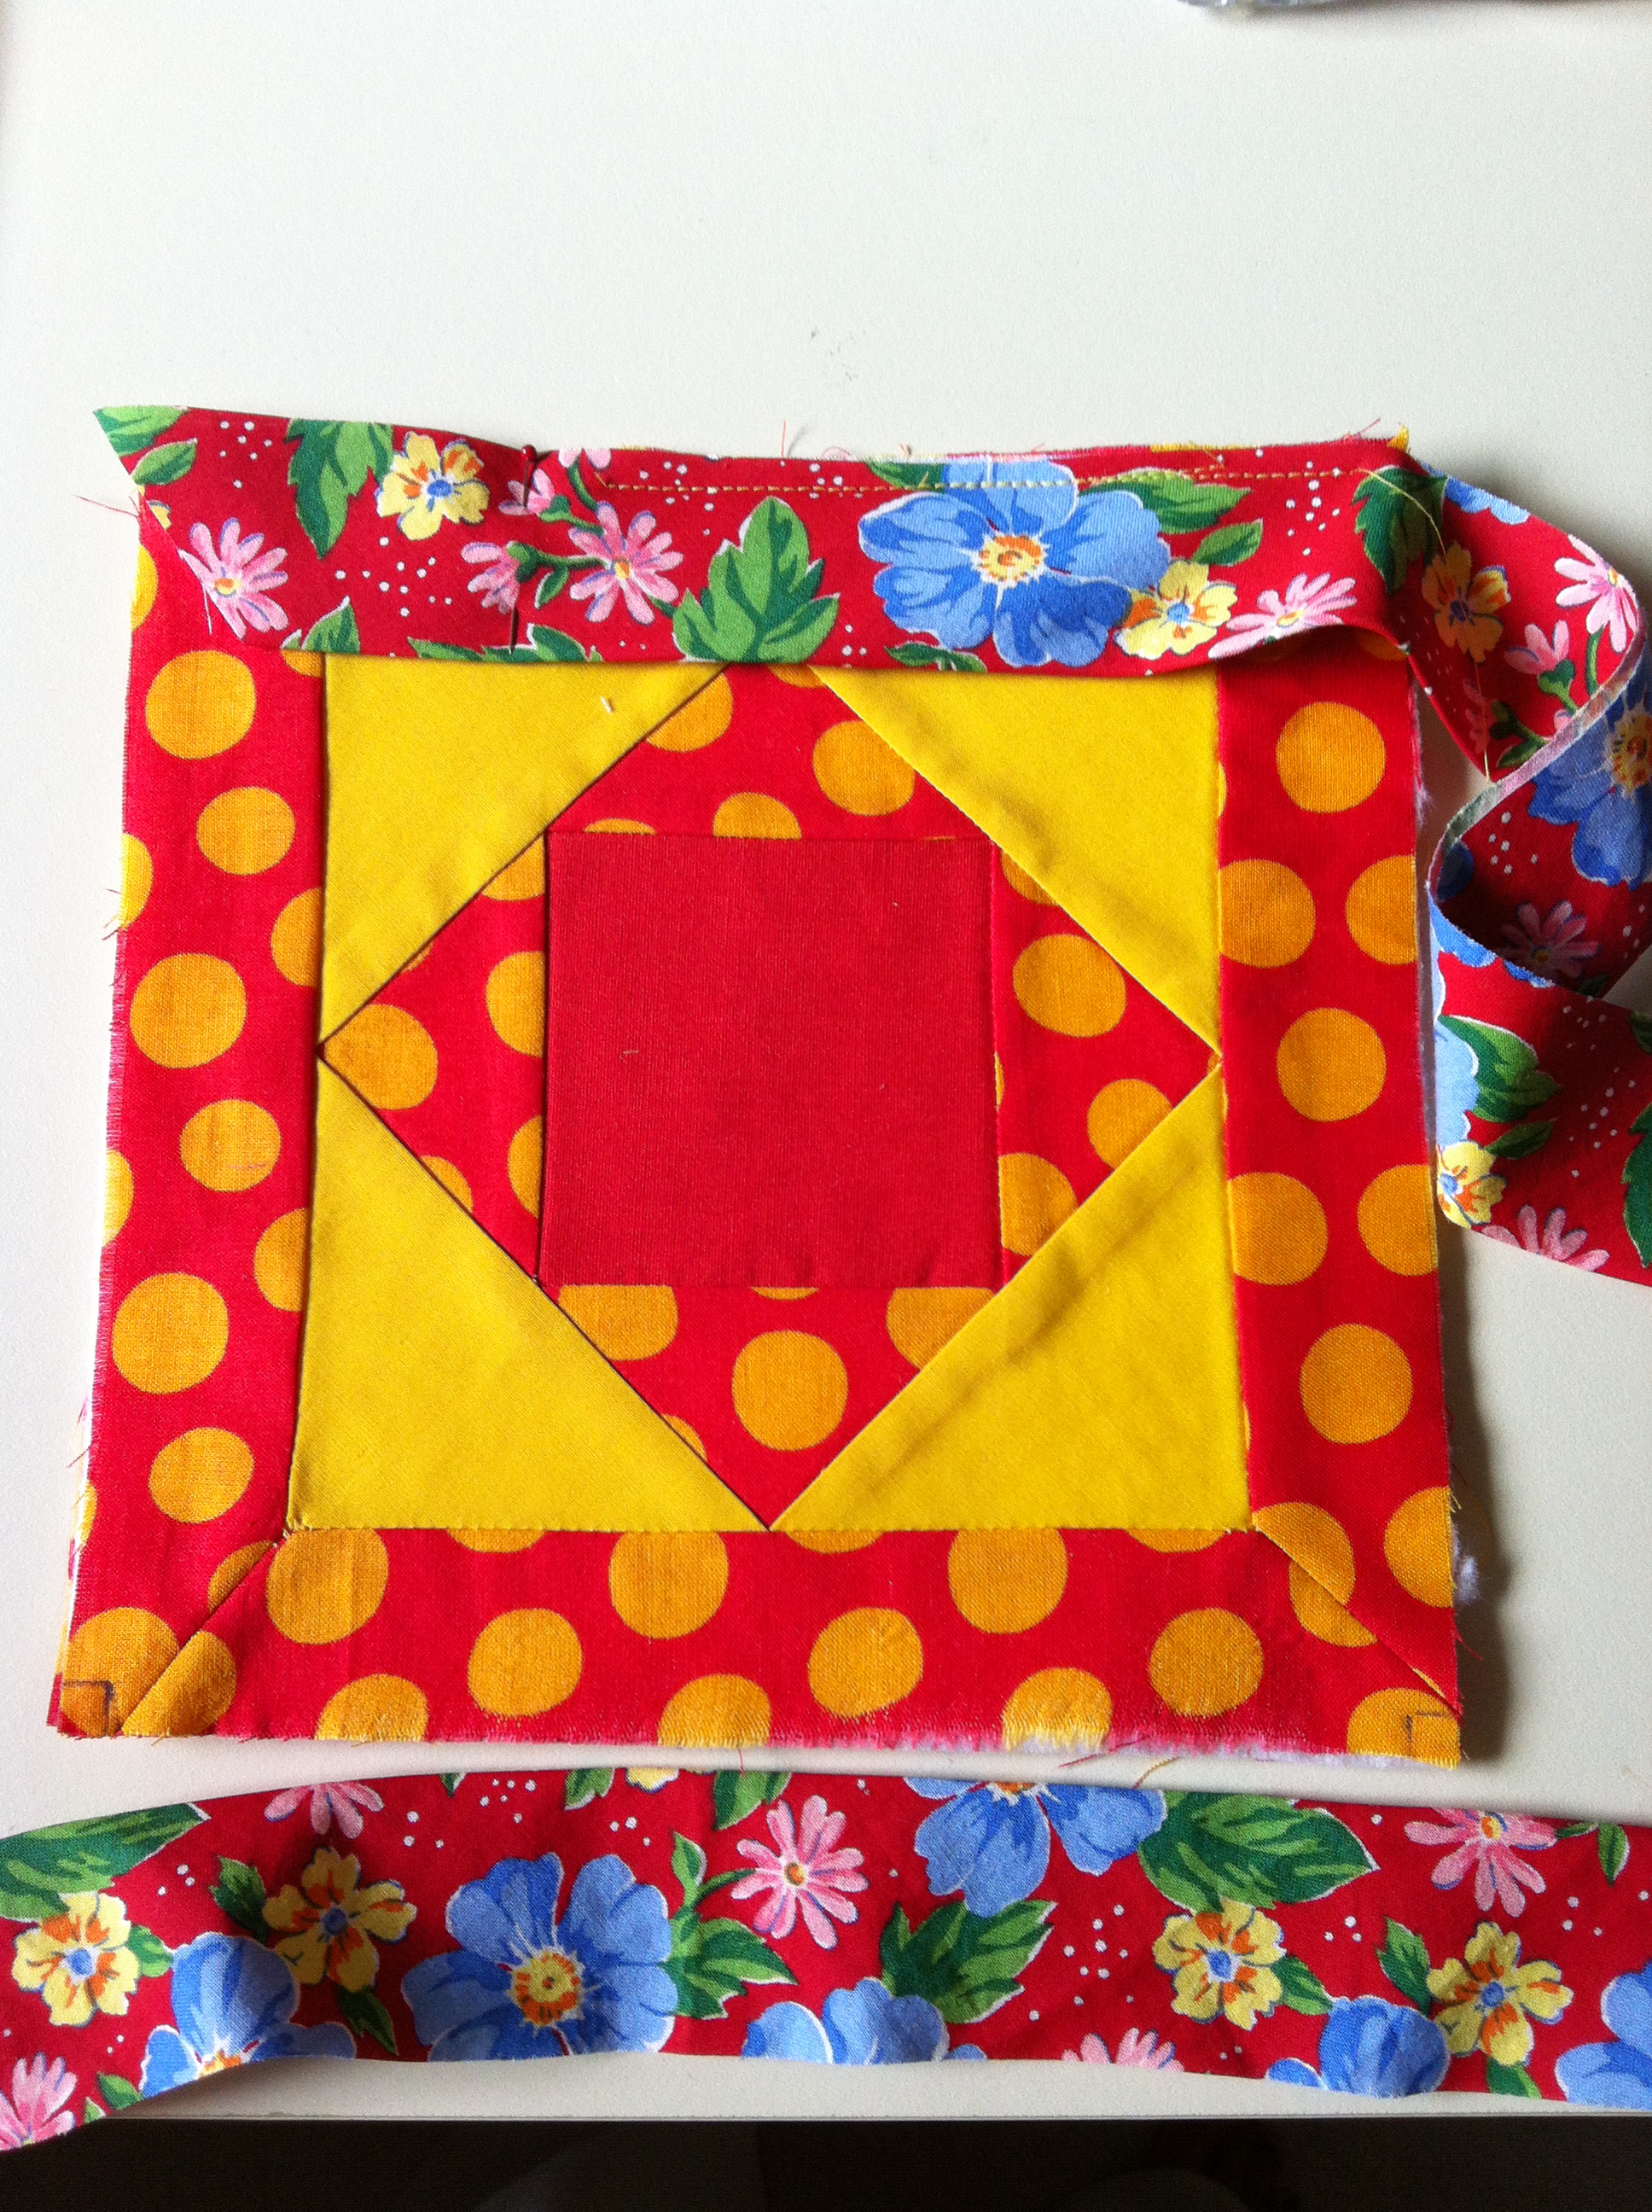
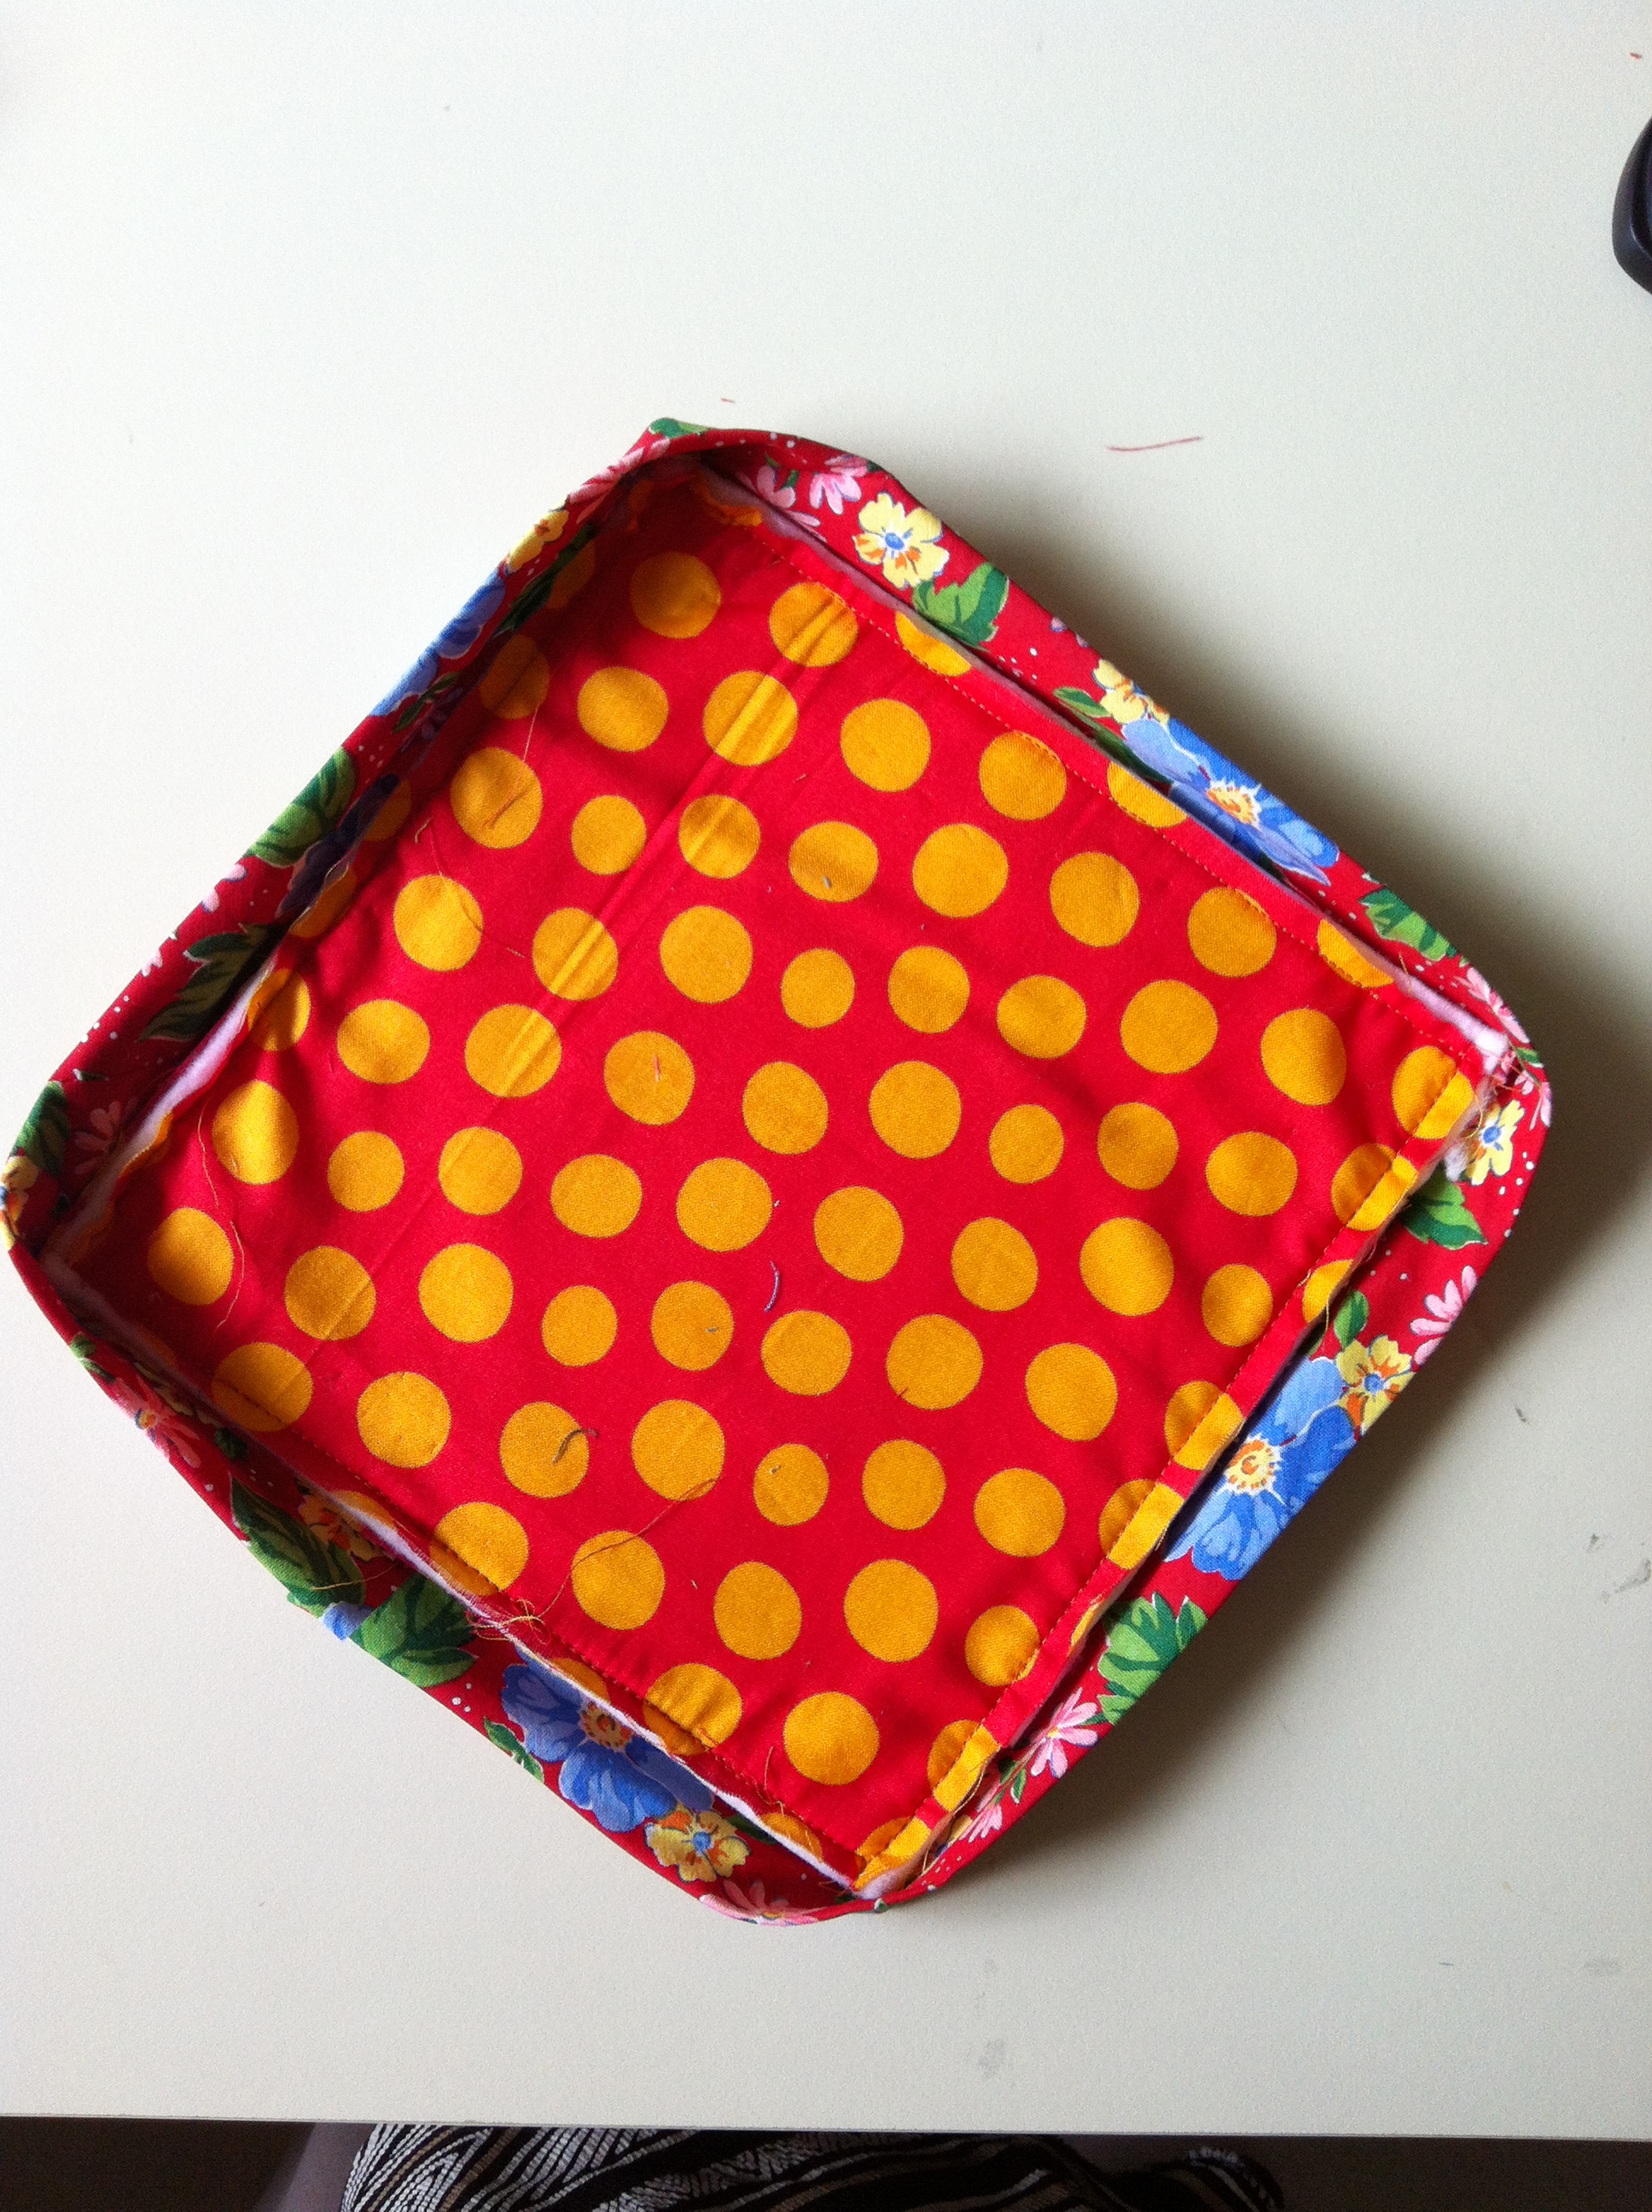
For this post, my projects were paper pieced squares made in a class I attended long ago. Fusible fleece and backing applied, the squares were ready for binding — mitered corners kind of binding. To use the tool look at these excellent, detailed videos on the Martelli website. But below is a brief recap of my own use of the miter tool. I must mention that all the things in this package are available separately from the company website.
Here goes:
Cut bias binding the perimeter of the square plus at least 6-8 inches, and 3 1/2 inches wide. Fold it lengthwise and press. Using a 1/2 inch seam allowance, sew onto one edge of the square. I started sewing from the middle, not the corner. You’ll see why later. End the seam 1/2 inch before the corner.
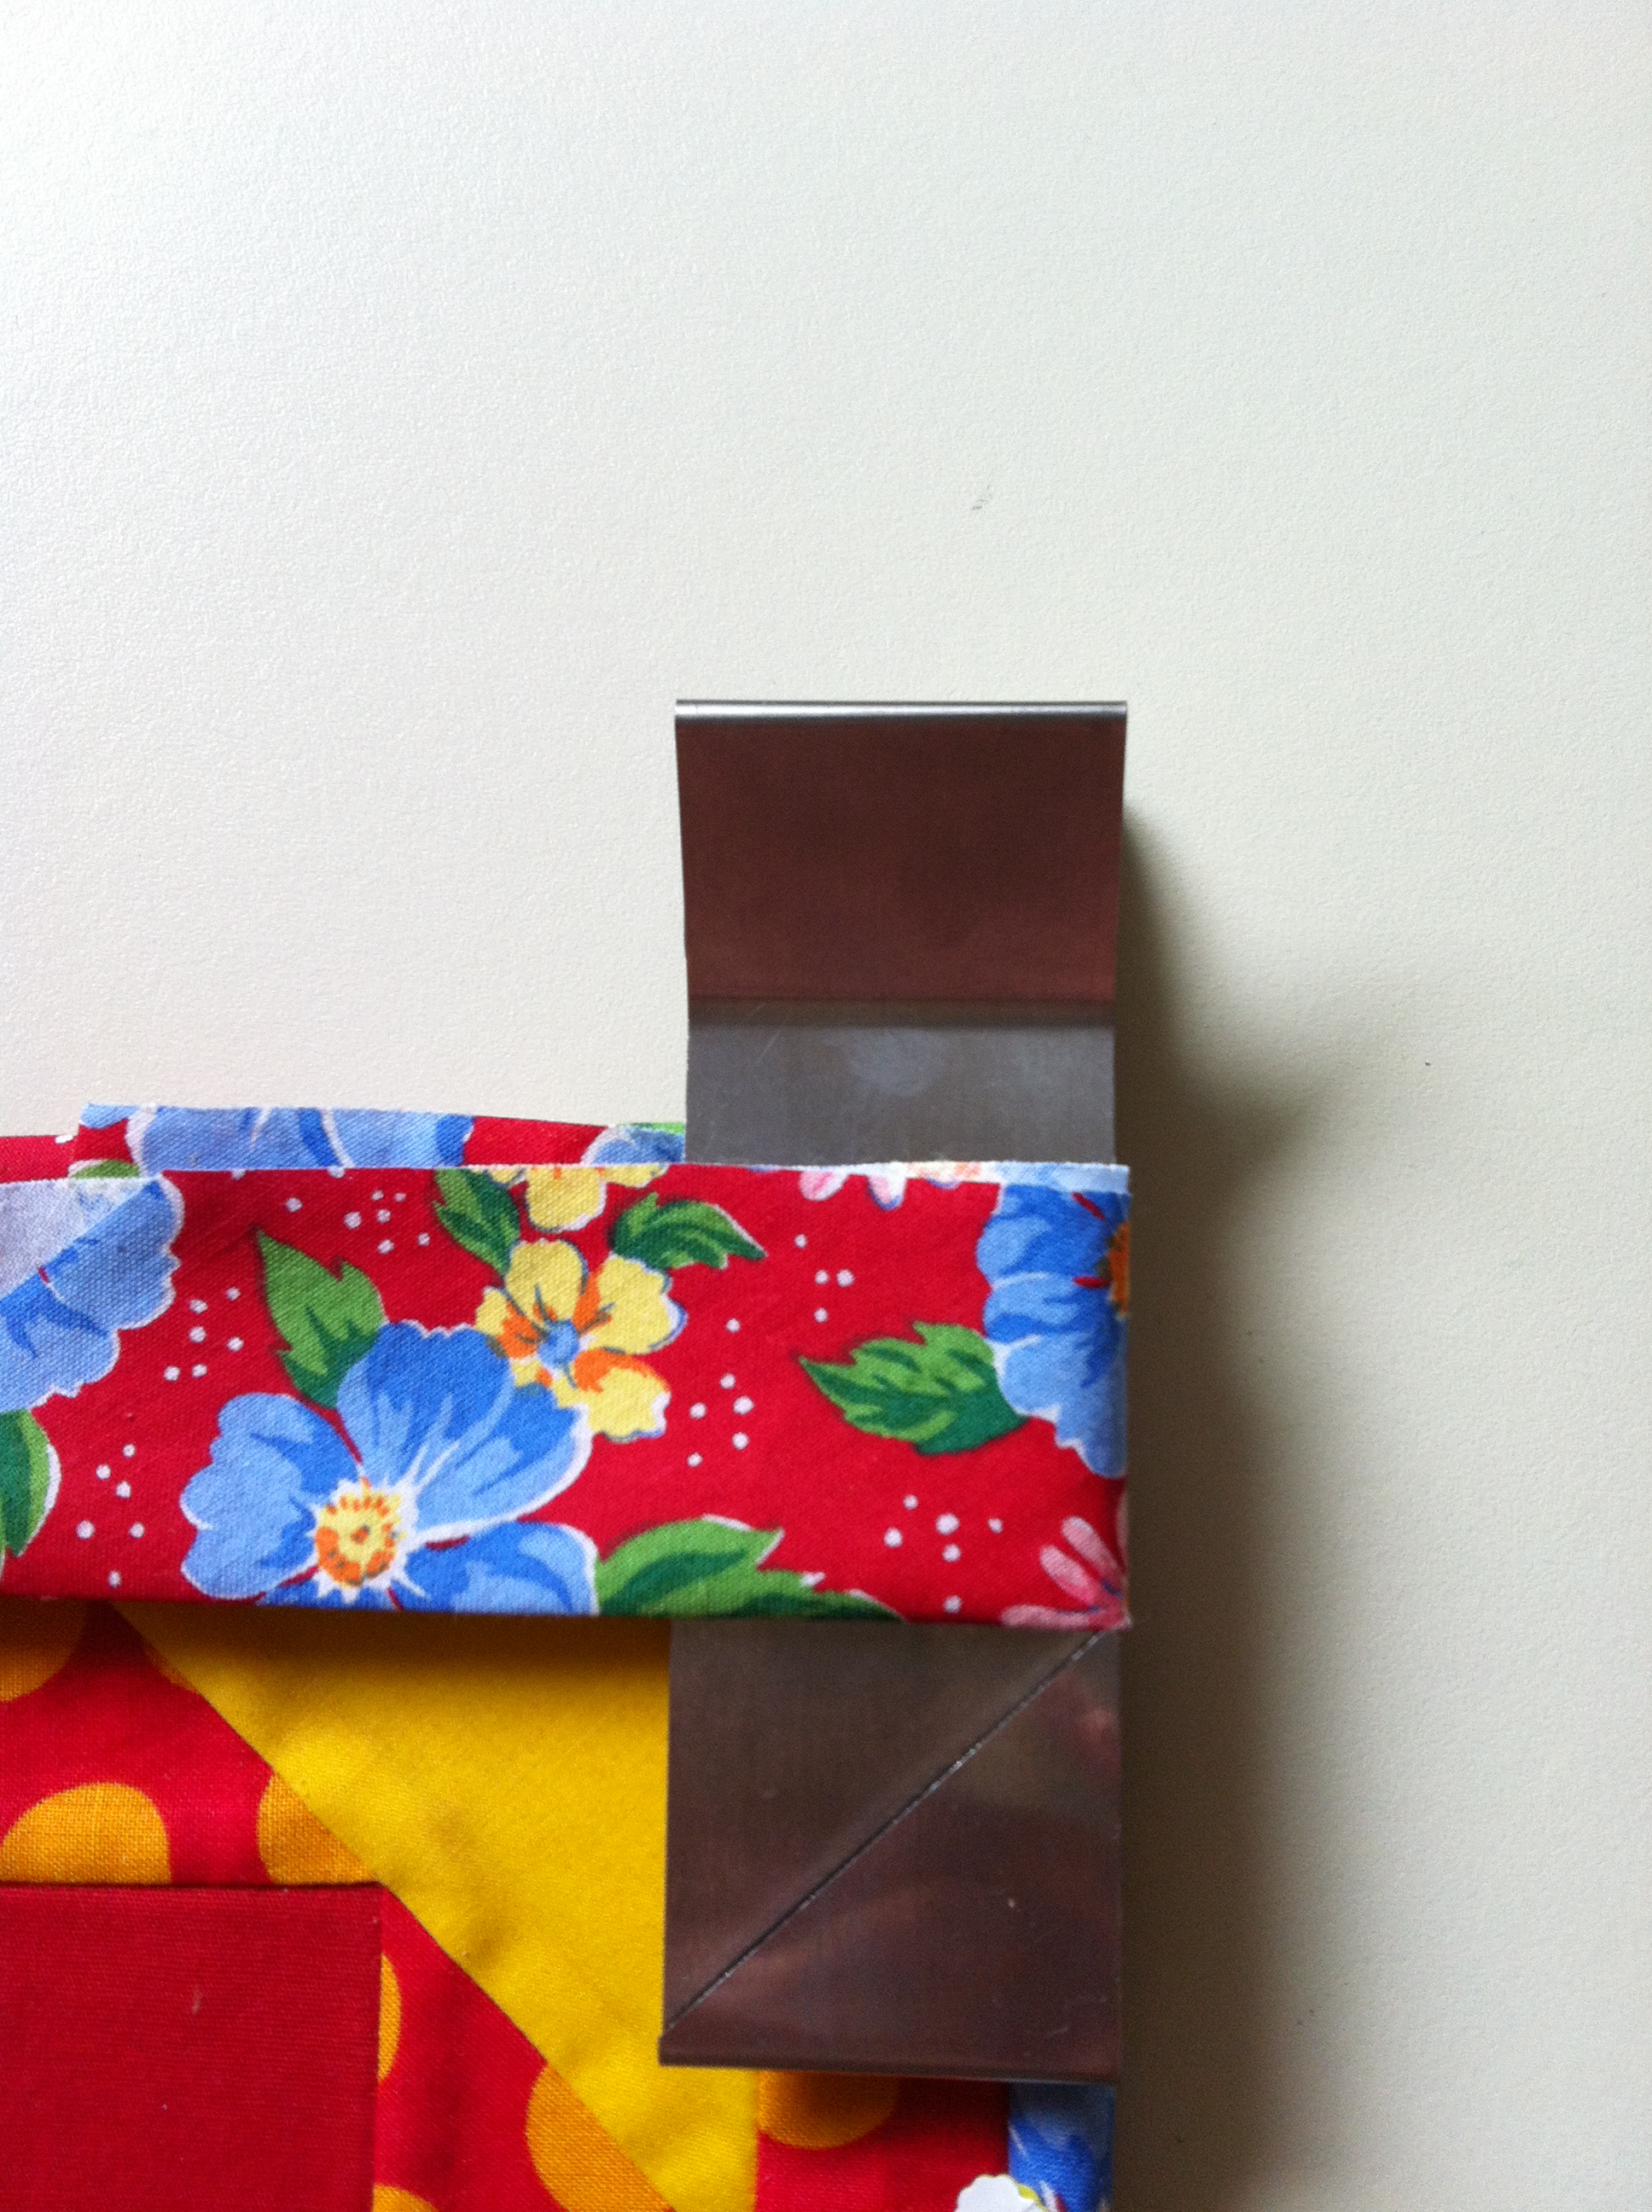
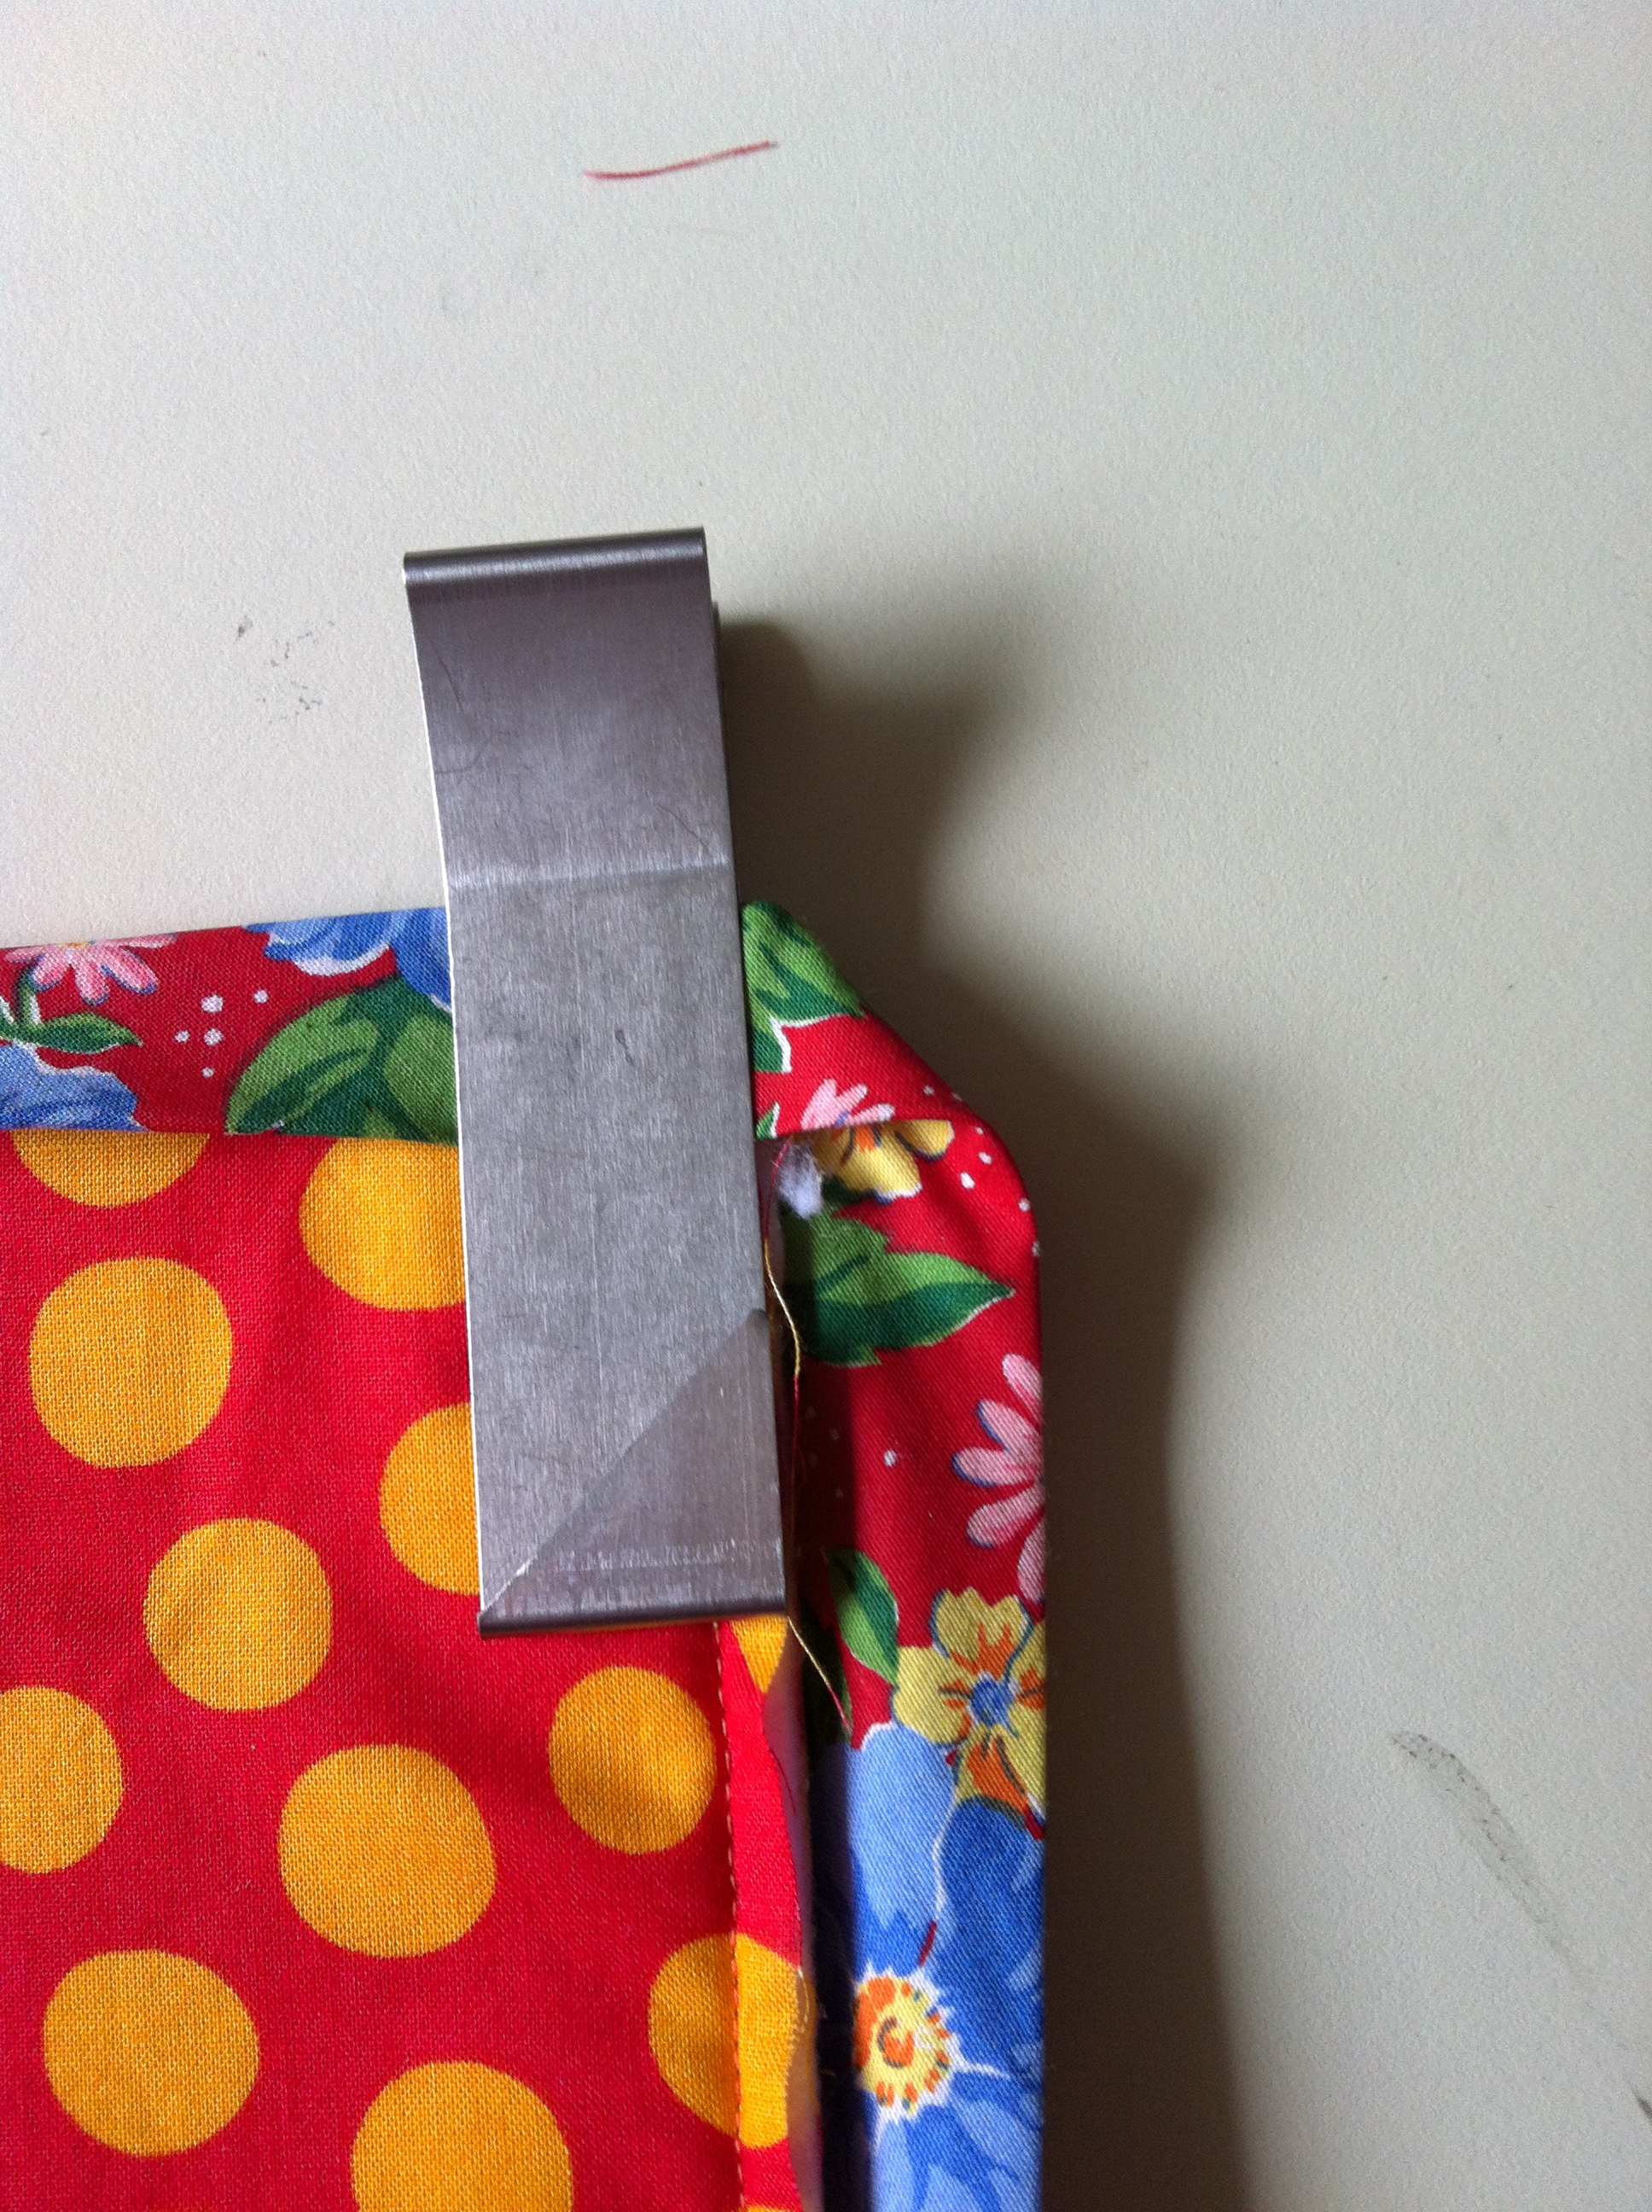
Clip the miter tool on to the corner all the way down aligned with the raw edge on the right and perpendicular to the sewn edge. The longer edge of the triangle is facing in, as in the picture below. I forgot to take a picture of this step while working on this, so you’re seeing the clip attached to the completed square.

Turn the free binding to the left over the metal, and slide the tool up. The metal triangle is now on top of the binding strip.
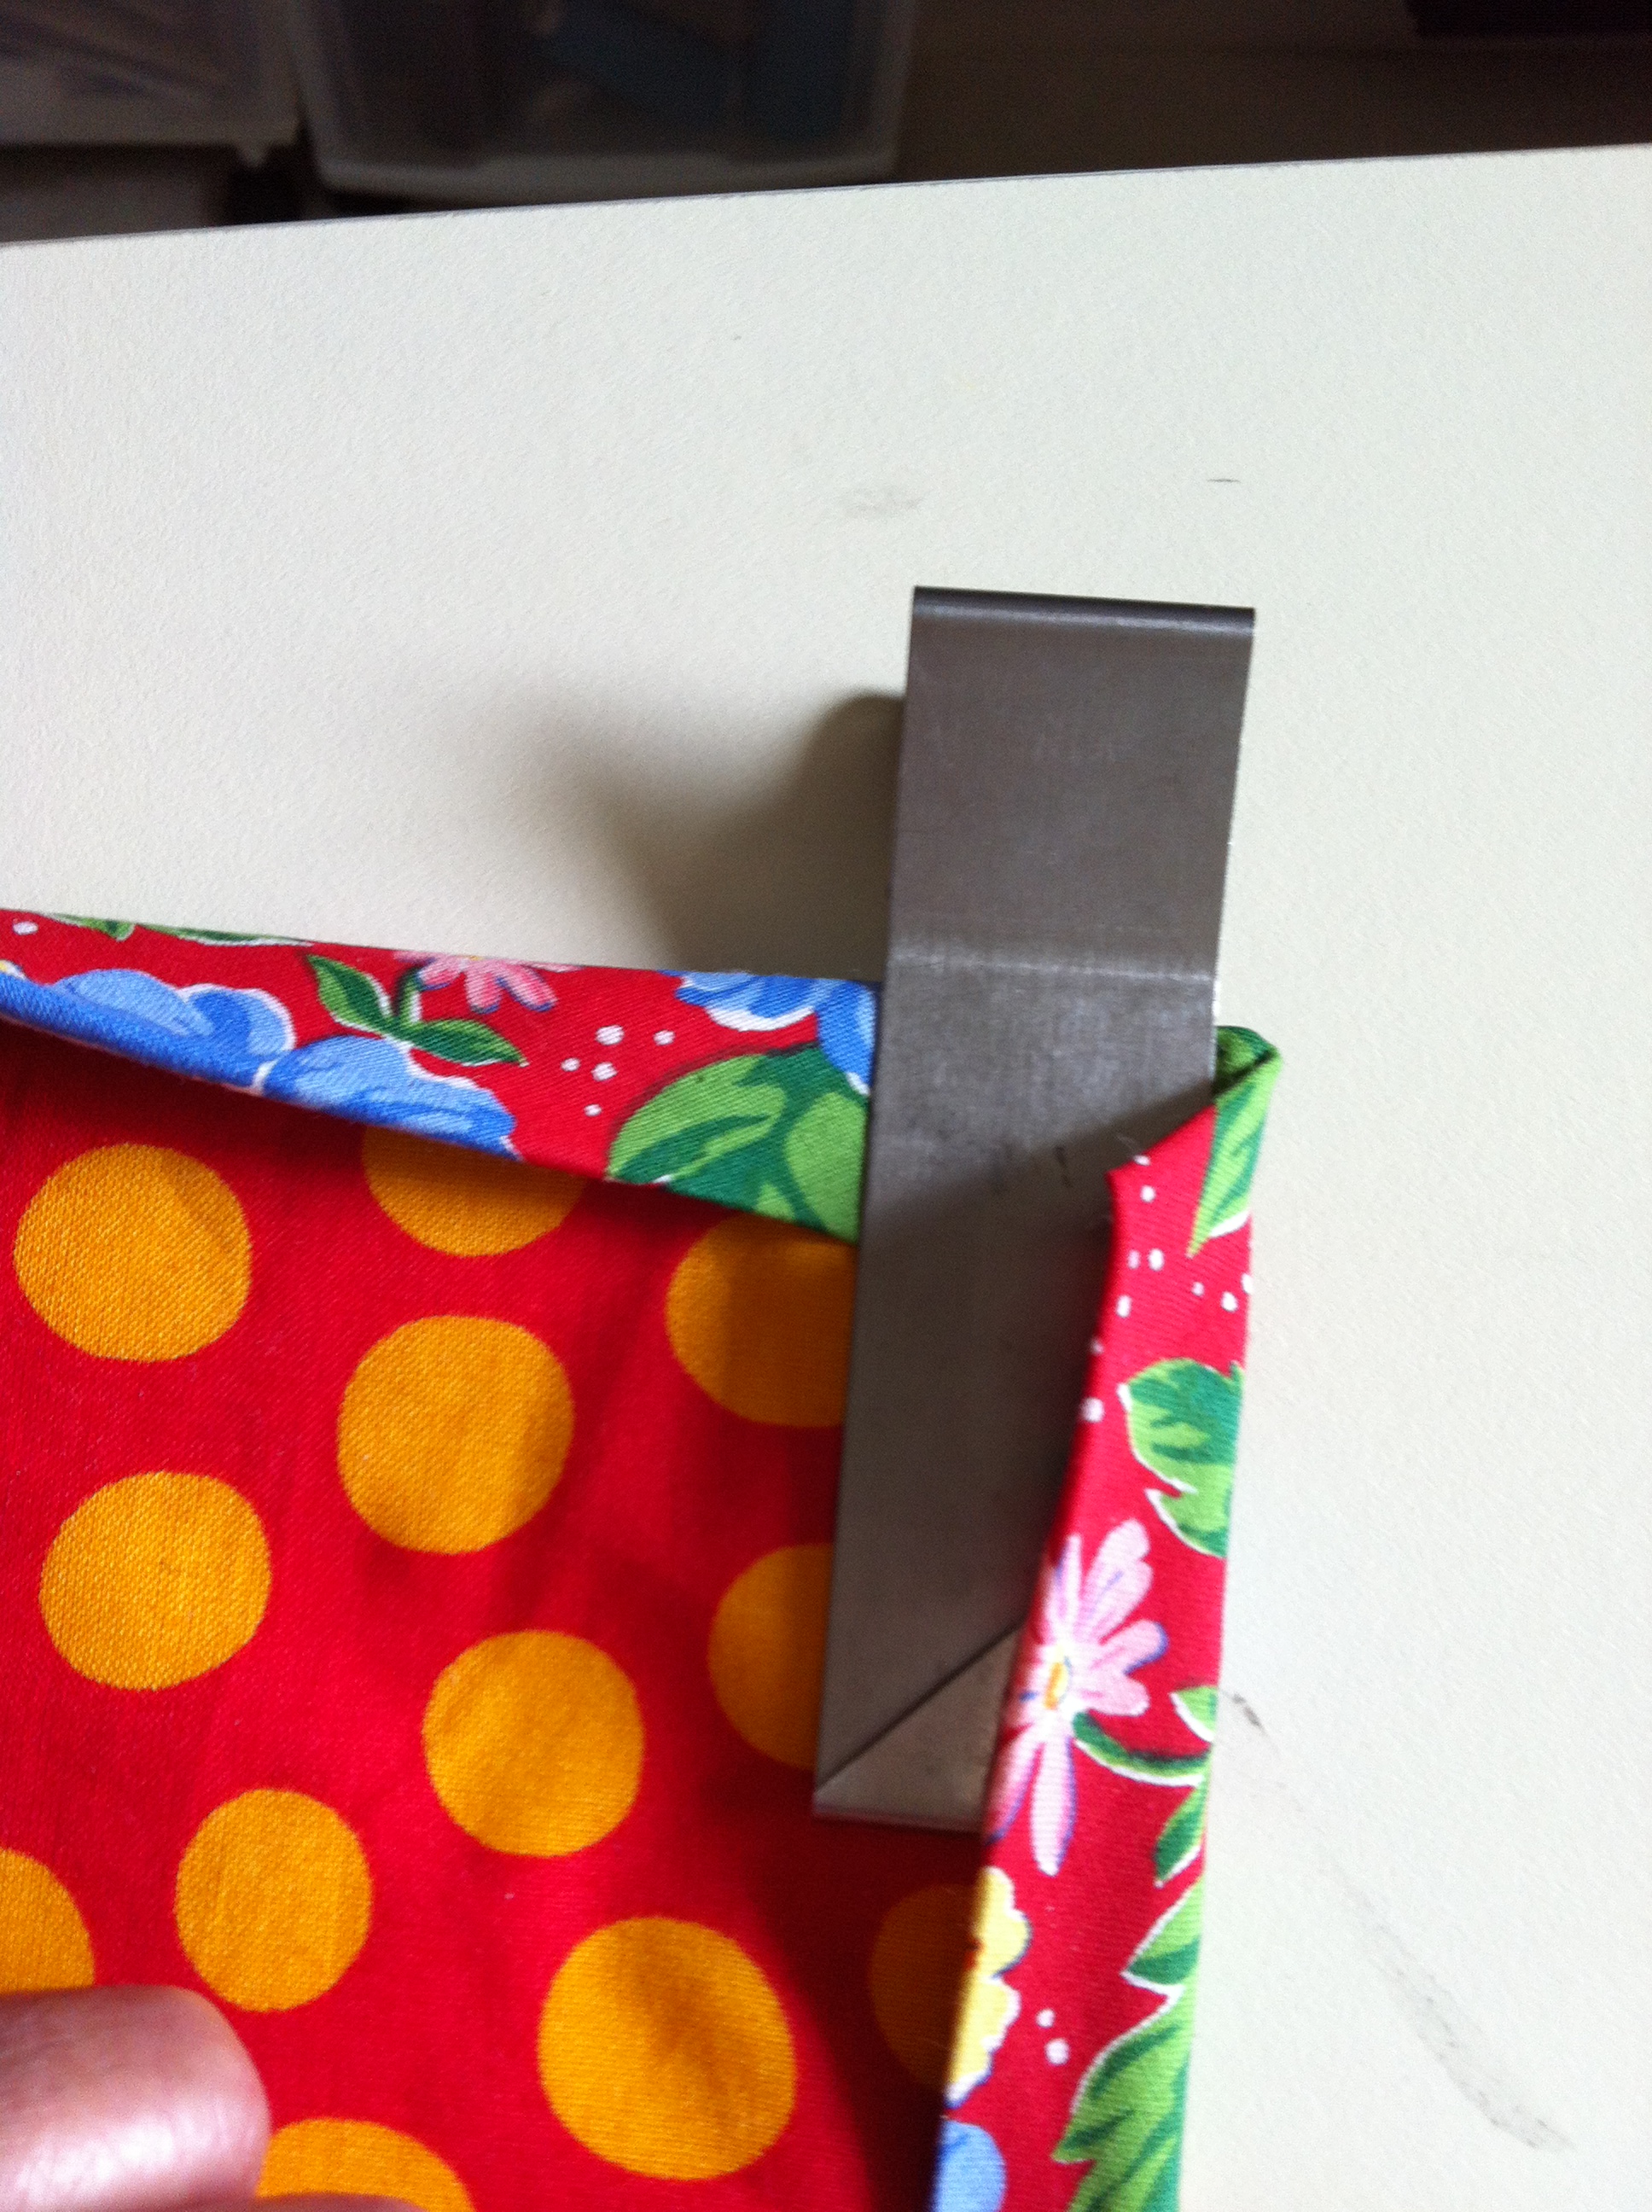
 Flip the binding strip down over the triangle so it looks the picture below. Pin the binding an inch or so below the edge of the metal.
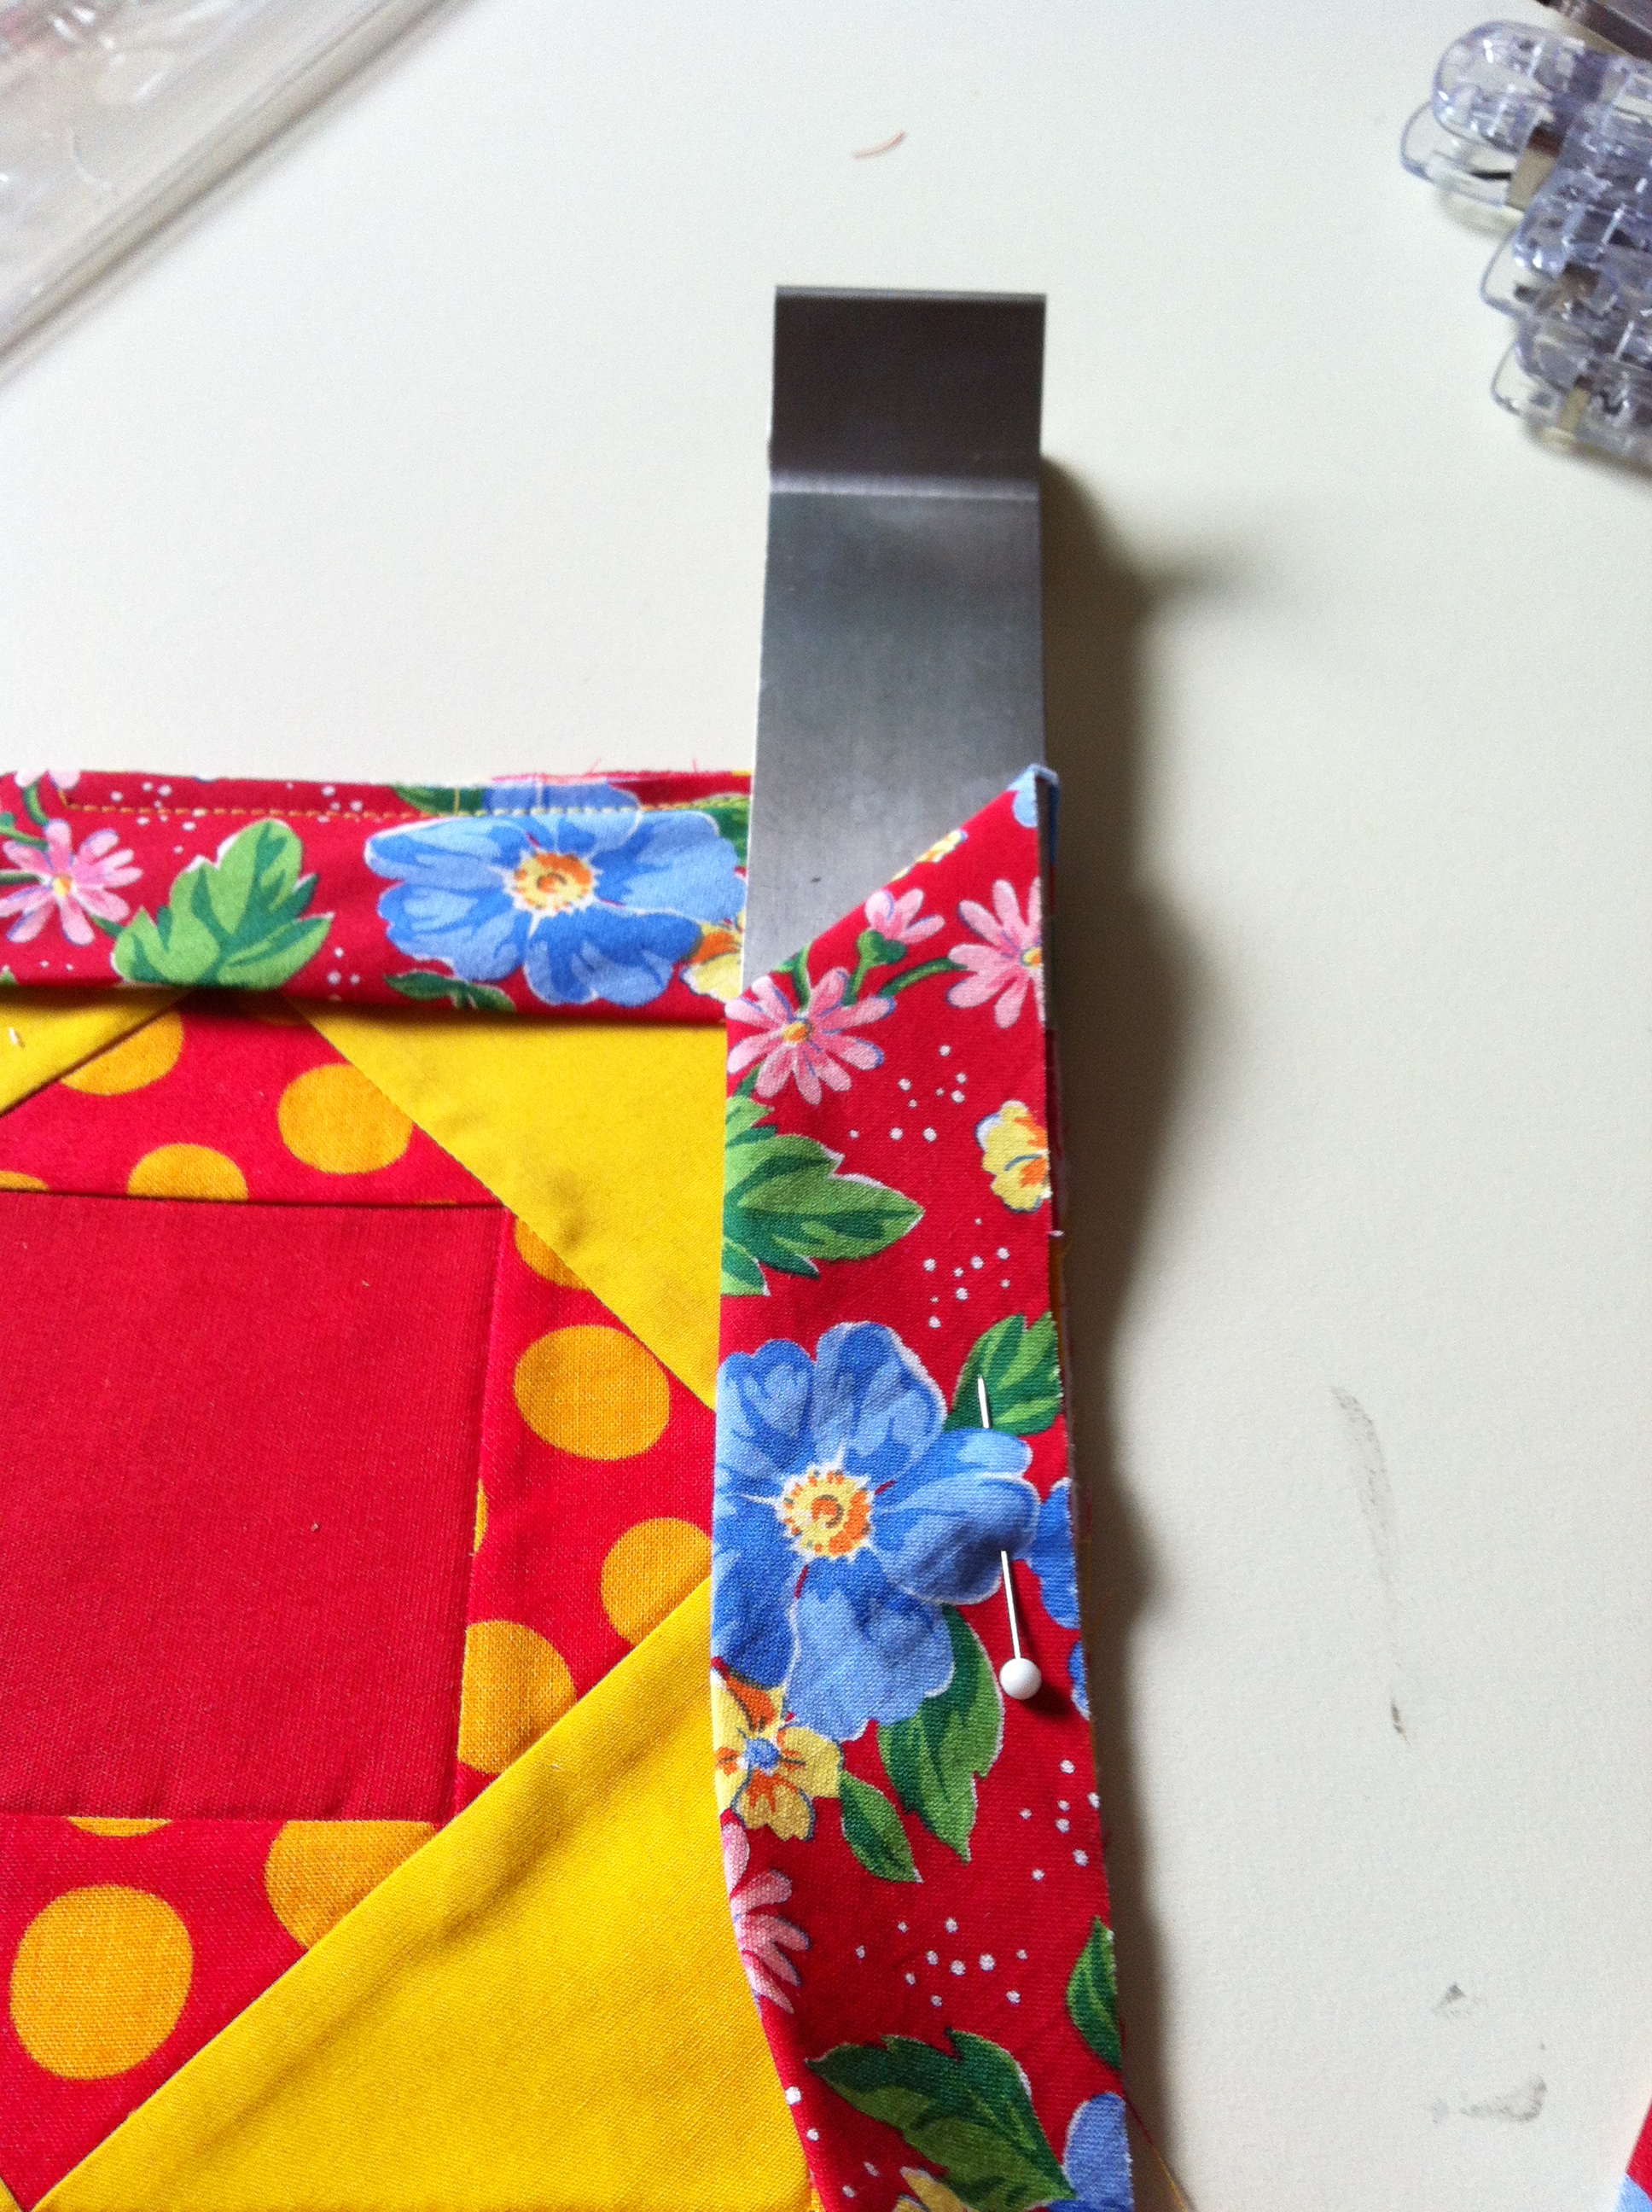
Remove the miter tool, adjust and pinch the fabric by hand to make a pyramid, aligned diagonally, as in picture below.
Press the pyramid to the left, and sew down the binding to the side starting from the top edge (yes, the point of the pyramid will be caught in the seam) and ending 1/2″ before the end. Repeat for all four sides. This is why I started to sew on the binding from the middle, to avoid messing with the joint of the binding and the miter clip at the same point. My binding is joined in the middle.
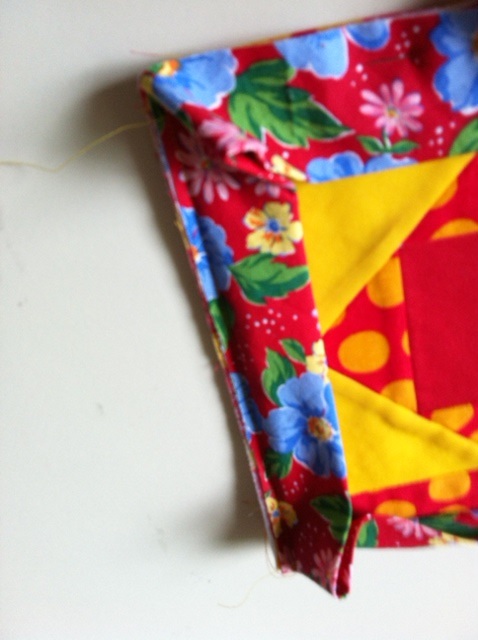
Turn the binding to the back and your project will look as pictured below.
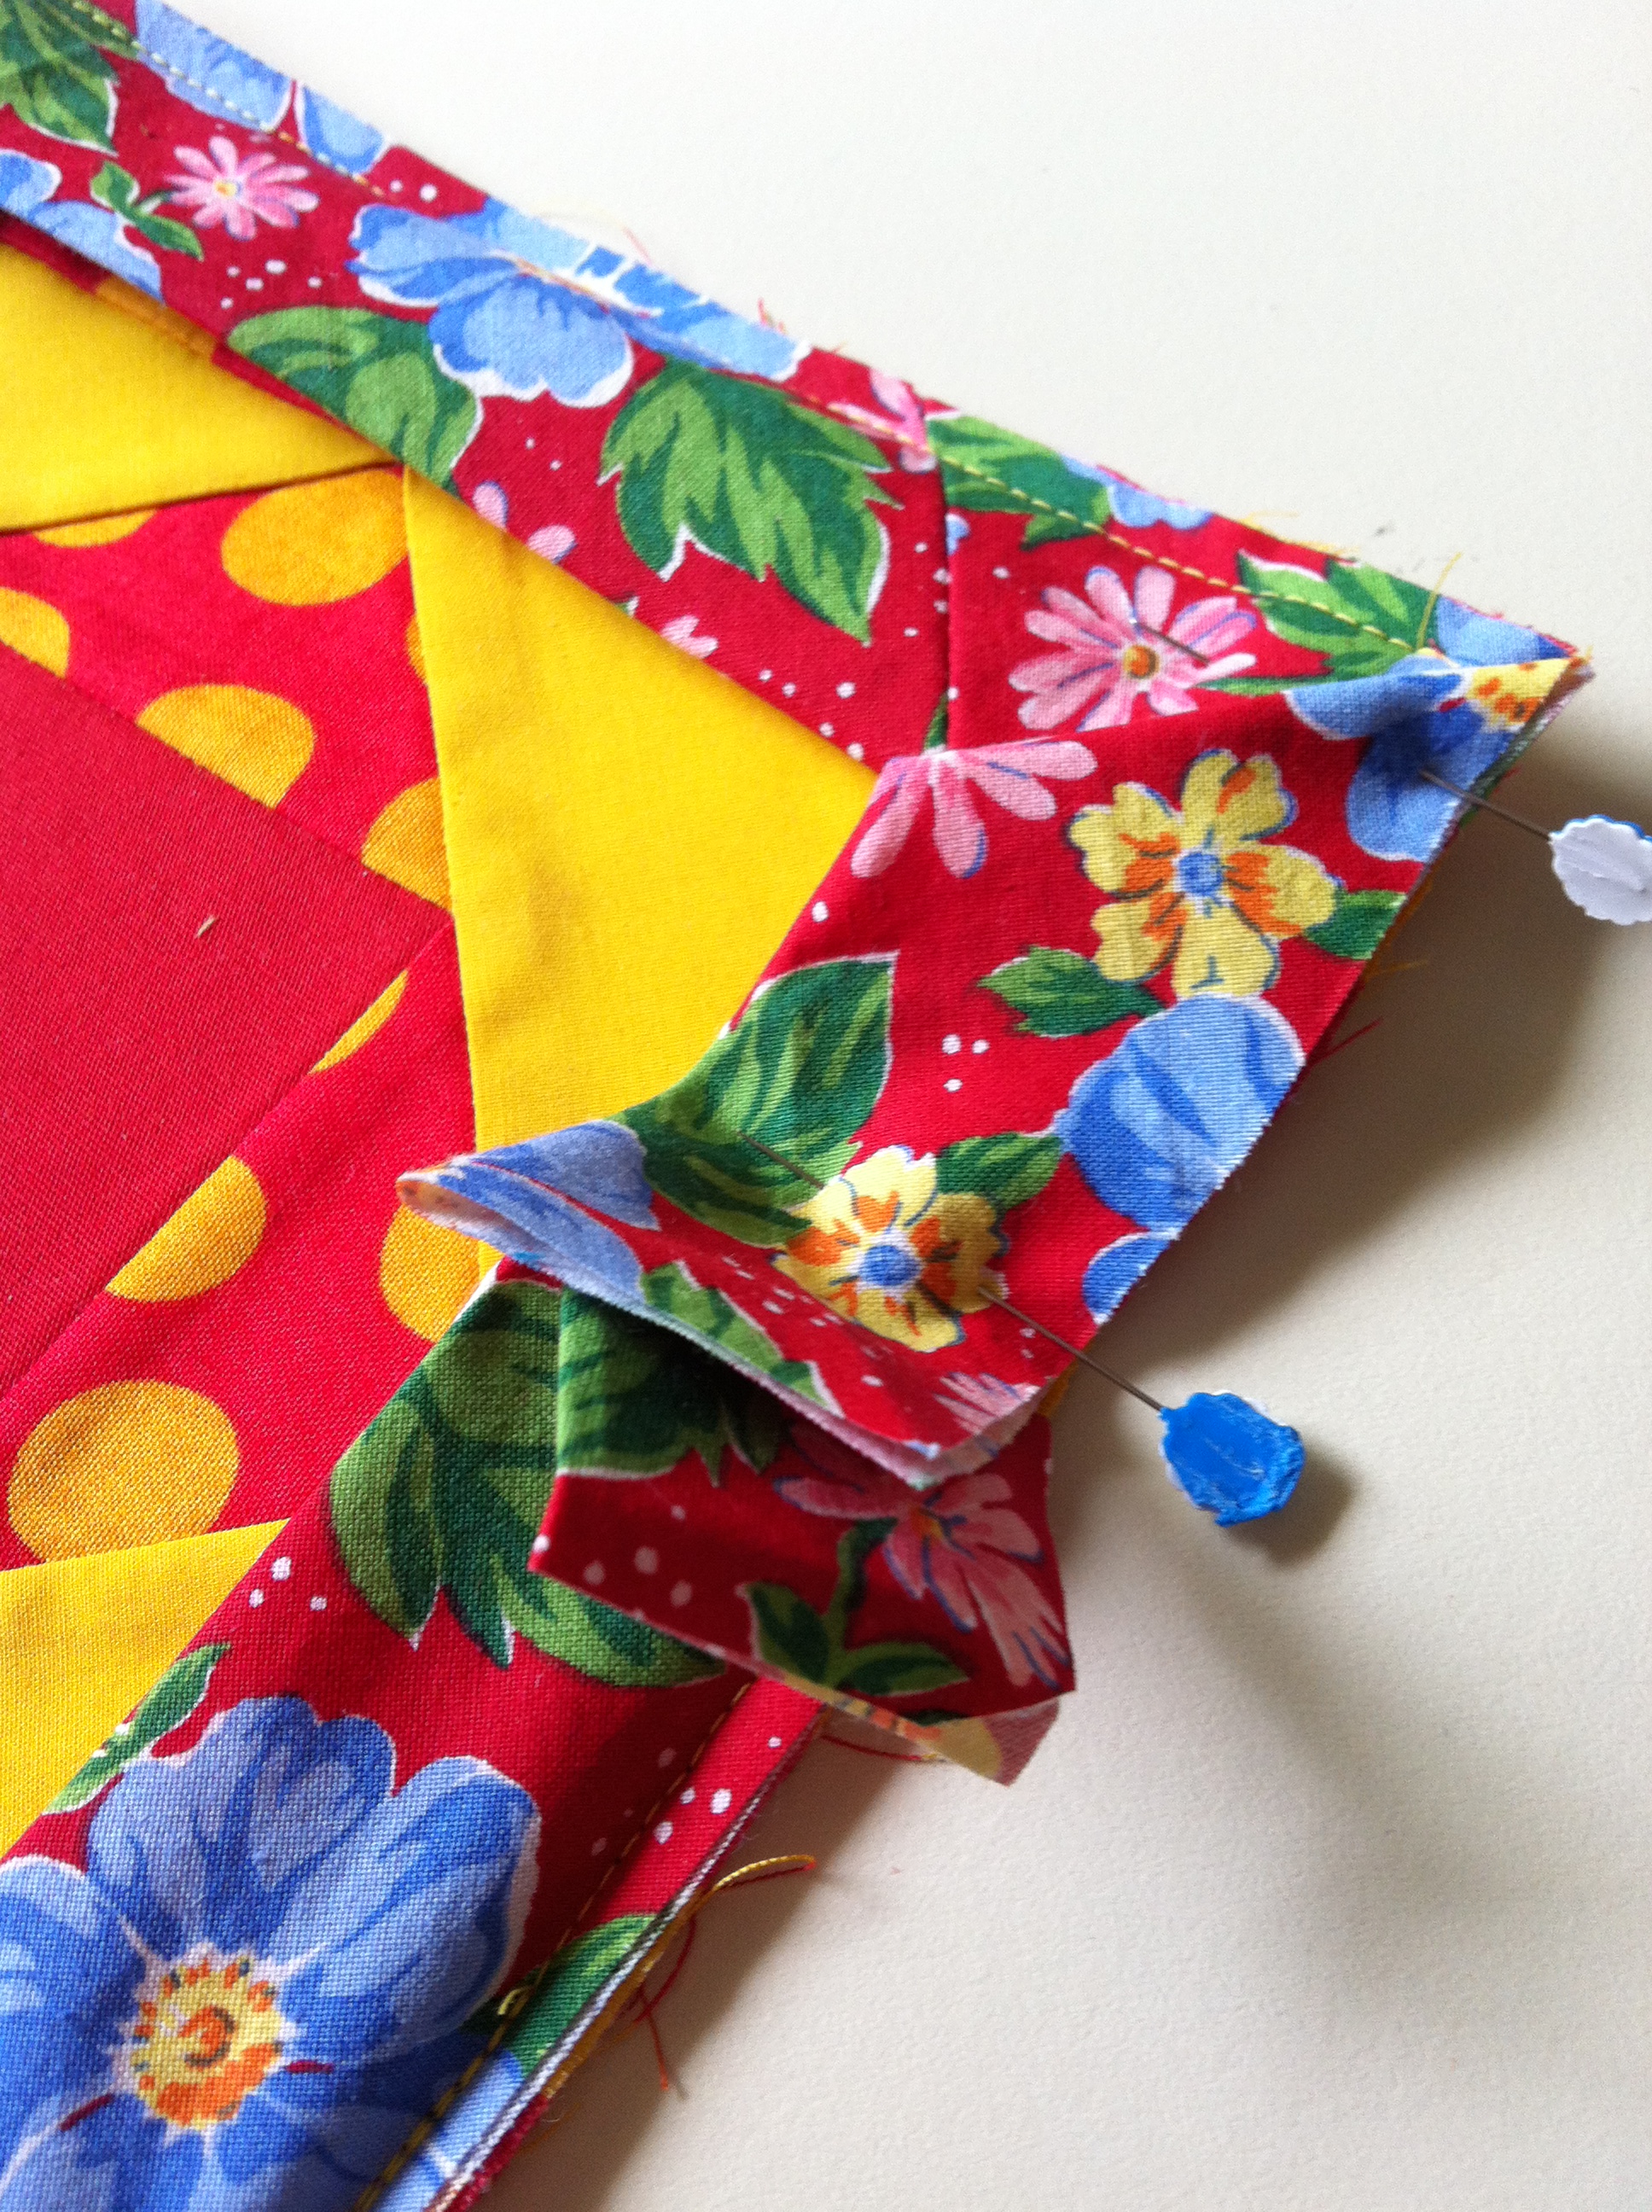
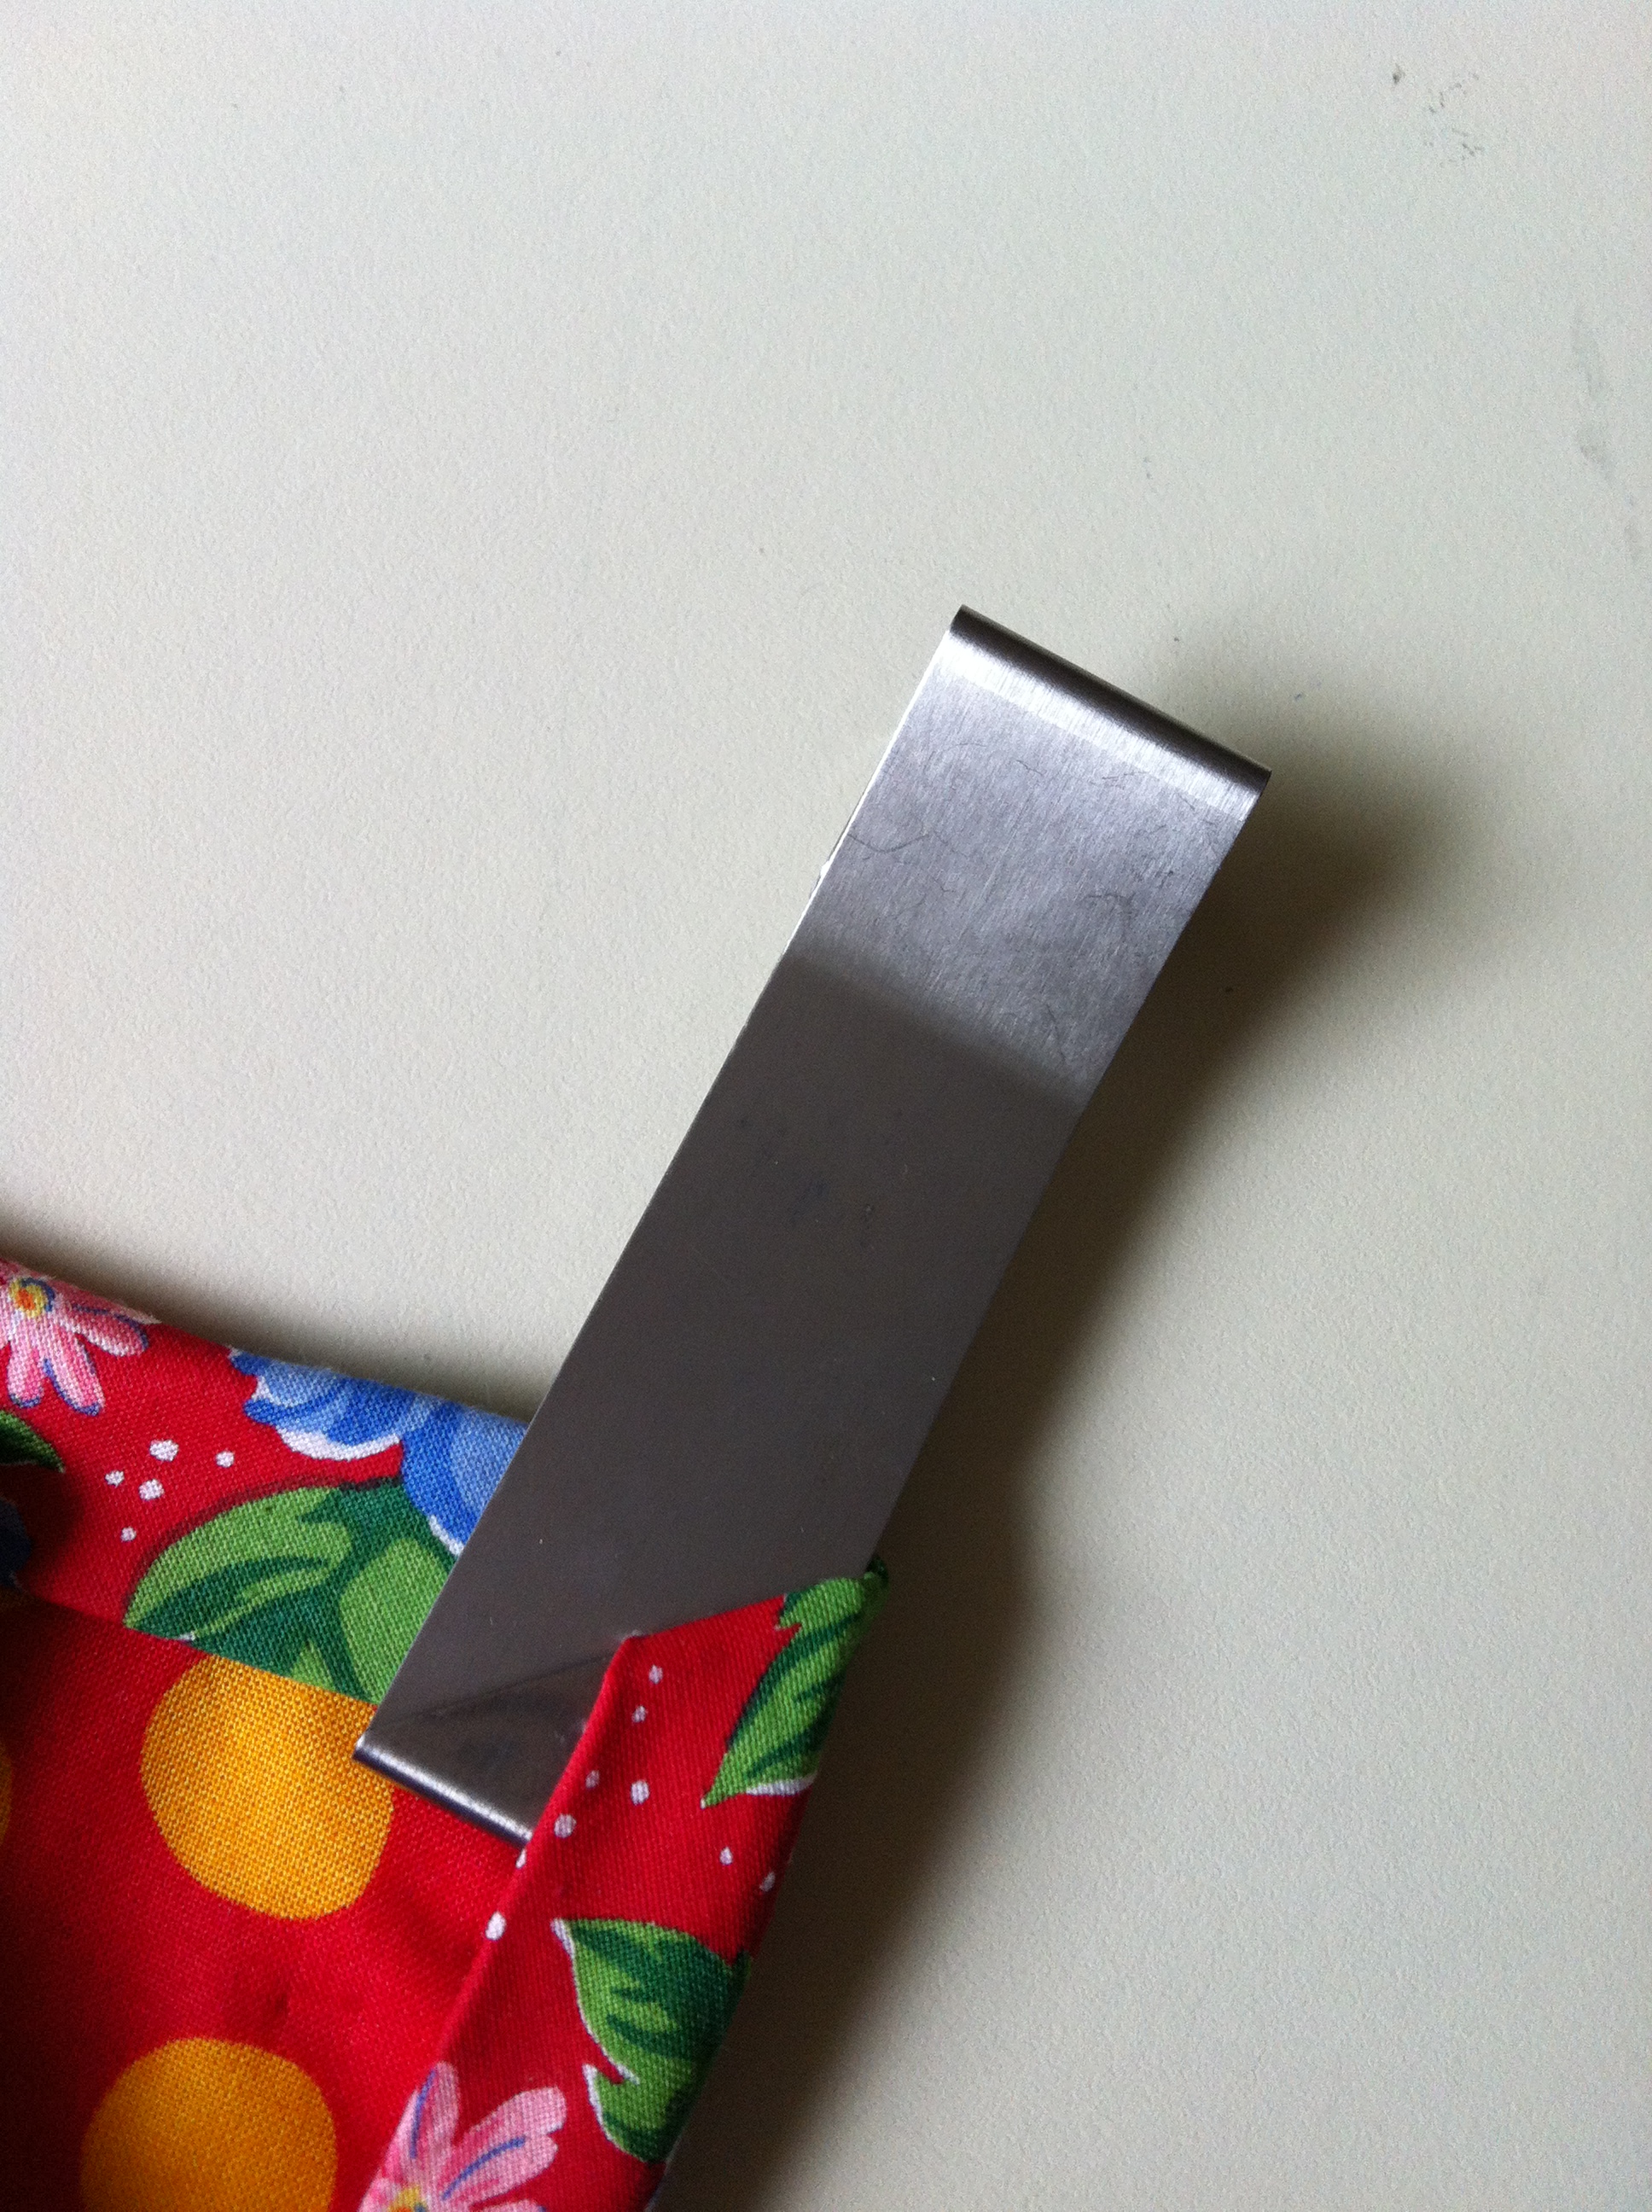
Use the smaller tool to create the miter on the back side, pretty much the same way you did in the front, except the edges are all sewn. Fold over binding on one edge, slide the miter clip so that it aligns with the raw edge.
Fold the binding on the right over the miter clip. At this point it’s a little fiddly but very do-able.
Slide the miter clip up, and you will see the miter settled over the triangle metal bit (picture below). Pin the folded over binding in place, remove the clip. Lo, a fantastic miter! There’s a method to removing the clip which can be found in the Martelli website videos. My 9 second video is not acceptable for upload here :(. In words: press the clip handles on top to open up the bottom, slide slowly to the left and slide upwards away from your project.
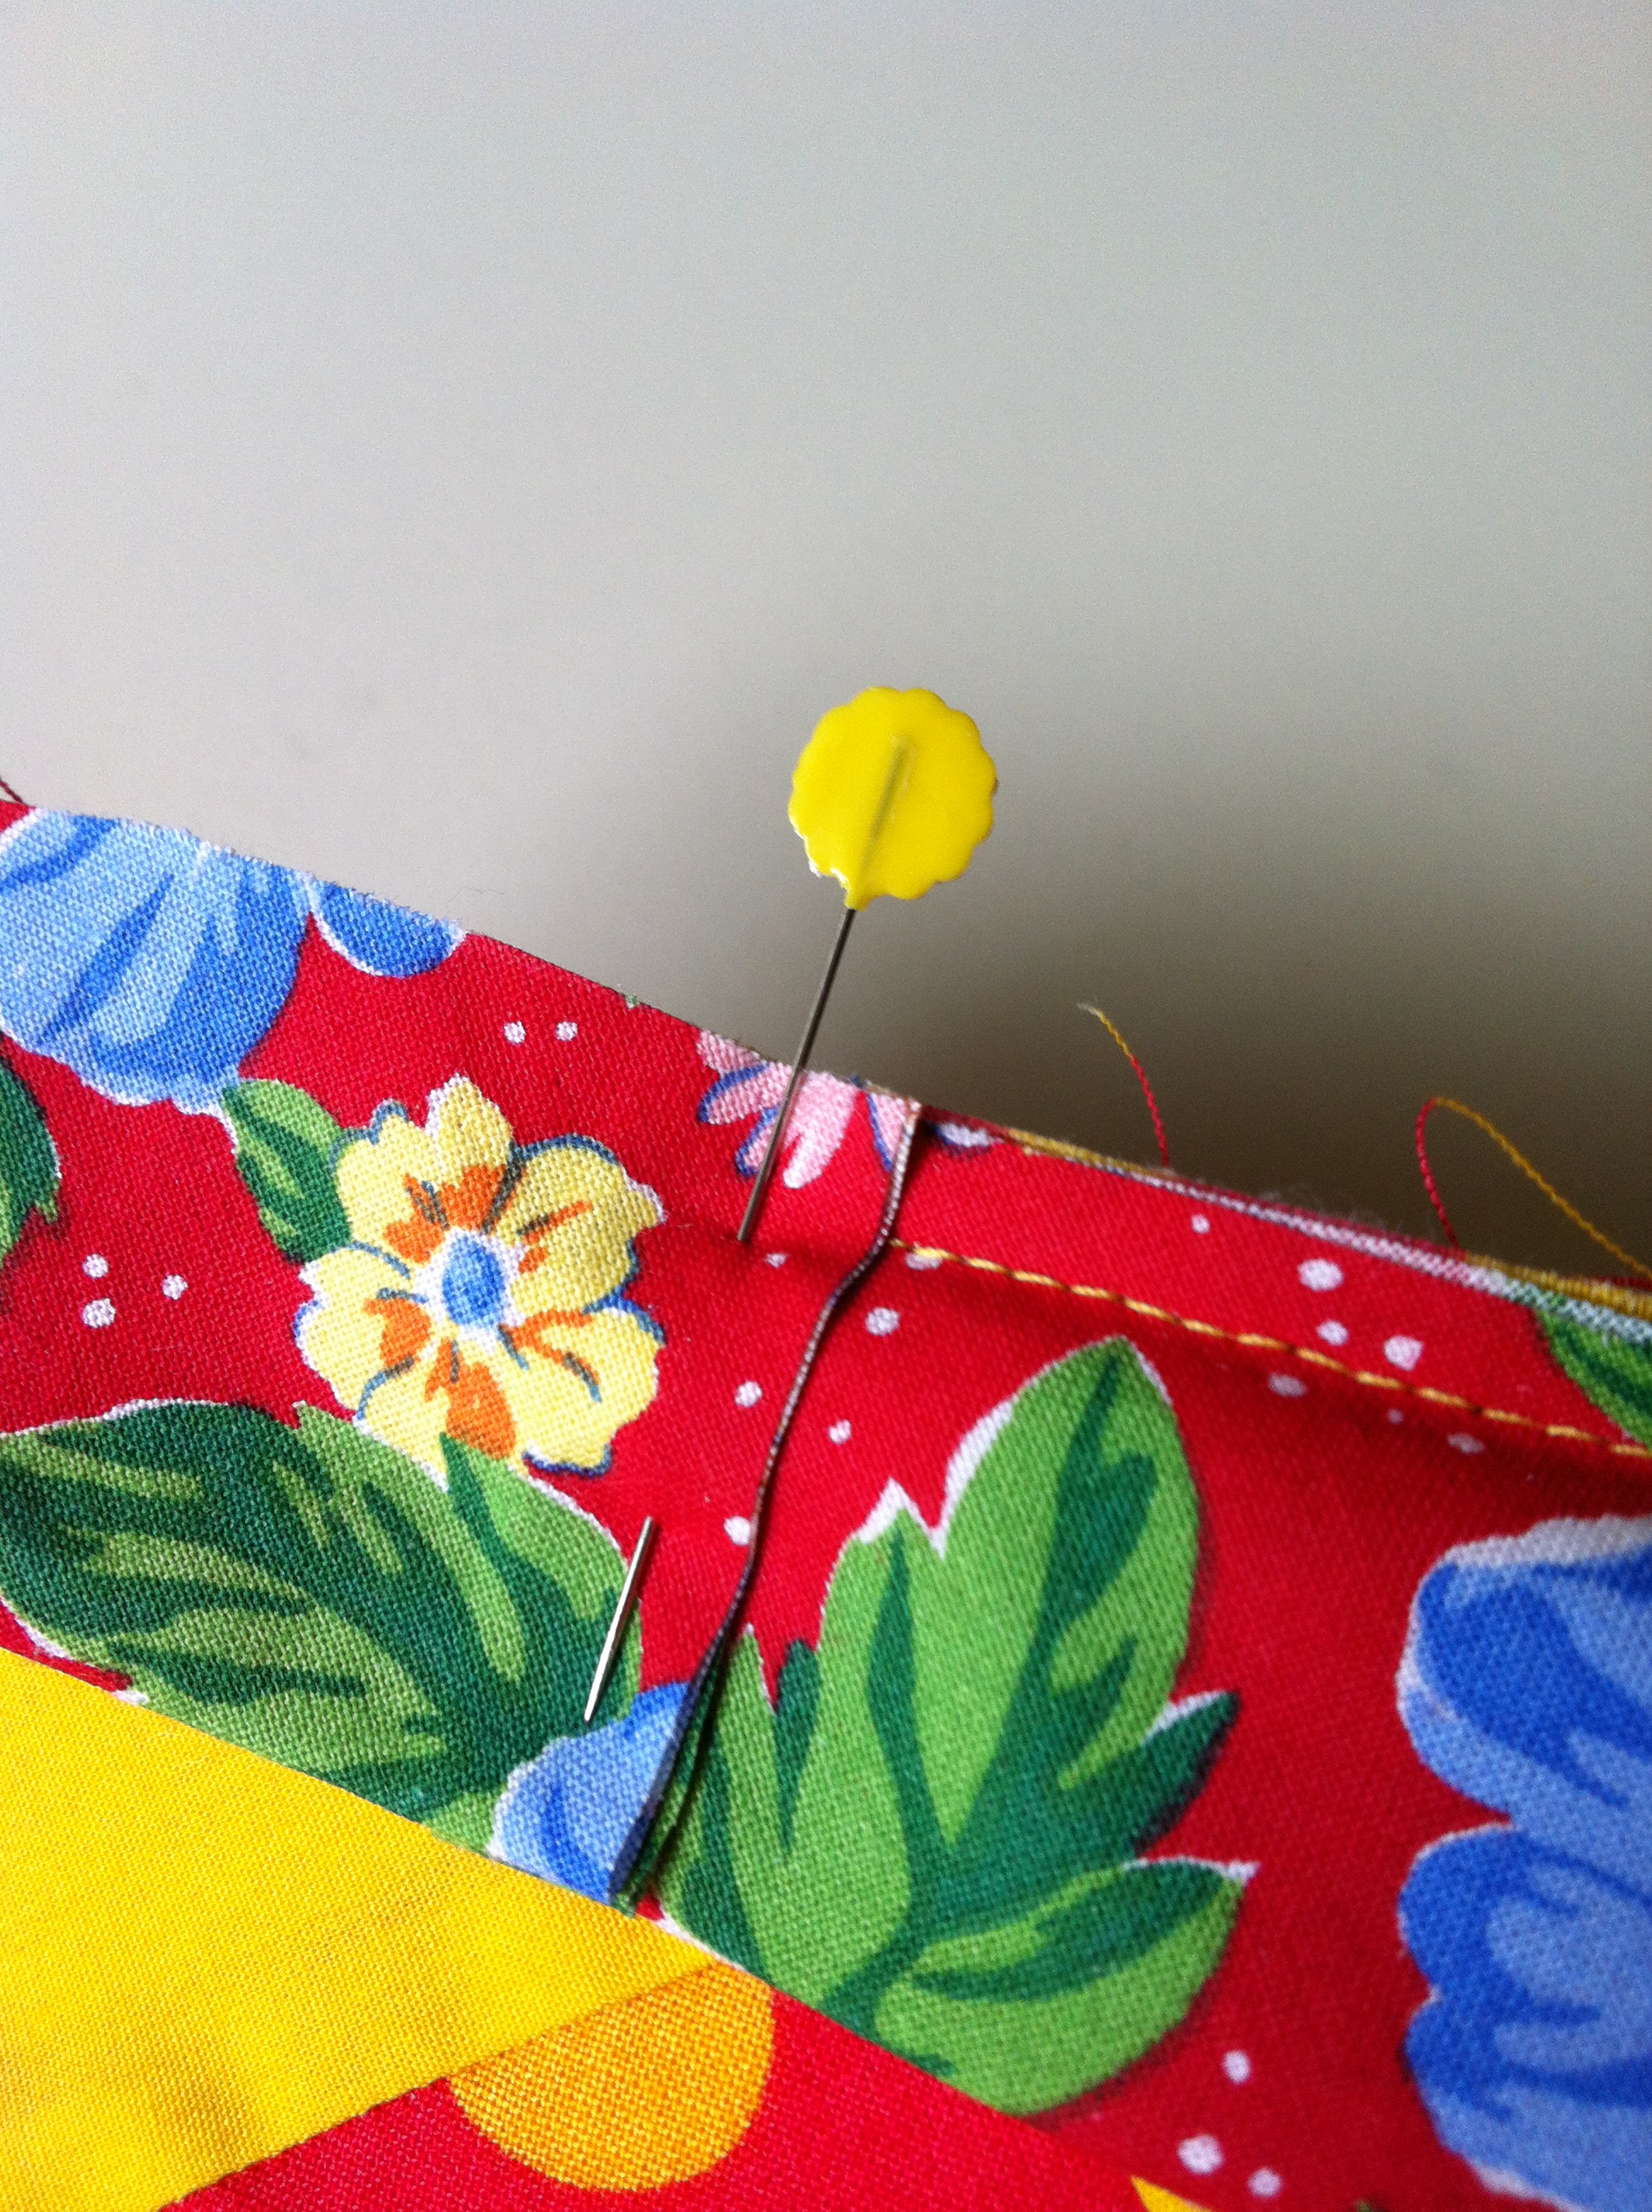
As you miter all four corners, pin them down. Last step: stitch in the ditch from the front, and I’m left with the most gaudy but cute mug rug!

Now I’m obsessed with mitering. I have my own easy, peasy method applied to fashion sewing, as well as some easy methods I found elsewhere which I’ll share very soon with you.
Thanks in advance for bearing with me until I get miters out of my system. It all began with the Fendi spring line…….
Have you used this tool from Martelli Notions? Would love to hear your experience. If you happened to make mitered corners in your sewing, how did you do it?
Happy Sewing
Samina

Oh my goodness!! You have amazing skill and I will be learning so much! I’m bookmarking you now!! My sewing skills are very elementary and unprecise. Thank you so much for leaving a comment on Dross into Gold. I appreciate the encouragement.
LikeLike
Jean, thanks for bookmarking my blog! I love your re-worked garments, and am still thinking which idea of yours to try out first. I have some old but favorite sweaters which I’ve worn almost to death. There is just one favorite which I’ve re-made a few years ago. Will post that soon. Am adding your blog right now to my blog roll below!
LikeLike
[…] I used the Martelli Notions mitering tool to miter the binding corners. It is easy to do without the tool, but in a buying frenzy I had bought it – so why not use it? It’s fun to use, actually. I wrote a post about it a three years ago, and you can read it here. […]
LikeLike