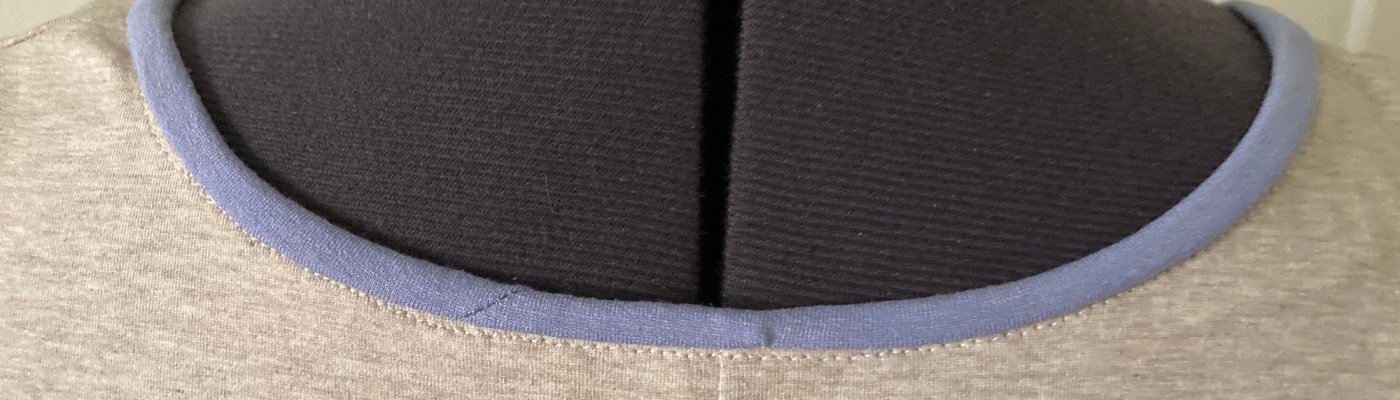
This may not be every sewer’s cup of tea, but it was kind of fun for me. Does sewing intuitively and jumping in with both feet affect the outcome?
This post is all about that little space where the binding is joined in a knit garment neckline. It is a test to see if my words will suffice to make sense of the task, or pictures are necessary. I am trusting you will let me know. I’ll add just one image here to get you a start off…
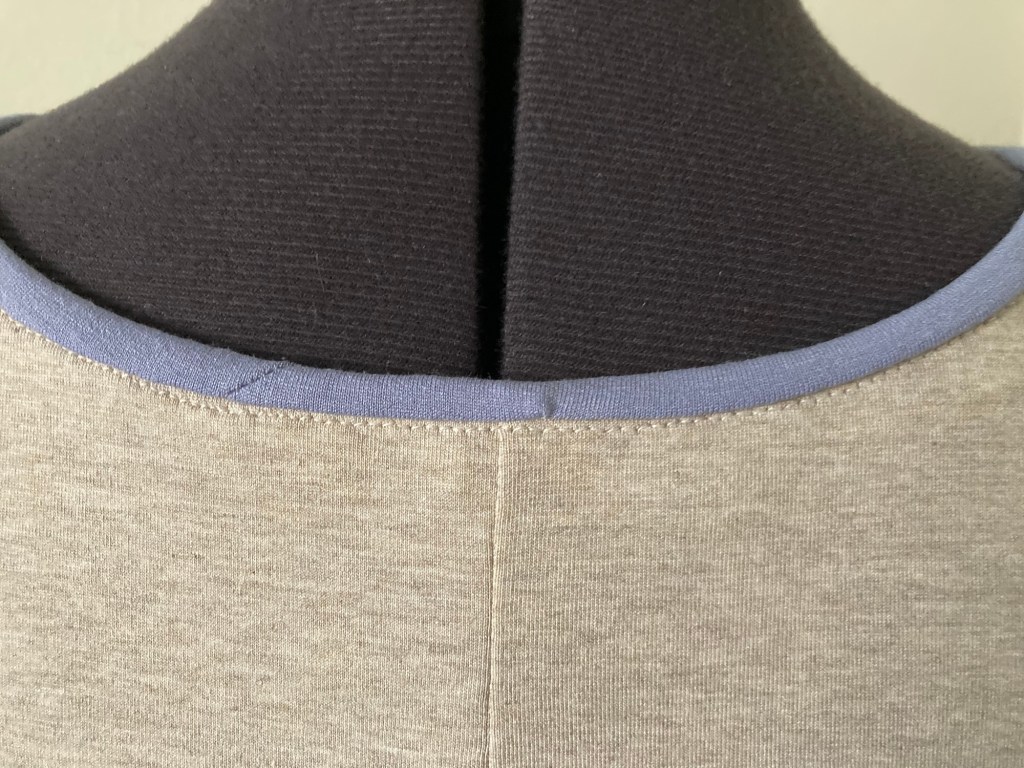
The first three are salient points before starting:
1. The binding joint is diagonal since it distributes the bulk of the joint — just like we join up cotton bias binding. This binding is knit fabric and is cut on the crosswise grain – it is not bias-cut.
2. The start/end point of the binding sits on the back neck edge, away from the center back seam; again, to avoid a bulky area. Apply the same principles and methods to armhole binding.
3. This is where the intuition comes in; I did not measure out the binding length a certain percentage less then the neck edge measurement. I went the other way and started with the binding a few inches longer than the neck edge. Head scratcher?? Bear with me.
4. So let’s go! With the contrast fabric knit binding, I cut out a strip approximately 2” wide and approximately 6”-7” longer than the measured neckline. My binding attachment plan was to be intuitive to see how it worked out — courage.
4. I designated the start and end point of the binding-joint away from the center back seam — in my neckline, 3” or more away from the center back seam — you can choose which side; this is where the diagonal joint will sit and not where you start sewing! Did I get you there?? Place a pin on the joint-point or mark it well.
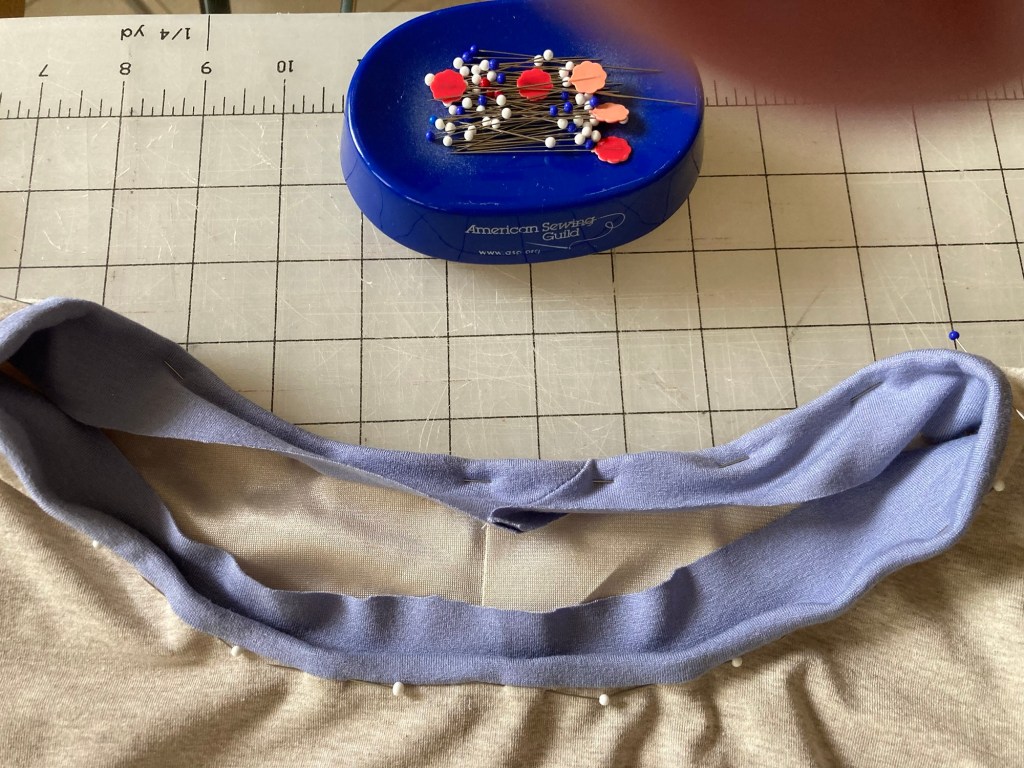
5. One of the keys to this intuitive process is stretching the binding only ”just-enough-but-not-too-much”; do not stretch the neckline edge. Leaving 3” of binding to hang free, Start sewing the binding to the neck edge 1 to 1.5” away from the joint-point; approach the other side, stopping about 1 to 1.5” before reaching the joint-point where you’ll definitely be left with a few inches of binding hanging free. This leaves some open neck edge space. Remember to sew the binding to neck raw edge with wrong sides together!
6. As noted above, there will be a strip freely hanging down from each of the points where you start and end the sewing (with some free unsewn space on either side of the marked joint-point. So utterly confusing, right? Not really.
7. Then comes the part which is a bit fiddly but quite satisfying — in rude terms, where the rubber meets the road. Here is where the diagonal joint of the binding strip is created — I know, you’re probably thinking, why didn’t she do that before sewing on the binding? I do not have an answer to that.
8. Note: for this step, make sure to leave the little bit of neck edge free; we’re only working with the binding here. Fold up one free-hanging strip UP perpendicularly, which will create a diagonal fold in the binding strip; press the fold — you’ll see why later. Bring the other free-hanging part from the opposite end of the binding, placing it straight across on top of the diagonal fold (keep top and bottom edges of strips aligned). Now it helps to pin this little assembly to keep it together. Feeling the diagonal fold with your fingers, mark a line on the top strip — this is where the binding edges will be joined. This is fiddly but do-able. Remember the pressed diagonal fold — it was done only to mark the joining seam. This is where you open up the diagonal fold and pin that pressed line to align with the diagonal chalked mark and stitch up the little thing wrong sides together. Hint: it’s only a 2” seam :). Cut away the extra fabric in the hanging strips to a 1/4”, press the little diagonal seam open; align the open neck edge space with the unsewn binding (with the join you just created) and sew together to complete the attachment.
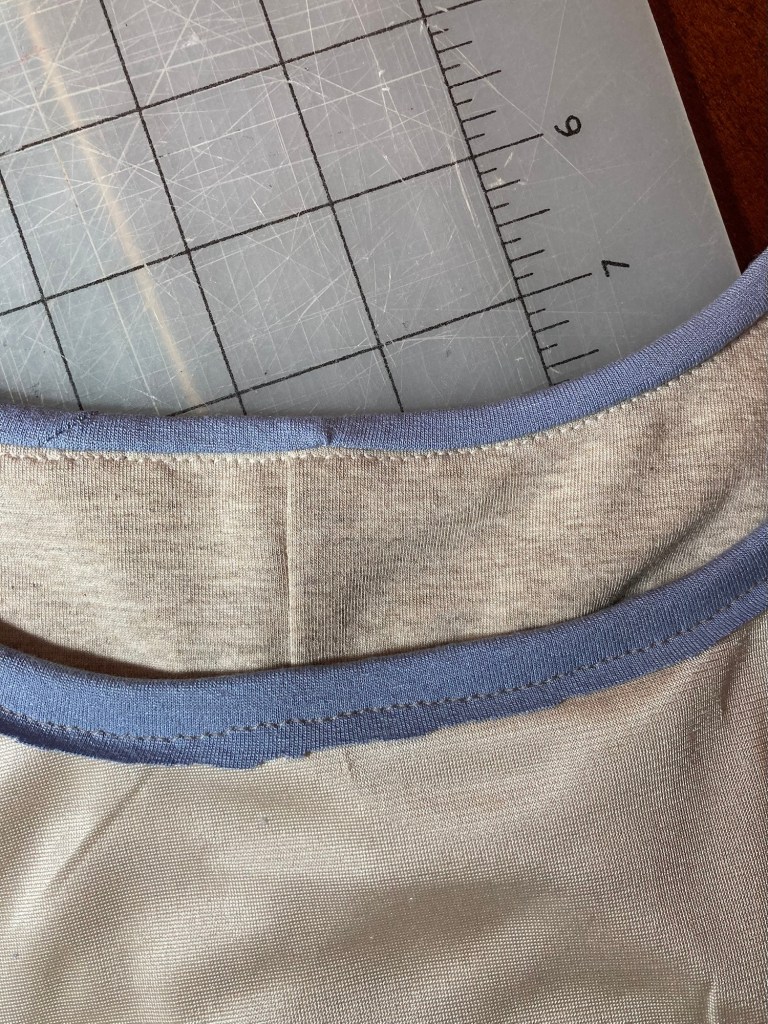
The last steps: trim the neck seam to a scant 1/4”, fold binding snugly to the wrong side, pin it down in the ditch from the right side and then stitch in the actual ditch. Trim away all the extra binding from the wrong side, reasonably close to the last stitching.
The knit will not ravel. I have done this on my other knit necklines and the binding is pretty sturdy — it hasn’t come apart or unraveled — while still retaining the snug smoothness from the right side. Do you still need specific instructions? Or will you wing it through to create a neat little knit binding?
If you’ve made it this far…. Happy Election Day, Americans! Go do your duty; I did mine early.
Until next time….
Samina

