For purposes of this blog, let’s keep the info into the fashion sewing realm, shall we? Although, curtains and pillows are ideal candidates for SO methods.
1. It’s best to use a relatively strong 4-thread serger seam since garments need to not come apart at the stress-bearing seams such as sides, shoulder and armhole seams. Stay away from 2-thread serger seams unless the area is non-stress bearing such as hems.
2. Fit comes first! Since your seam allowance will be partially shaved off, leaving behind a narrower seam to hold the garment together, use a tried and true pattern; or, make a muslin before making the final piece, even if it’s a simple tee shirt. This is permanent, people! You cannot adjust the garment fit once you’ve serged it together.
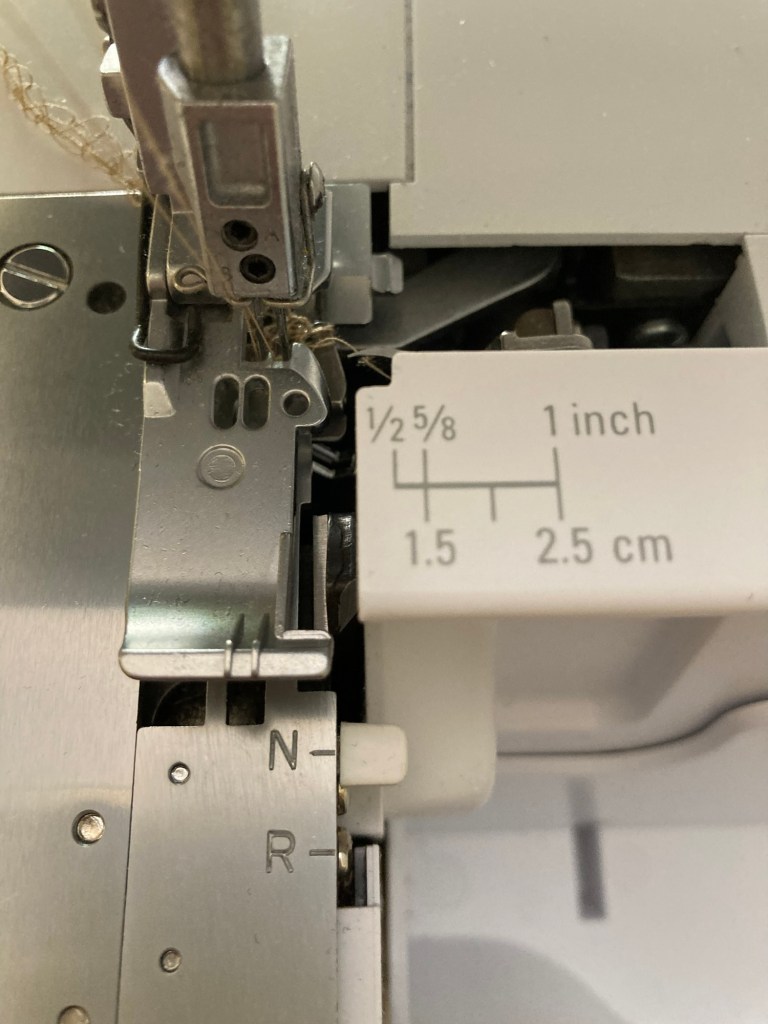
3. Know your serger: Only now, when I decided to make an SO (serger-only) garment, did I discover that my 3 year old Bernette has seam allowance lines marked right next to the knife/looper assembly. Wait, what? Why did I spend time measuring the 4-thread stitch, then doing some math, then marking the seam for the knife to remove 3/8 inch? The 5/8” seam mark is right there — which means that if you align your edges with the 5/8” mark on the serger, you’re good.
4. Places where serger cannot be used: A) seams that have to be pressed open, although you can serge-finish the seam edges. B) details within the design such as darts. C) Staytitching. I mentioned these for beginner serger-operators. If you’re an experienced whiz at serging a garment together, you already have tricks up your proverbial sleeve. Has anyone sewn a dart on a serger? Let us know in the comment section. Theoretically, it seems possible……
5. Other stitch formations can be used where appropriate: Among serger attachments, there is the optional hemmer foot, which works like the blind stitch presser foot on your sewing machine. For that a 2-thread formation is best. If you like a banded hem, any stitch formations can be (2, 3, or 4-thread) used. Just stitch the separate band to the hem, such as in my khaki Renfrew top. But wait, you can go ahead and indulge in a hack here — just cut the garment longer than intended, fold hem to the inside once (the fold is the desired hem line), then back over itself to the outside and serge all edges together — there will be 3 layers of fabric. On the right side, it will look like a banded hem line. Same with a sleeve cuff or sleeve band.
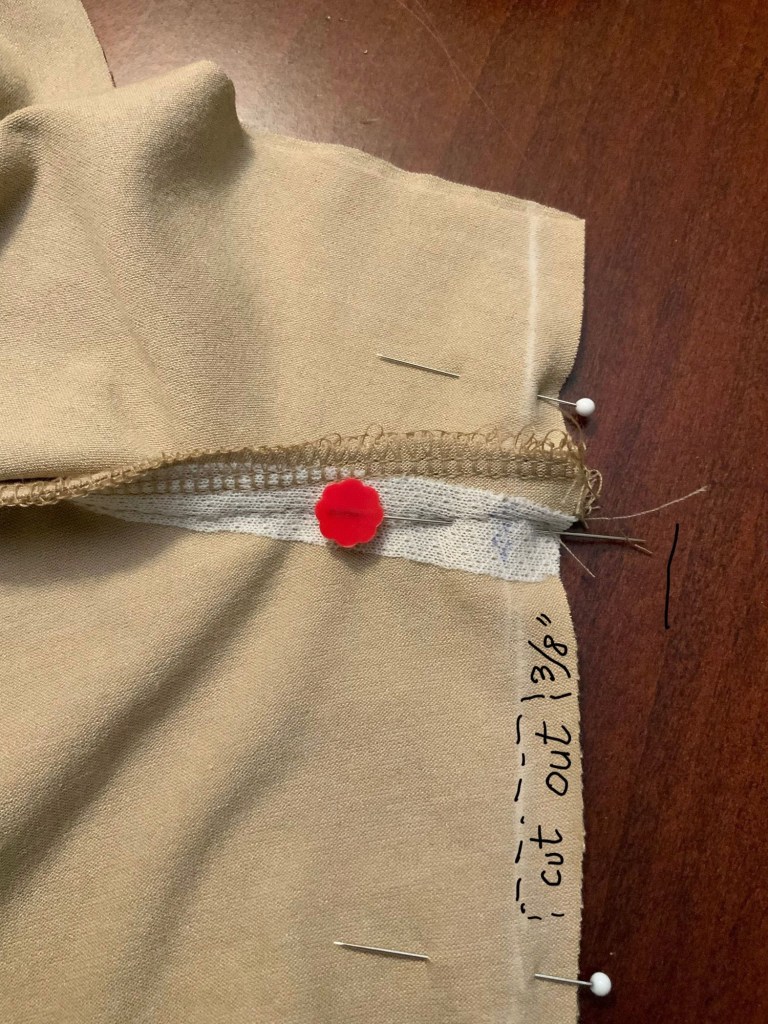
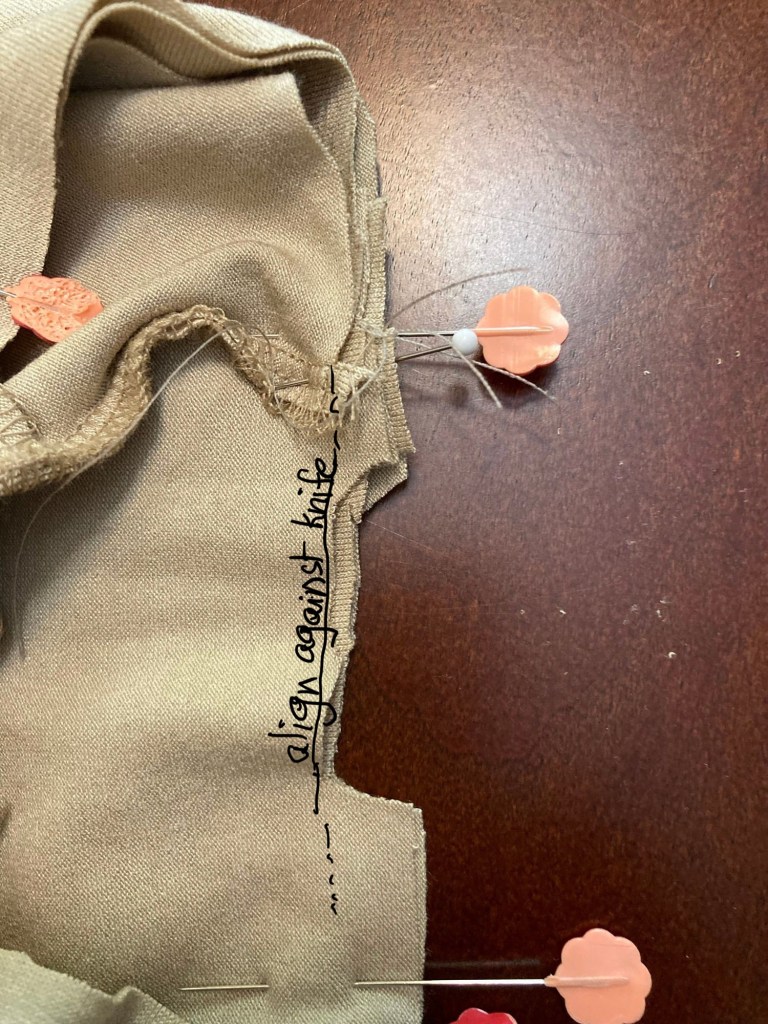
6. Read this one carefully! So, you’re serge-hemming? It is usually sewn in the round. Read on for serging in the round including the sleeve hem or wherever else. Give it some thought beforehand; let’s do the hem-band thing. Pin the , separate band piece (folded and pressed) to the shirt hem, raw edges together, matching seams and such. Since we have already done the math, we know that the 4-thread stitch formation (1/4)” + cut off area (3/8”) =5/8”. We need to remove the cut-off area (3/8”) for about 2 or 3 inches anywhere at the pinned hem/band seam. Do that by marking a 3/8” line first and then snipping into the fabric up to that line, do a sharp perpendicular turn and continue cutting along the line for about 2-3”. Pivot the scissors out again and snip out the 3/8”. Make a mark where your stitch begins. Align the inside edge under the presser foot so that the seam edge touches the knife but does not get in its way. Start serging all the way around the hem. Stop when you reach the marked line (where you began serging), needle down. Now what? Two options: serge off the edge; another option is a clean finish (without the serging off), one I have to try. Full disclosure: the technique for ending with a clean finish rather than an overlapped, thread-heavy, serged off finish was learned from an ASG Zoom class by Joanne Banko. Genius!! She demonstrated with a 2-thread stitch formation, and I have yet to try it. If you get a chance to watch Joanne Banko’s serger class anywhere it’s available, sign up immediately to get a wealth of serging information.
Now, I’m looking at my old serger with new eyes and am obsessed with doing SOs as much as possible. Isn’t it exciting to get more involved in a sewing method you’ve been ignoring for decades, and suddenly it makes a lot of sense?? It’s not haute couture, but suits the purpose. I’ll share more SO info, tricks and “hacks” as soon as I discover them!
Until next time,
Samina

