
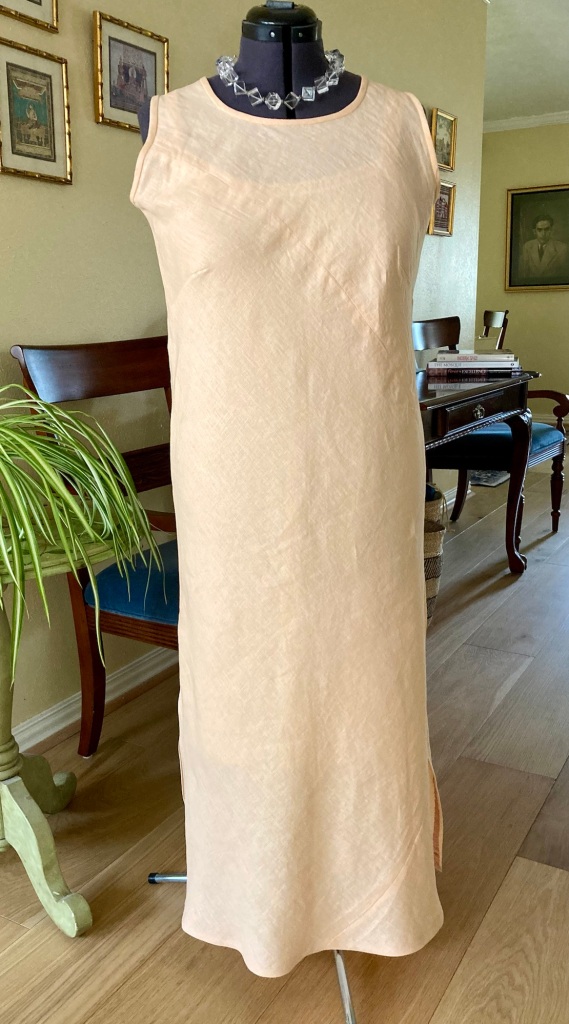
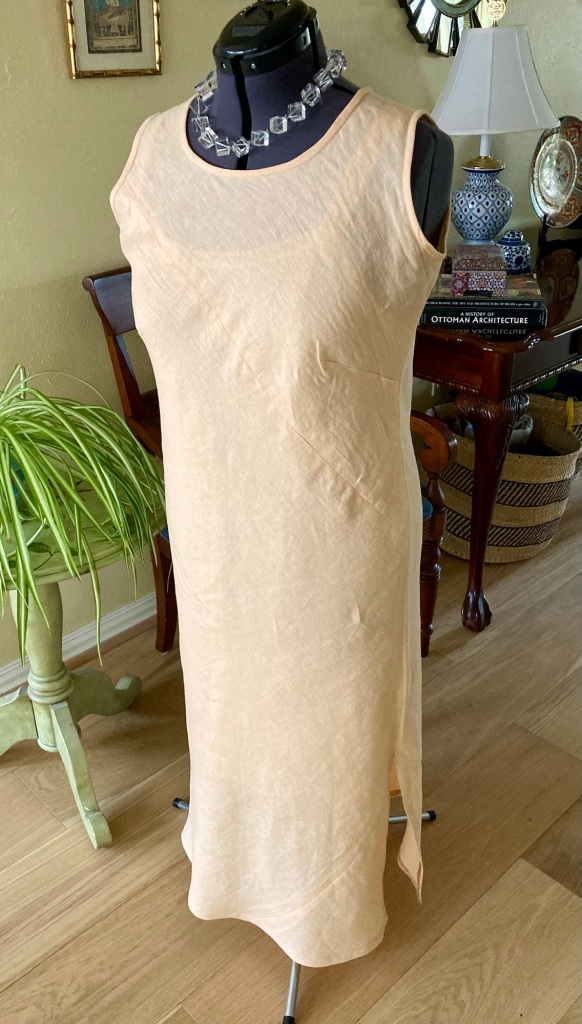
I may or may not be writing this sewing tip solely to show off my new linen maxi, made on the bias grain, the fabric being from Sew Much Fabric . The beauty of the fabric and color doesn’t come across in photos, though. It is shown on a dress form, but it does look better on me. Note: the color peach parfait may be sold out, but there is another color called Honey Cream, a delicious colorway which is waiting in the wings in my stash.
On to the tip! This small task helps me apply an even and consistent binding. You only need a measuring tape or ruler and a disappearing marking pen; I use Frixion (no business affiliation).
Hahahaha — me no artist.
Process:
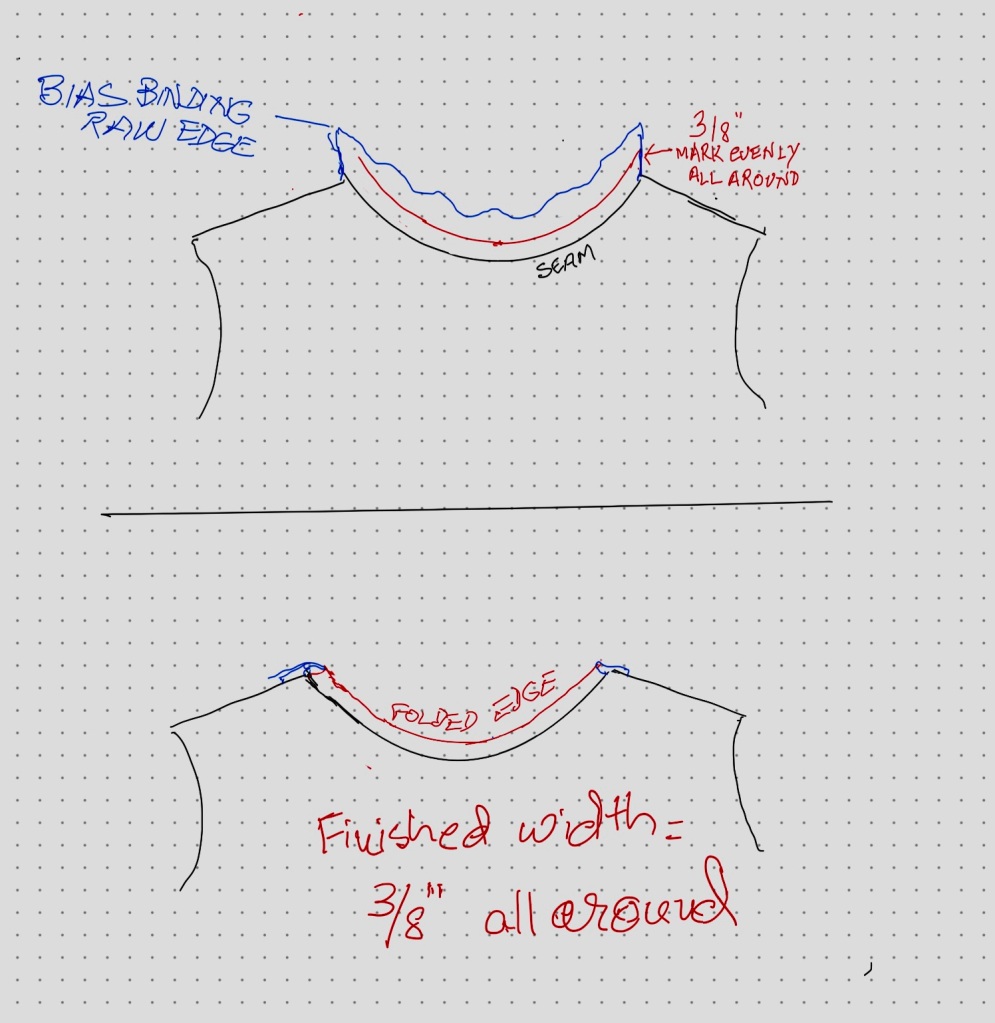
1. Sew the bias tape around the neckline. Trim seam.
2. Press seam and bias strip upward.
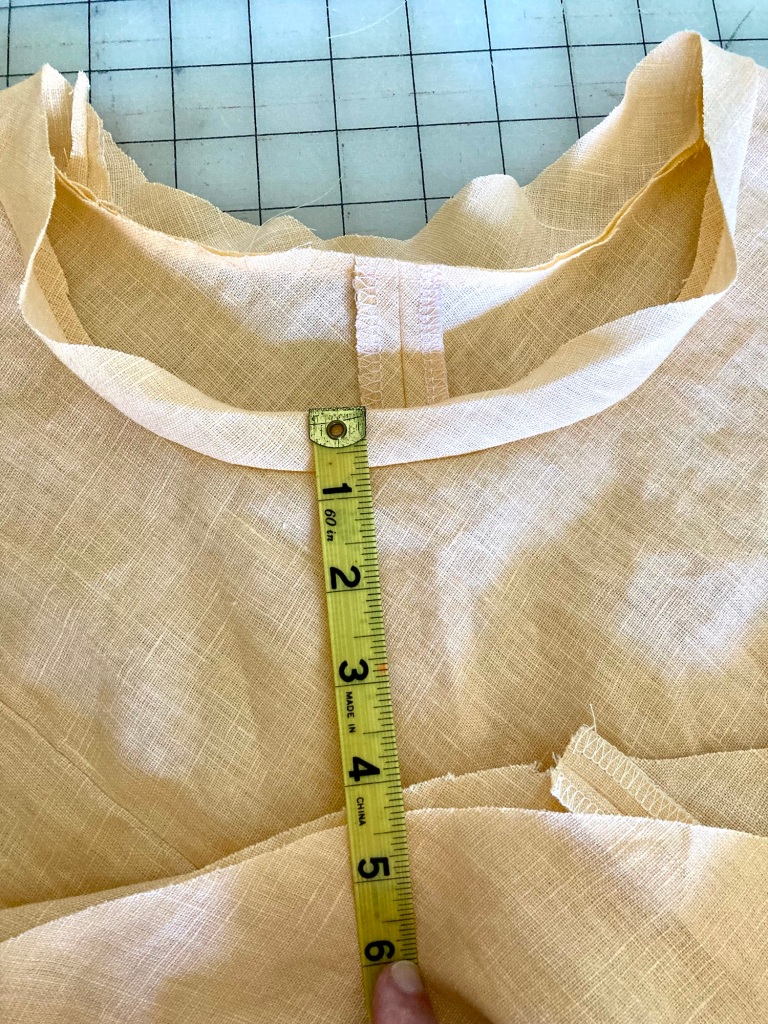
3. With an erasable marking pen, measure and mark finished width up from the seam on the right side of bias tape — and, therein lies the success for an even binding width — it’s in the marked line. I marked it up 3/8” on my linen. Tip: using a ham may help in working through the measuring/marking process of the round neckline.
4. Fold down the binding on this marked line toward the wrong side. Press.
5. On the wrong side, tuck in (fold in) the inside seam allowance and press. Baste or pin onto the seam. It helps to measure the binding again on both the right and wrong sides before permanently sewing down. Both sides of my binding measured 3/8”. Awesome.

Is this tip is clear as mud? I’m open to any questions you may have; also, would love your thoughts on this if you have other ideas — we’ll all benefit from a variety of techniques to achieve the same result. I have a couple more up my sleeve, dedicated to bias binding.
I’ve deliberately omitted the measurements of the strip, the seam allowances etc. because I wanted the focus to be on that wee task of measuring and marking the strip (on the right side) up from the first stitching.
As with most bias-bound necklines, a narrow binding looks the cleanest and “finest” — I like it right around 3/8”. Smaller than that (e,g. 1/4” finished width) depends on the fabric weight and “hand”; it could be fiddly on a linen but workable on lightweight silk.
Hope you have a great summer sewing season! Later…
Samina

Very clear and a great tip, thank you!
LikeLiked by 1 person
Thank you for reading. Glad you found it useful.
LikeLike