
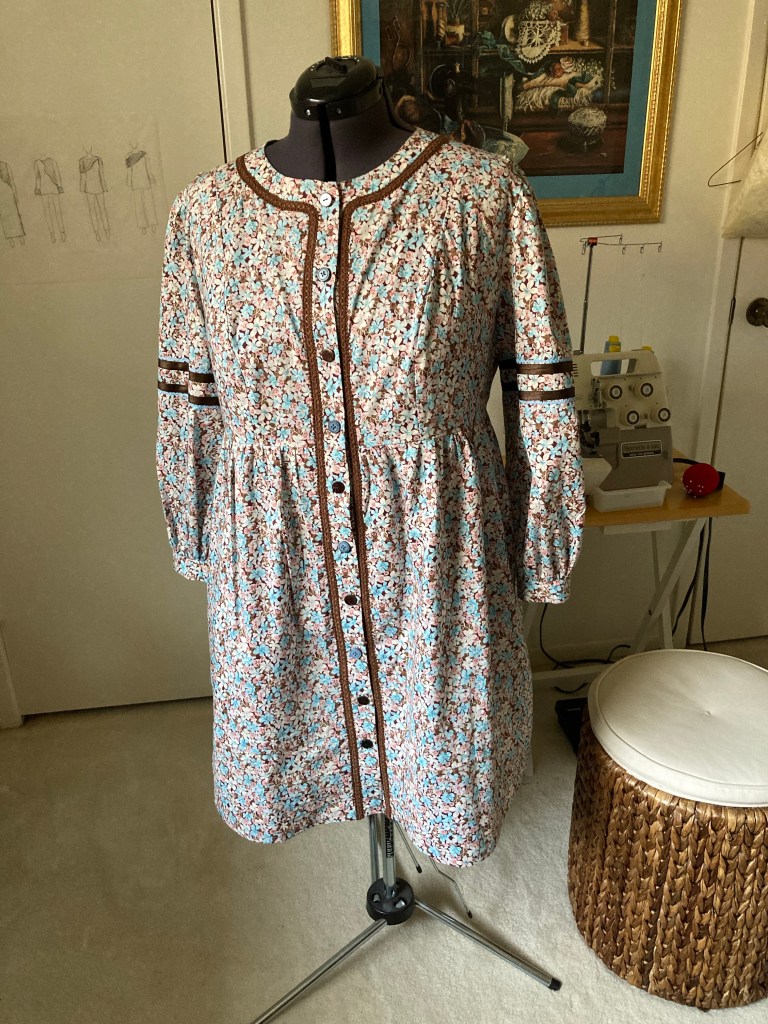
Pattern: Simplicity 8689

Fabric and Trim: Lightweight cotton lawn, a stash item. Sundry stash trims, also stash items.
Tips that affirm the idea that one never stops learning. Also see previous post.
Stitch #26 strikes again.
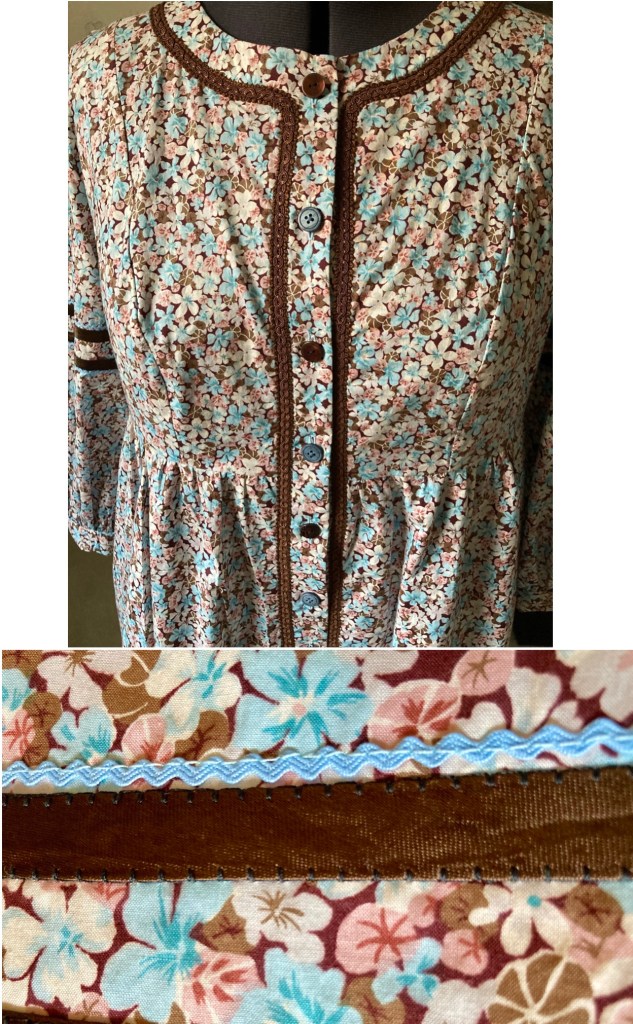
It’s also known as a blanket stitch, the appliqué stitch and some other names I’m not aware of, and it is built into most sewing machine with subtle and inconsequential differences. Go ahead, look at the stitch line-up on your sewing machine. In this project, I used #26 to attach the flat bias tape on the sleeves, and the woven braid down the front band. Why, you ask? Because sewing down the tape on both sides with a straight stitch seemed to make that area somewhat stiff; maybe the straight stitch brought in too much thread? It may sound counter-intuitive but the #26 (on my Bernina 1230, circa 1989), with it’s sideways motion for the “zig” gave it some “give”, which, in turn kept the softness of the fabric intact. Here, the two straight stitches strike the base fabric, and the sideways motion catches the tape. It’s enough to attach the tape or braid securely while keeping it soft. However, the only way to attach the tiny blue ricrac braid was a long straight stitch.
Leave the “automatic” machine buttonhole foot alone!

By such admonishment, I mean to say that when using an automatic buttonhole foot (if your machine has one), let it do it’s job. In the left photo I tried to guide it gently to make sure the buttonhole would be straight and narrow. It had the opposite effect. Photo on the right is the result of letting the buttonhole foot do it’s job. After using this gadget to make tons of successful buttonholes, I should have trusted it, and let it do it’s work without trying to guide it. Did I forget? I will never again try to bend it to my will.
Shop Your Stash
Finally, if you care, no item was newly purchased for this project. Everything was in my stash; the fabric, trims, thread, interfacing, buttons. I had to use two sets of buttons because there were not enough of one color. The blue and brown buttons go well together, don’t you think? Moral of the tip: shop your stash first.

If you still care, this dress was a long distance project. It may go through some adjustments by it’s owner.

Morning Samina! I love the way something inspires you and you just do it! Thanks for the tips, I appreciate you sharing what you learn with us. Another tip about automatic buttonholes – make sure the machine area is clear and the fabric isn’t going to catch on anything, picking out out messed up buttonholes is a bear!
LikeLike
Hi Kasey! Ooooh, thanks for the great tip. I agree that it’s important to keep everything flat and clutter free around the machine area. Amazing how little things like this can make or break an automatically made buttonhole.
LikeLike
I’m so glad to see a follow up post on this project. I saved the dress style when i saw your earlier post. Your finished dress is lovely, and your tips and trials are informative. 🙂 I love that it all came from your stash. I’ve set out a thin brown cotton herringbone weave for my version, and can’t wait to get started.
LikeLike
Thank you! I’m eager to see your finished herringbone dress. The trim will be a standout on the herringbone cotton.
LikeLiked by 1 person