
It’s not a complicated top, just Marimekko’s version of a woven tank top with a contrasting yoke. But it’s a learning experience to see how the fashion design house makes a sleeveless, woven tee.
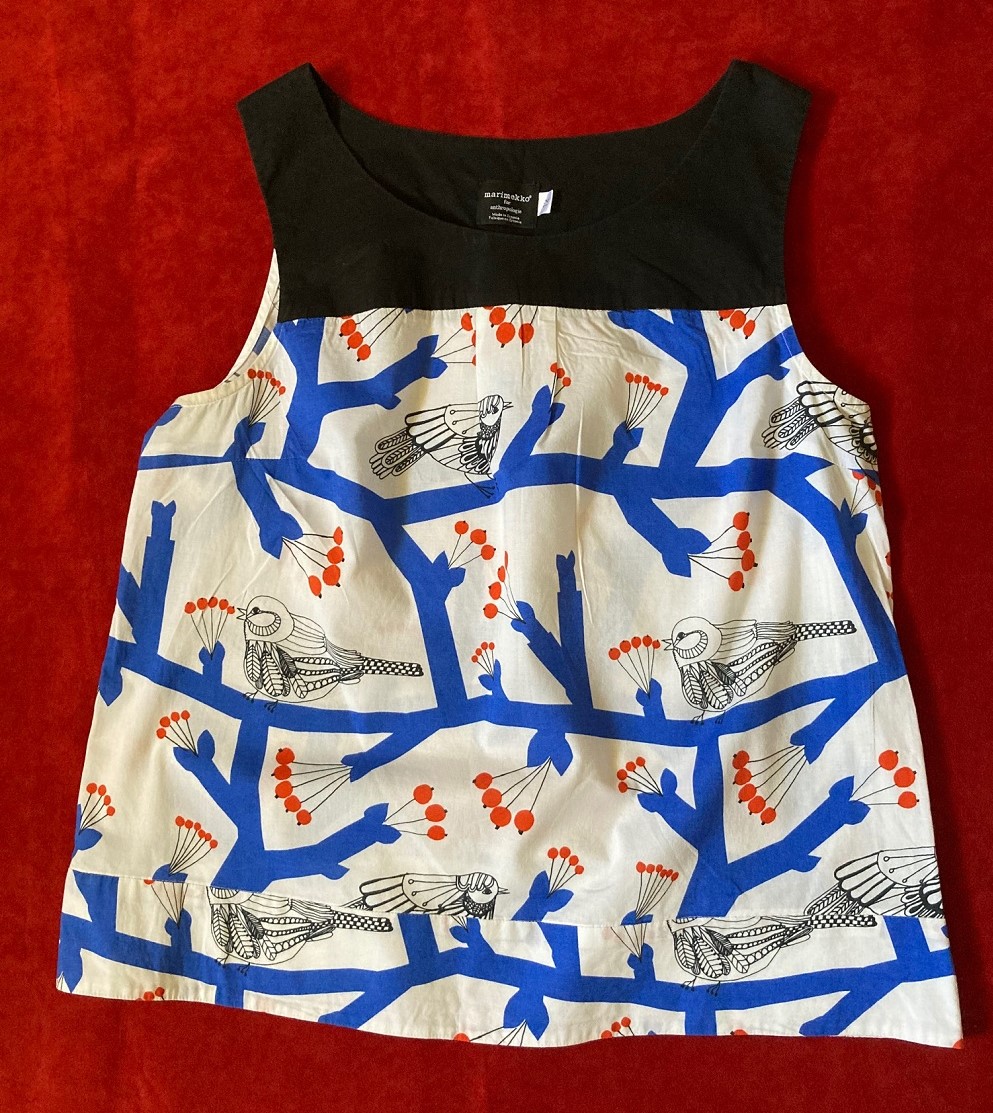
This is my child’s request – that I copy her top in another fabric, close in fit and style to the original.
Examining the original: The cotton Marimekko has a contrasting black yoke high above the bustline. The yoke is lined completely with the same fabric so there’s no facing to deal with. The printed bodice portion has a side zipper and the fitting features are two small pleats in the bodice portion where it joins the yoke, plus bust darts – that tells me that the dart from the basic block was partially pivoted to form those pleats. The pleats also show up on the back.
She also pulled out a silk top that was a beautiful silk crepe but with bad design and fit; this was to become the knocked off Marimekko piece. Below, it’s been taken apart.
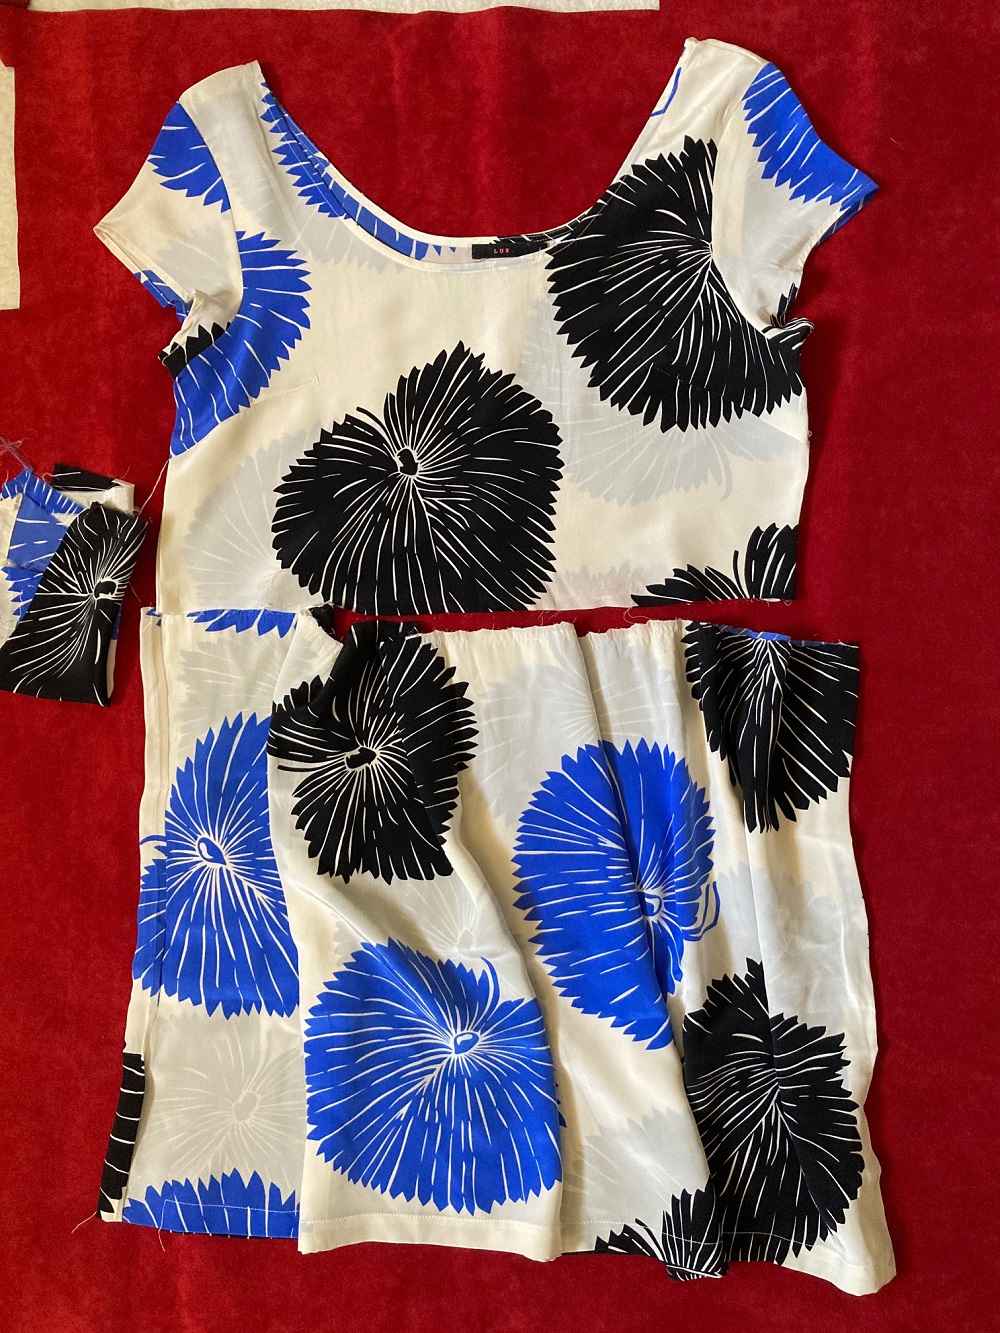
The “muslin”: the lesson here is — never discard leftover fabric except if you really hate it. I made a trial Marimekko in this leftover crinkled rayon.
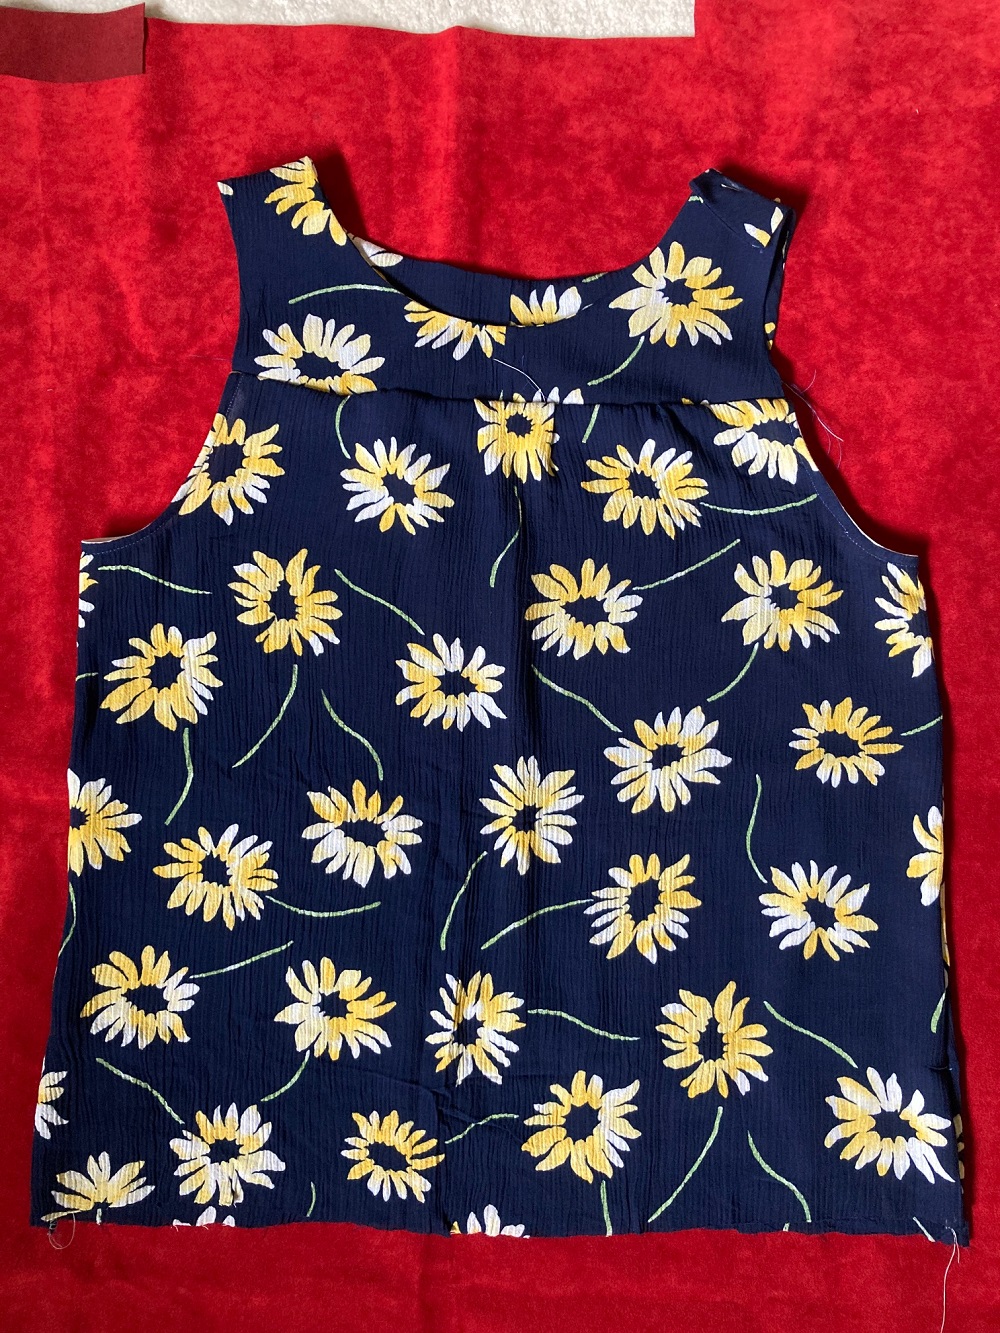
The trial, above.
Tracing the pattern: There are many ways to copy an existing garment without taking it apart. I chose the simplest one; that is, trace the outlines of the finished piece. This was based on the simplicity of the top – it did not have too many obvious details that needed many pattern pieces, and the grainlines were obviously straight. For a project that has multiple pieces, I recommend Kenneth D. King’s class on copying a favorite piece by making patterns with silk organza. The class may still be available on PatternReview.com or directly from Kenneth King.
Tracing process: Establish the center front and center back. Fold the original vertically along that line – marking is not necessary but you can pin the center folds. Draw a straight vertical line on paper, align the yoke center front to it; trace outline of the yoke keeping everything flat and steady — we have now traced half of the yolk — I mean YOKE.
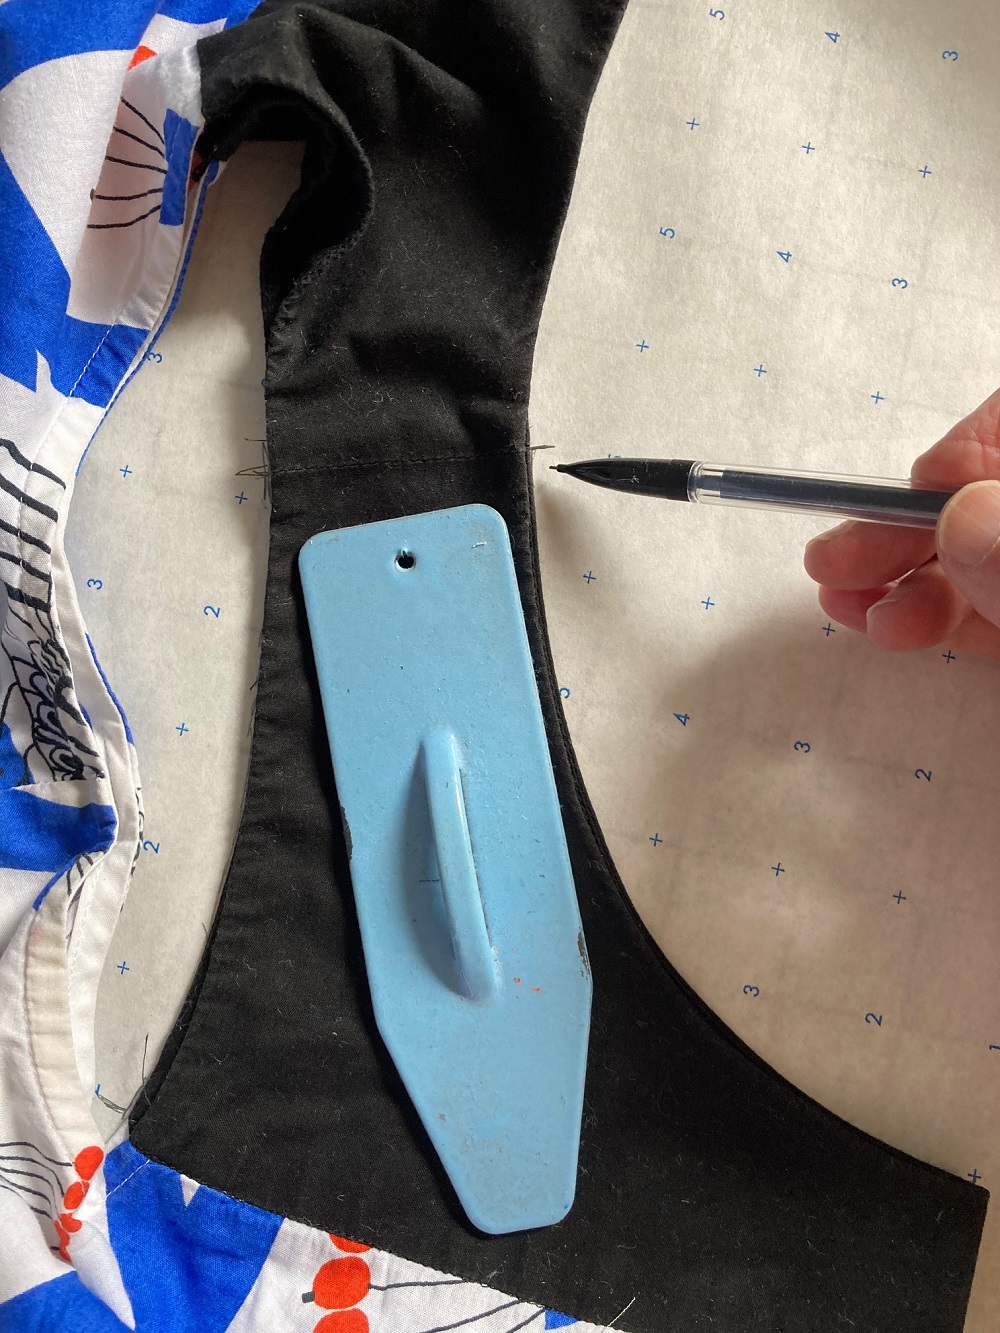
There’s trickery in darts: Did you see last week’s post? Things may be revealed in the tracing process which are not obvious by looking at the top. For example, the lower edge of the black yokes are curved upward at the sides – that tells us there is an “invisible dart” embedded therein and this makes for a closer fit at the armhole. The other revelation was in the different shapes of front and back necklines! The back neckline was squared off slightly while the front remained a perfect round. Not sure if this was a structural decision or purely aesthetic. Minor detail but important for making a close enough copy: there is a separate 3 inch band at the extended hem.
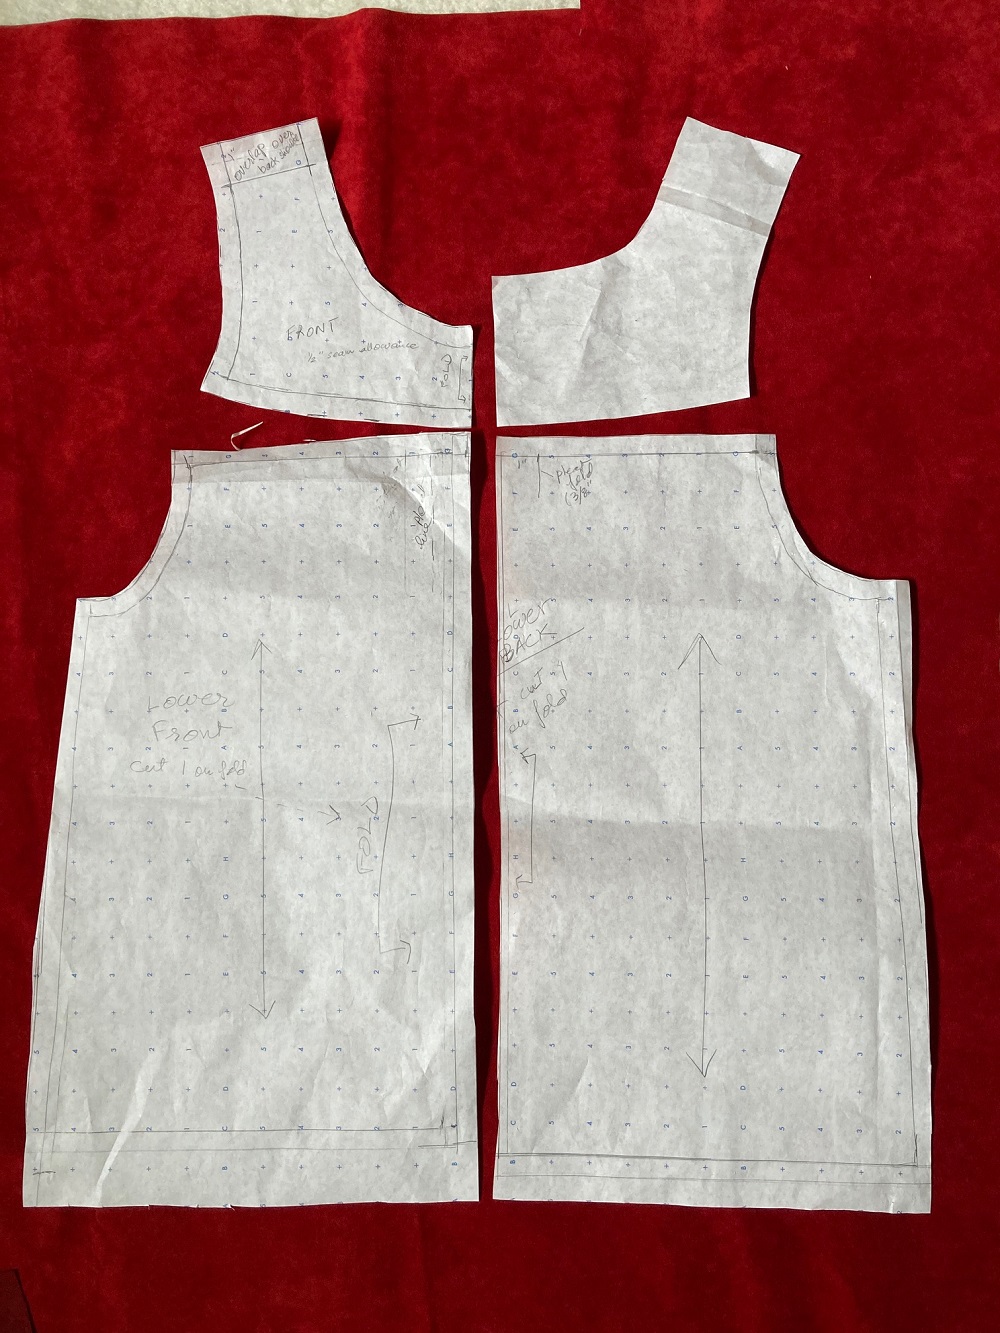
Add seam allowances to all edges except center front which will be placed on the fold while cutting new fabric. Mark the grainline, the name of the piece etc. and everything else; I also made sure FRONT, CUT 2 (yoke and lining) was written clearly on the pattern. Repeat with back yoke and the front and back bodice pieces. Edge of bodice pieces at the top of side seams are swung out about ¾ inches on each side to accommodate the center pleats. Measure all pattern edges and compare to the original top.
Important note: After the decision to eliminate the side zipper and install shoulder buttons, I marked the shoulder seam clearly and extended the overlaps on both front and back yoke patterns.
Cutting out: once the patterns are traced, marked and measured, cutting out the new fabric is easy.
Post cutting out notes: I interfaced one back yoke and one front yoke with lightweight interfacing. Plus, if using unstable fabric, stay stitch appropriate edges – armholes and the uninterfaced neckline edge.
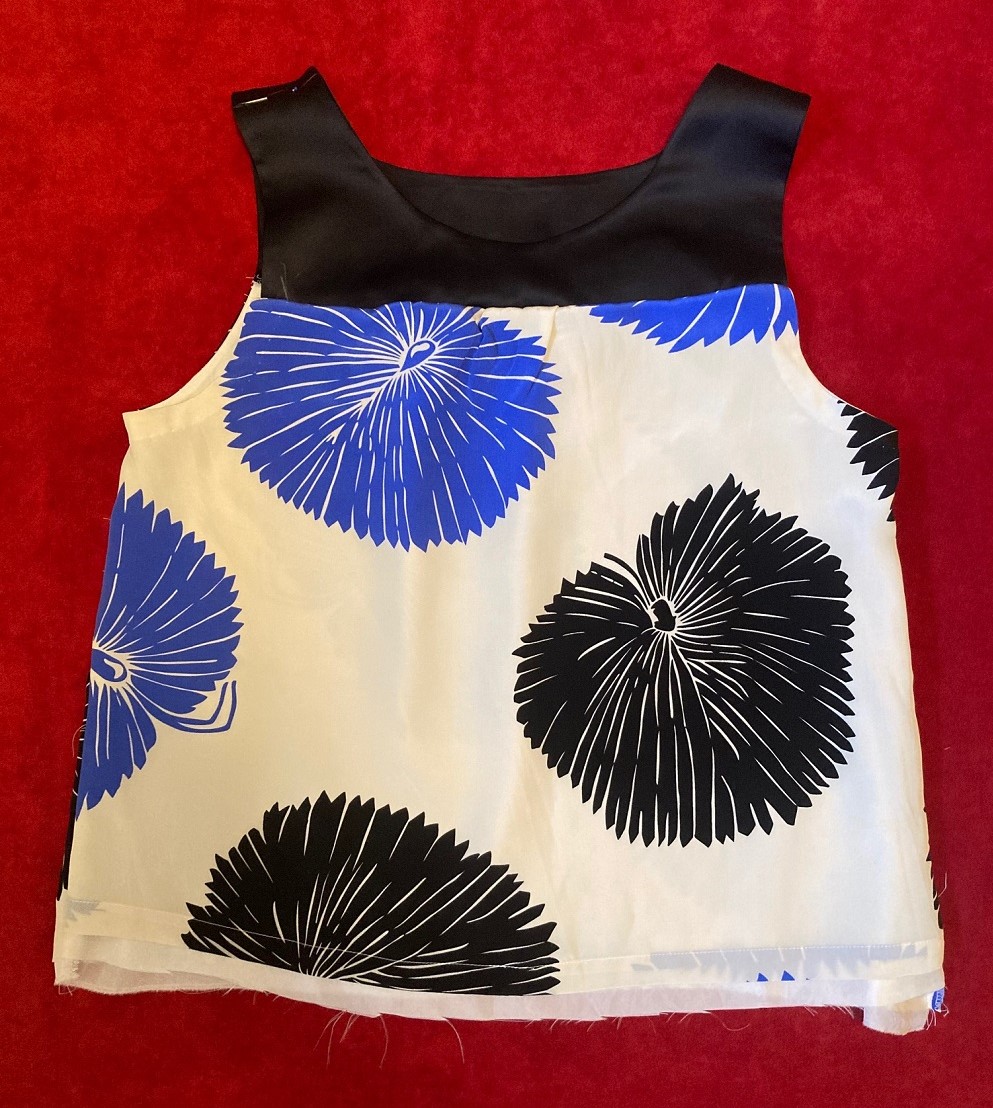
Sewing: For this Marimekko knock off, we decided that the side zipper may not hold up in the silk, even if underlined; therefore the openings should be one or both button-up shoulders. That decided, the sewing went smoothly. Also, the side dart for the knock off was eliminated – don’t raise eyebrows – because the “new” fabric was silk crepe and black charmeuse, which are not suitable for a fitted, darted look. The original is stable cotton and is more fitted, therefore the presence of a bust dart for a good fit is recommended. In the silk version I just eased the side seam for a couple of inches in the dart area to accommodate the dart take up. Wow. All the hidden and invisible features in “just a tank top”. Isn’t sewing clothes amazing? The original Marimekko fits her well, but she didn’t quite know why — well, we now know why after examining the details and pattern-nerding out over this tank.
Final project: gah! It’s not quite finished. The hem band and the buttons/buttonholes are still pending. Oh well, here it is in all it’s promising glory.
Final note: expect to do some nips, tucks and change sewing details to get the same look — that’s so weird, isn;t it?
Have a great summer, friends!
Samina

Looks great and thanks for sharing this process, I’m looking to copy some pants so I will use some of these tips 👍
LikeLike
You’re welcome, Kellie! Have a great time copying you pants — glad you found this info useful.
LikeLiked by 1 person