
It tends to be subjective. The answer depends on who you ask and what you read.
Just how many ways are there to actually put the shirt neckline and the collar/collarband combo together? I counted four. I’m breaking it down in this post with the assumption that the collar and collar-band have already been sewn together and prepped for attaching to the neckline. Note that the lower edge of one collar-band piece is pressed under at the seamline so it can be hand sewn to finish up the collar. Stay with me here.
Ways to attach the above to the neckline
The “Vintage” Way:

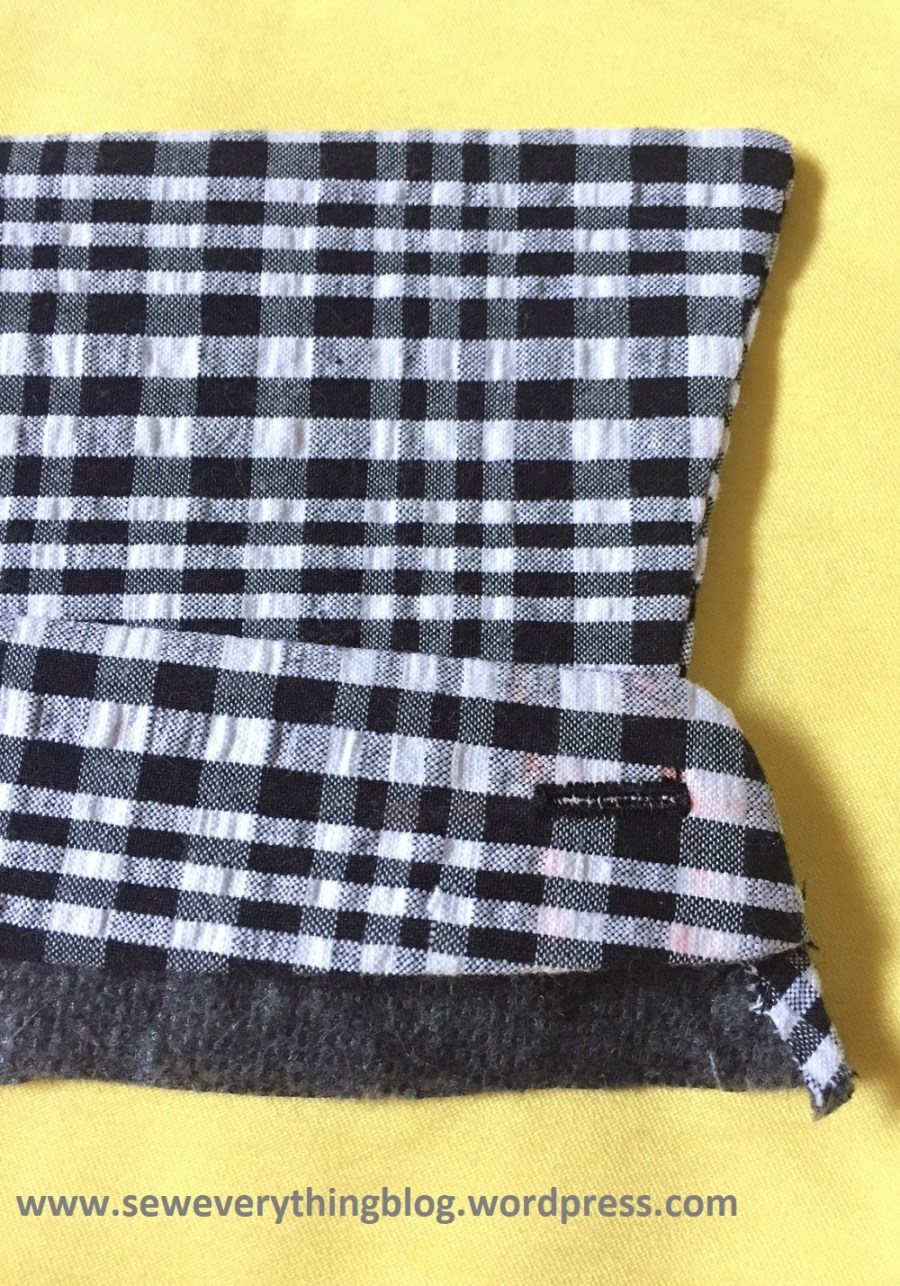
I’m calling this the “outie”. Old sewing books and patterns tend to instruct the reader to sew the raw edge of the collar band to the raw edge of the shirt neckline from the inside – with right side of band to wrong side of shirt neck edge. Press up the seam into the band, trim seam, then hand sew the prepped, folded-under collar-band edge to the same seam on the outside (the public side). I used the “outie” on the checked shirtdress collar you see in the header image.
The Current Pattern Way:
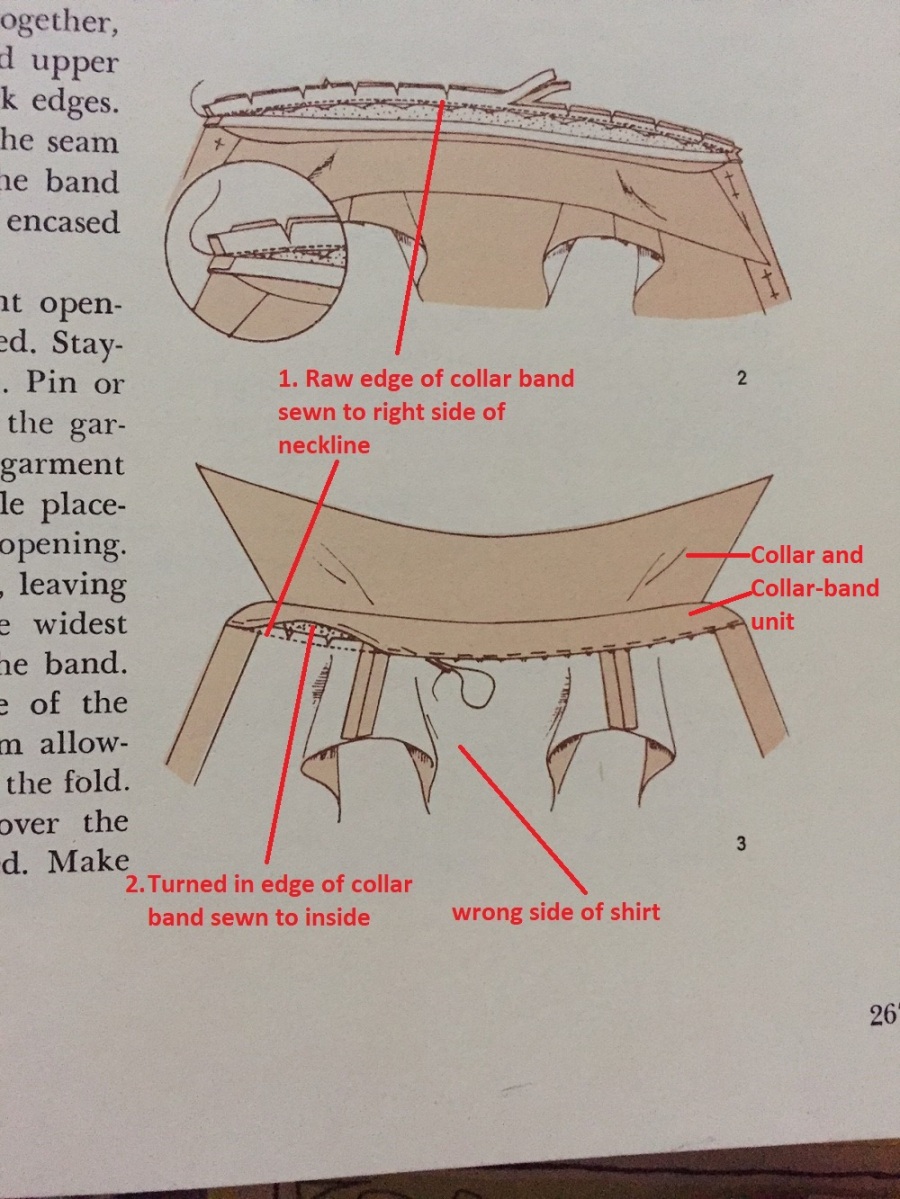
The “innie” way is found in modern patterns; for example in McCalls 7470 the instructions are to sew the collar/band unit the opposite way to the “outie” instructions. The hand sewn edge is on the inside, touching the wearer’s neck. Well, I found the “innie” instruction in this old 1970 Vogue Sewing Book, which should teach me never to generalize.
The Rough-and-Tumble Way:
You can, if you wish, avoid the hand sewing by keeping both raw edges of the collar-band together, sew them to the shirt neckline right sides together. I don’t need to remind you that speed does not trump accuracy, so mind the center front alignments and things of that nature. How does one finish this seam? Serge it for the fastest finish and live with whatever issues occur at the front edges e.g. the serging will peek out. Or you can make it cleaner by including a strip of bias facing to the neck seam, then sewing down the facing’s other edge to the shirt. I have no image for this, but do know of people who have done this.
The “Rolled Up” Way or the Burrito:

This method is best explained visually. Also famously known as the burrito way, the goal here is to get the center front area as cleanly sewn as possible. The curve of the collar-band at the center front is quite a fiddly place to sew neatly. Well, the “burrito” technique gets this point cleanly sewn by machine. Clear as mud, right? I have yet to find a really satisfying video tutorial on the “burrito” way of collar attachment; may I suggest you do a search on YouTube and share your success in the comments section here?
Just for Fun:
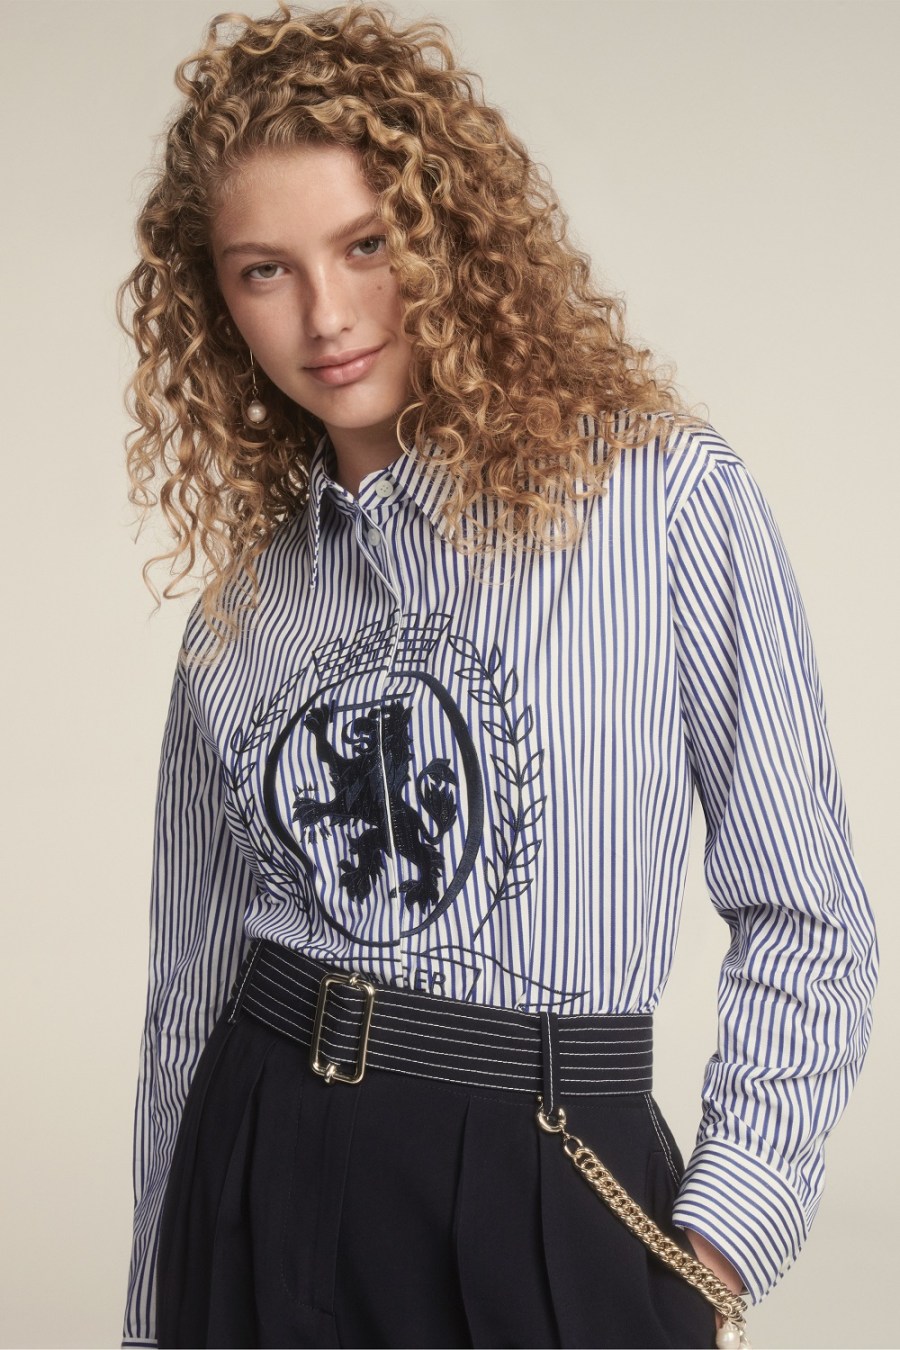
Is this a perfect shirt collar or what? By Tommy Hilfiger, image via Vogue Runway.
")

Who made a better buttonhole? Louis Vuitton (left) or me? (Vuitton image from VogueRunway website)
One more shirtmaking expert resource is Janet Pray of Islander Sewing Systems. I have yet to purchase a pattern from them and never had the opportunity to take a class, but Janet’s shirt classes are highly acclaimed by people who have. Like their Facebook Page! They do a live feed called Tuesdays at Two, and are currently doing a shirt sew-along where Janet is taking participants through the shirt making process.
Happy Halloween and Boo to all,
Samina

I don’t know why I started doing it but I would sew the collar to the inner side of the shirt and hand sew it to the outer side. That way, since my button was always undone, the cleaner inside would be seen by everyone!
LikeLiked by 2 people
Hi, Great post! I’ve decided to nominate you for the Sunshine Blogger award! Take a look at my post for my details! https://sewhyggelig.wordpress.com/2020/01/10/sunshine-blogger-award/
LikeLike
Yes, a great post, Samina!
LikeLiked by 1 person