
I like to alter ready to wear clothing. I mean, really.
This chambray shirt belongs to my son-in-law Brian (he’s a photographer); it fits him well, except the sleeves were very, very long. In this post, you’ll see how I took the path of least resistance to get to the desired end.

We examined the shirt and determined that the sleeves needed to be at least 2 inches shorter. Not a problem, right? Here’s my assessment and determination of the path to a better fit.
Option 1: Remove the cuffs, cut away 2 inches from the remaining sleeve length, and re-attach the cuffs. But wait, the cuffs and placket closed with studs rather than buttons and buttonholes, which complicated things.
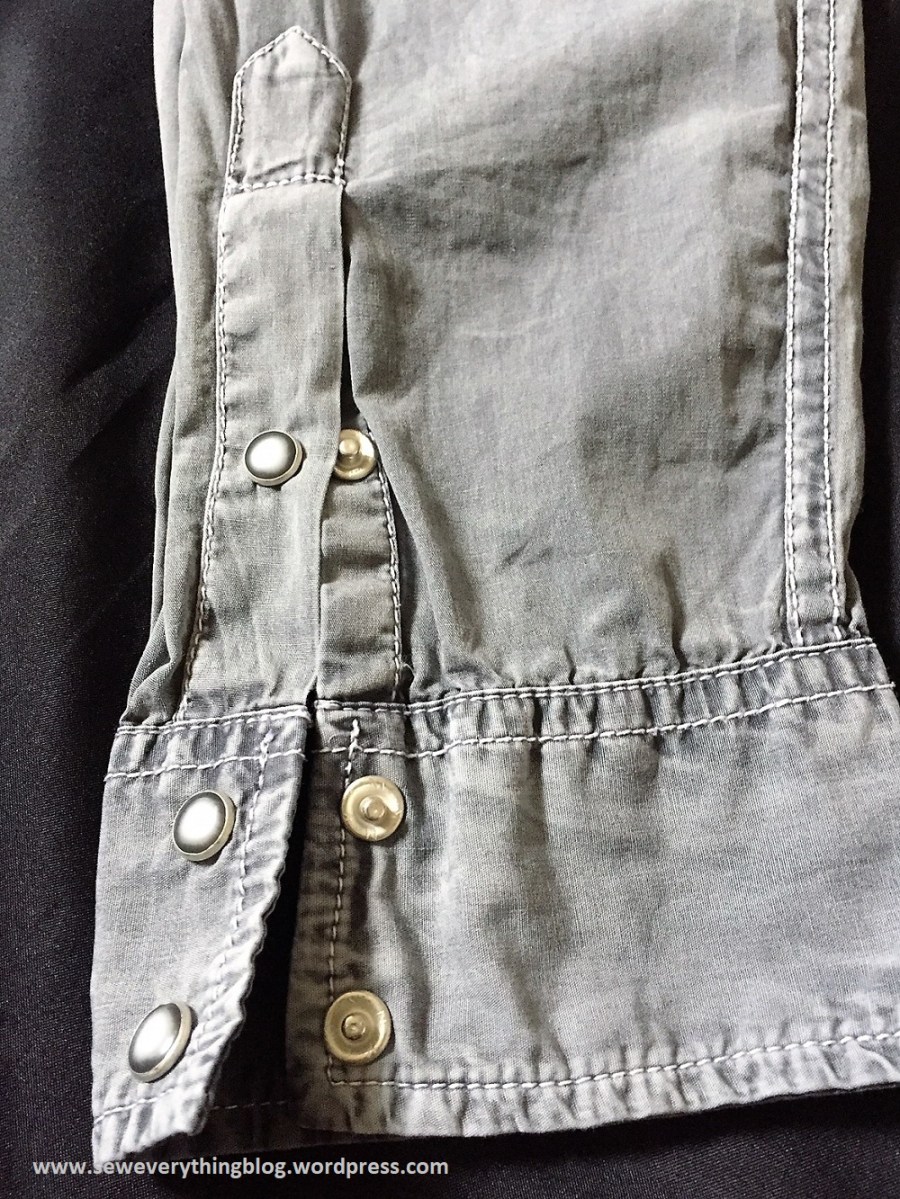
Option 2: Cut the cuff/sleeve seam and just move it up, knowing that the long placket would become shorter. Nope, can’t do that either. On the placket, exactly two inches above the cuff there’s another stud. Altogether, I must forget about removing the cuff.
Option 3: Let’s look at the armscye (the armhole/sleeve seam). Nope. The seams are flat-felled with three rows of topstitching in a chain stitch. It would be quite complicated to cut away 2 inches from the sleeve cap all around without destroying the armhole shape. More conundrums.
Option 4: Eureka moment to the rescue. Plus, this idea could be a design element and reduce the sleeve length – all at the same time. I planned two ½ inch tucks mid-sleeve from the right side of fabric, and sew them down with topstitching so they somewhat match the flat felled shirt seams. No ripping and undoing involved – not even the sleeve seam in the elbow, although I did think about opening it up to keep the project flat. As it turns out, I did not have to. So here’s the process:
- I determined the center of the sleeve length by folding it over. We’ll call it the “elbow line”, and it should be as accurately on the crosswise grain as possible. In the pictures, I started working from the wrong side, but it may be better to work from the right side as long as you use removable marking tools.

- Mark the elbow line with pins and fabric markers all the way around. See photo above.
- Mark a line 1.5 inches above the elbow line, also all the way around.
- Mark still another line 1 inch below the elbow line. Note that the two lines above and below the elbow are not equidistant to the elbow line. There’s a method to the madness, y’all. (The final tucks will end up ½ inch equidistant from the elbow line.)

- To make the tucks, push in the lower sleeve inside along the upper line, press, and sew a ½ inch seam away from the fold to make a tuck. Your needle thread should match the thread used in the rest of the shirt. In this case, I used a slightly heavier white thread (Sulky 12 wt. cotton) and a topstitch needle (to accommodate the thicker thread). Press down the seam, and topstitch the other end of the tuck all around. For this, I removed the flat bed from my machine, so the sleeve could be sewn in the round easily.


- Repeat the tucking process for the line below the elbow. Then, repeat the whole thing on the other sleeve.


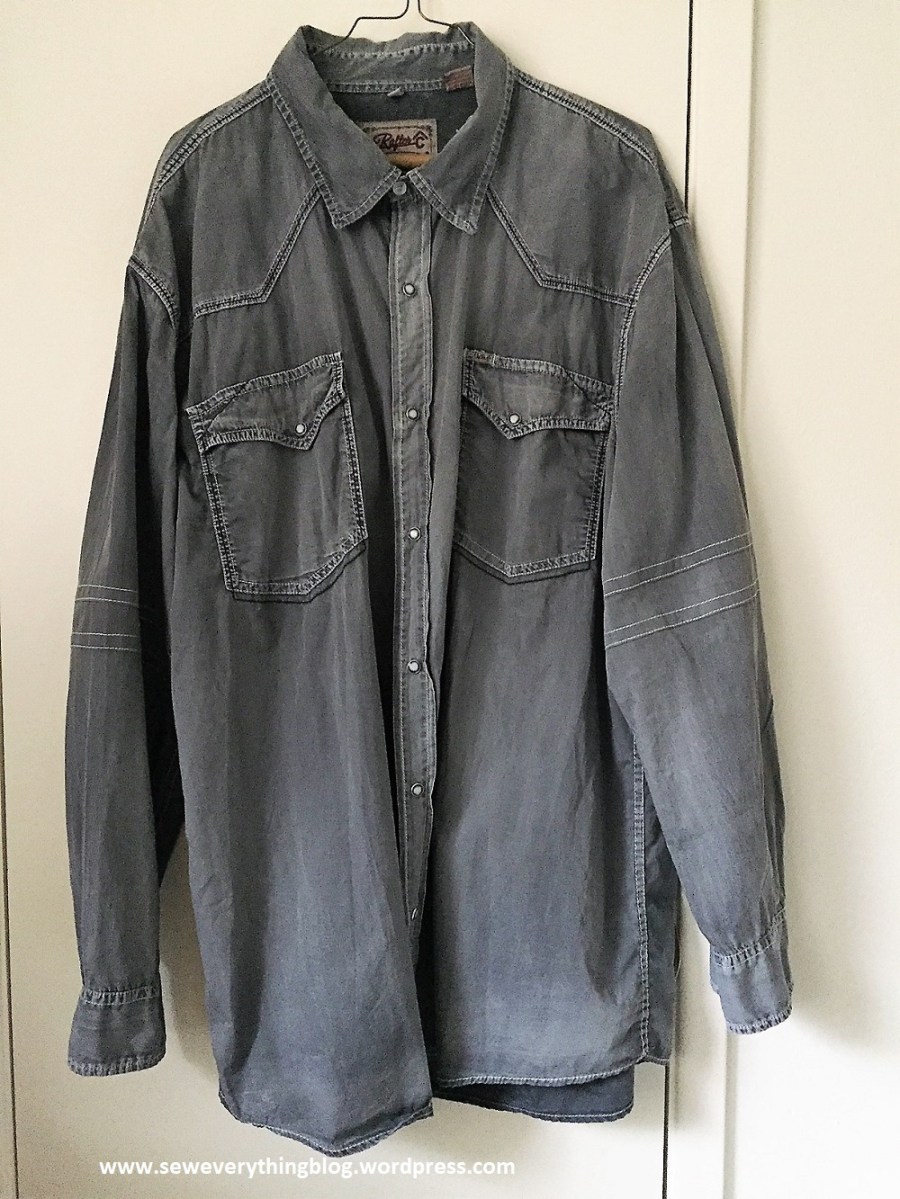
You. Are. Done. The sleeve-alteration accomplished the end goal and made it look like a design element. It worked on this casual western style shirt, but will the tucking work on a dress shirt? It may; you’ll just have to think it through with your own particular shirt. Hey, people, you can have fun with alterations. Seriously.
Wishing you a great December and Holiday Season!
Samina

I’m such high maintenance!!!
Thanks for going through all of this for me! Can’t wait to try it on!
LikeLiked by 2 people
You are welcome! I would expect nothing less 🙂
LikeLike
So very clever!
LikeLiked by 1 person
Thank you!
LikeLike
Very Nicely Done!
LikeLike
Thank you so very much.
LikeLike
That looks like it just was there from the start. The best mends of all look like that. “It’s not a bug, it’s a feature!” – old software developer quote
LikeLiked by 1 person
I love it when an alteration turns out like an integral part of the design. Lol – love that quote!
LikeLike