
Hi, all! This is the last post about this particular jacket – I promise. After asking your opinion in the last post about how to make the seams more prominent, I added saddle stitching to the seams. So, here it is. I like the loose, monk-like vibes of this jacket; and there was a request that the jacket should be pictured on me for ease in judging. Note: the hair and makeup department failed me. Oops, forgot to wear a polka dot scarf and forgot to hold black clutch to mimic the illustration. And the hat…..


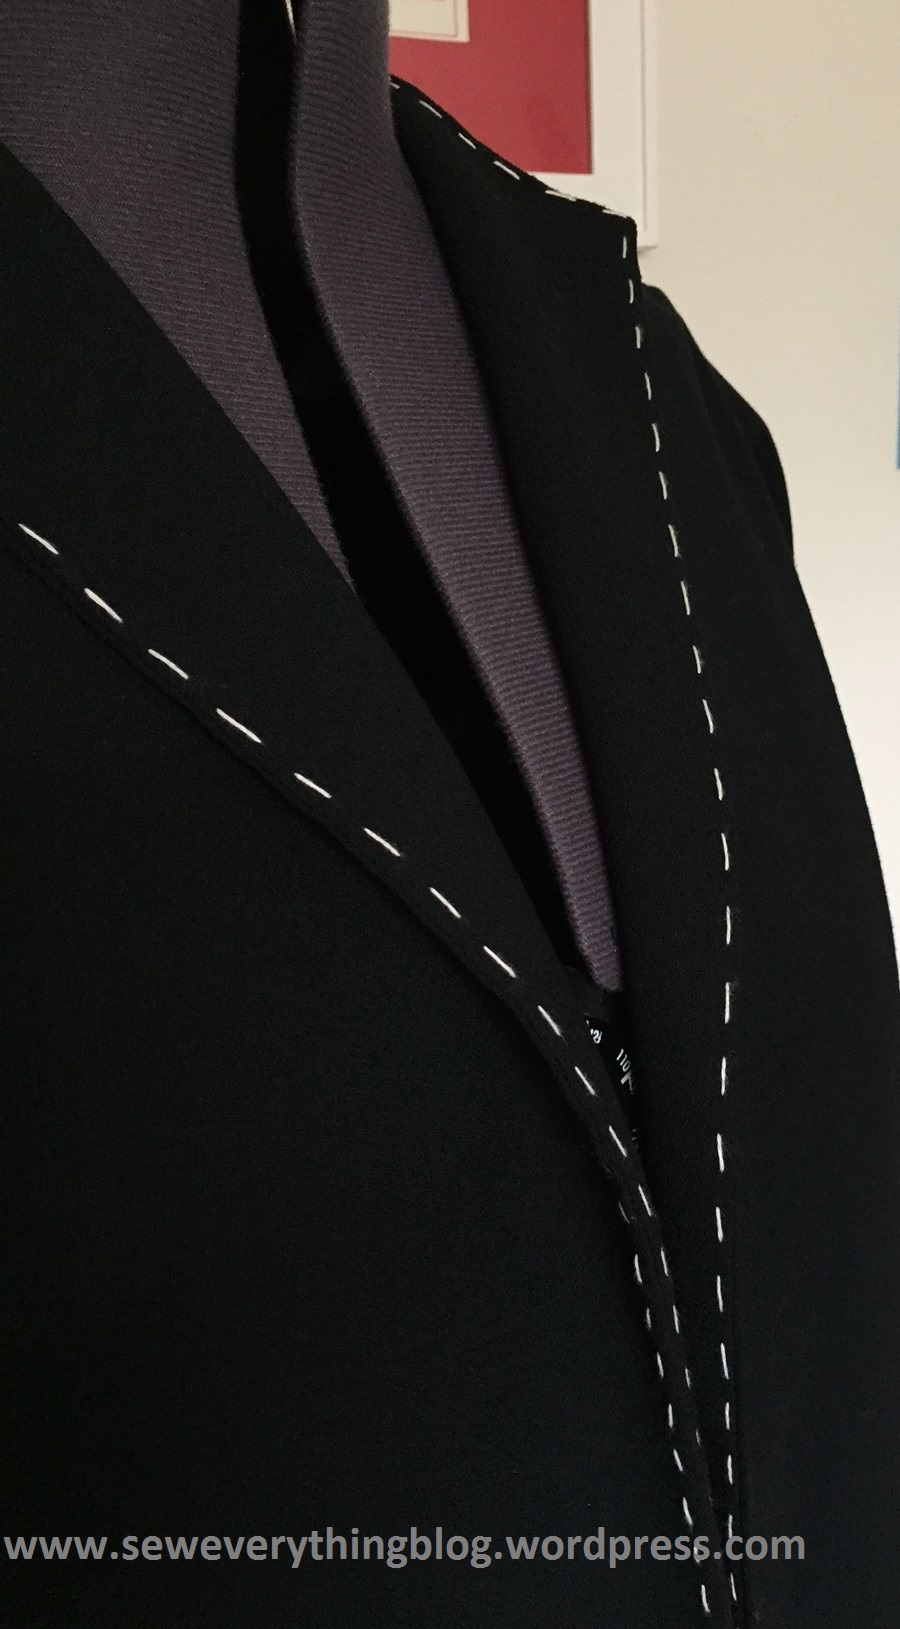
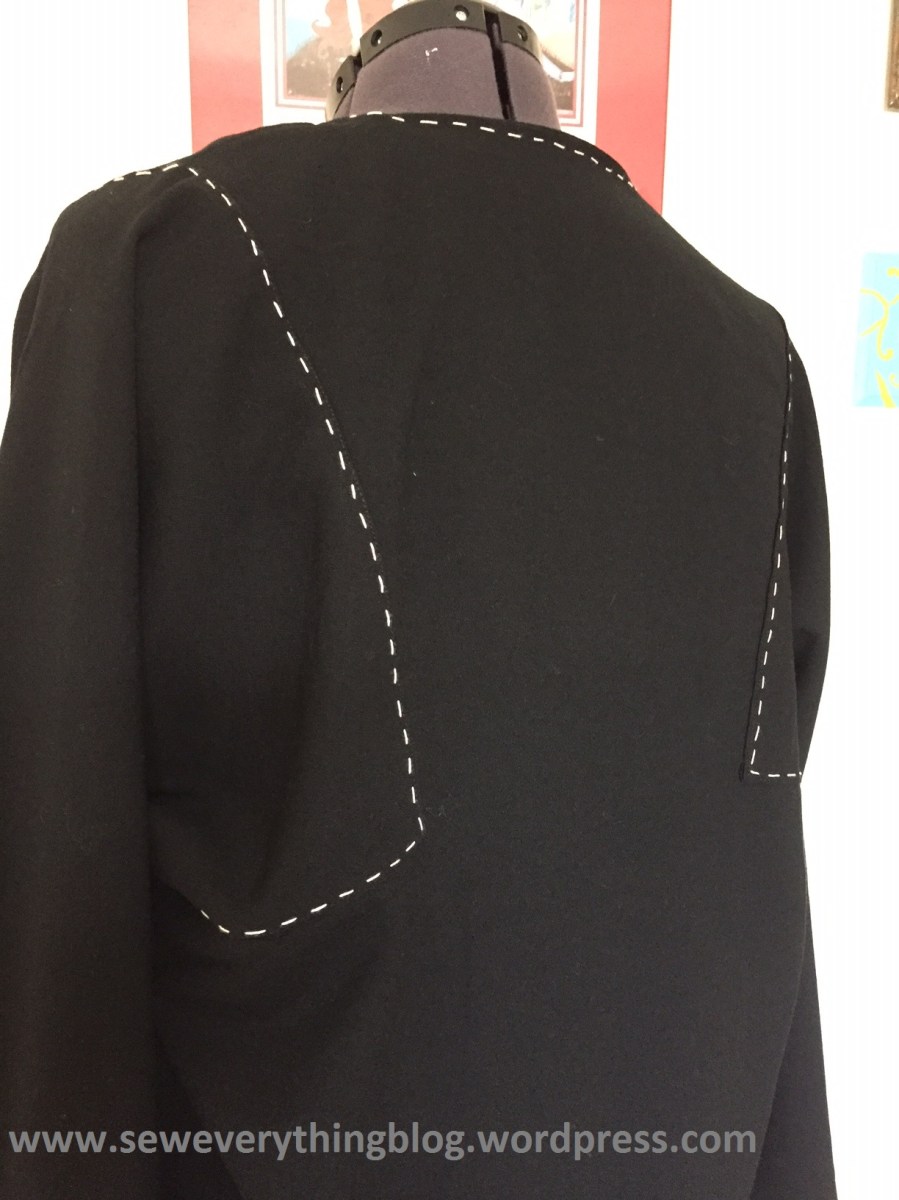
The saddle stitching: Even though the original instructions do not call for any embellishment, it’s used in my jacket because the black wool crepe overshadows the interesting angular seams. Saddle stitching is a running stitch, run through somewhat evenly at the edges and at the prominent seams (the square armhole). Note that I turned back the upper front to form lapels, therefore the saddle stitching needed to be done on the right side of front edge as well as the inside (facing) side, if you look closely at the photo below. Also note: the stitching is not run all the way through all layers. I did the running stitch with 3/8” on top and taking ¼” on the back side, catching the inner seam allowance for the “under-take”. Is that a word?
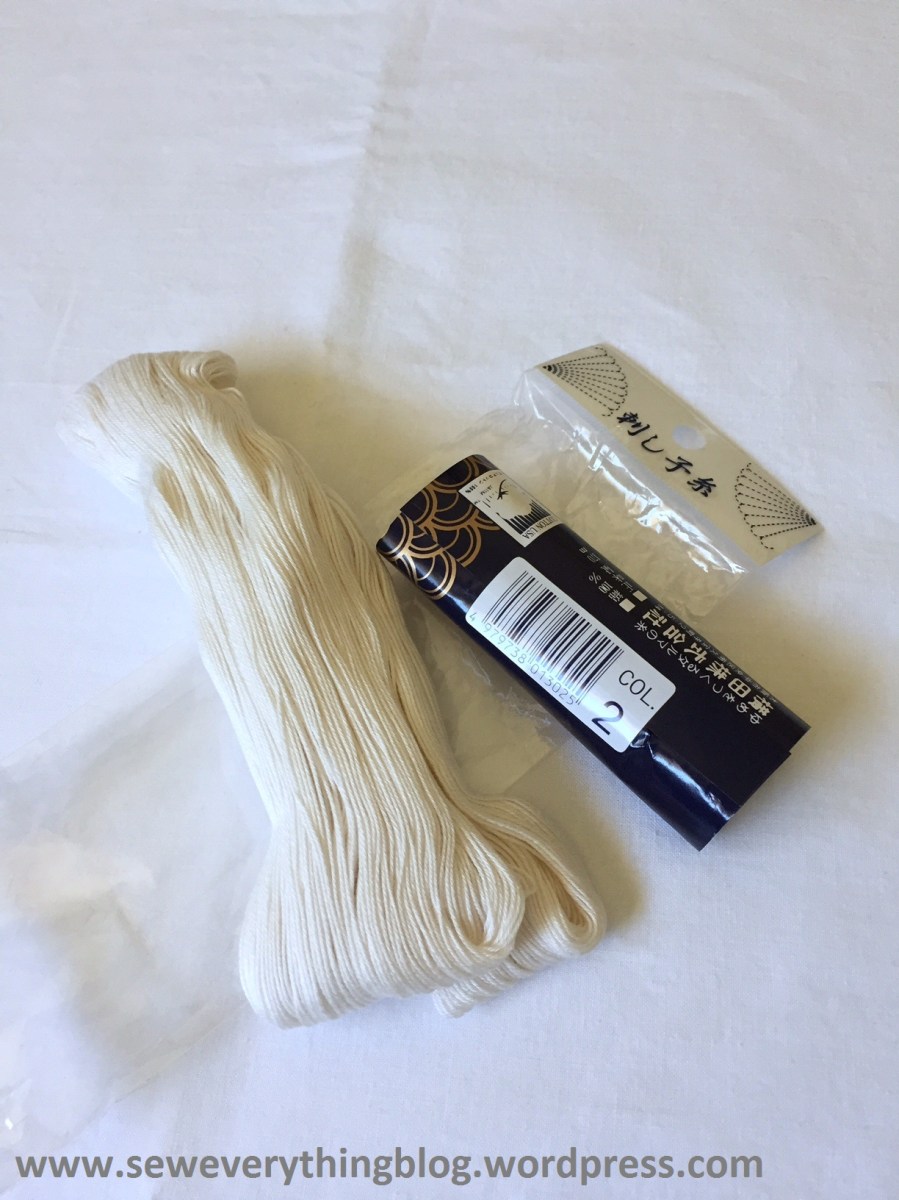
Thread for the saddle stitch: I wanted to use was a tea-colored pearl rayon for the saddle stitch but could not locate it in my thread & notions stash (downside of a large, unorganized sewing supply stash, but I’m working on it). Then, I found this skein of Sashiko thread, which worked quite well.
The facings: I went my own way with the back and front facings by added them to the neck as two separate units and did not sew them together at the shoulder. Once they were applied to the neck, I turned in the shoulder edges of the facings and slip stitched them down on the shoulder seam. On the right is the back facing in the form of a bias strip, and on the left is the neatly applied front facing. Some untidiness going on here, which I will have to address…. tuck in the end and clip those threads, Samina!

Seam finishing: Combination of hand over casting, Hong Kong finished seams and bias bound seams. You can see hand overcasting was done on the angular armhole seam.

Well, into the closet she goes! And waits for the first sort-of-chilly day.
Samina
PS: No purchases were made for sewing this jacket, and I feel strangely satisfied.

Lovely jacket. LOL you also forgot to model with gloves.
LikeLiked by 1 person
Seriously, I wish gloves, even in summer, would make a comeback!
LikeLike
Such a unique and lovely design!
LikeLike
Thank you, Linda Faye!
LikeLiked by 1 person
Isn’t it great when you get make a project from your stash/isn’t it appalling you can make a project from your stash?!!! I know I need to make more of an effort to do more stash sewing and less stash buying! Love the saddle stitching by the way.
LikeLike
Well put, Lynn!!
In spite of my conscious use of stash materials only, there is still no obvious dent. Maybe one day the dent will become noticable.
LikeLike
Love all the special touches at are so you! Great job!!!
LikeLike
Thanks, Roz! I’m so ready to wear the jacket.
LikeLike
brilliant…ure totally my icon now..
LikeLike