
Last week, you saw me following the instructions in a leaflet issued by Coats & Clark in 1934 – read about it here. That was a trial; today, I give you the final slip. Why didn’t I just use a tried and true camisole pattern from the old Stretch and Sew book? Maybe…. because I wanted to delve into a 1934 seamstress’ head?


After some pattern manipulation by the slash-and-overlap method, I managed to give a 2016 curve to the front of the slip in the bust area; made a medallion with the technique called fagoting (need lots of practice in this); cut the slip to tunic length, and I am done.
The slip begins with two even 36” squares of fabric; 39” in my case. You may wnat to have about 1/2 yard extra fabric. Second step is cutting the corners of three sides of the squares (according to the leaflet instructions) and pivoting the resulting triangles to attach to the uncut corners to form the body of the slip. The Coats diagram explains it all. The dimensions are given. I made a test, which is documented in the previous post. It needed to fit better, so I chose to fit the front triangles to my body by the “slash and overlap” method on paper to re-shape the fabric triangles.
Pattern manipulation: before cutting out the new slip, I determined that the triangles should be 2 inches more all around. How does one come up with how much more? I put a tape measure on myself from the chest center to the side, diagonally following the future seam which joins the triangle and the body. If it’s too much it can always be cut away on the side.
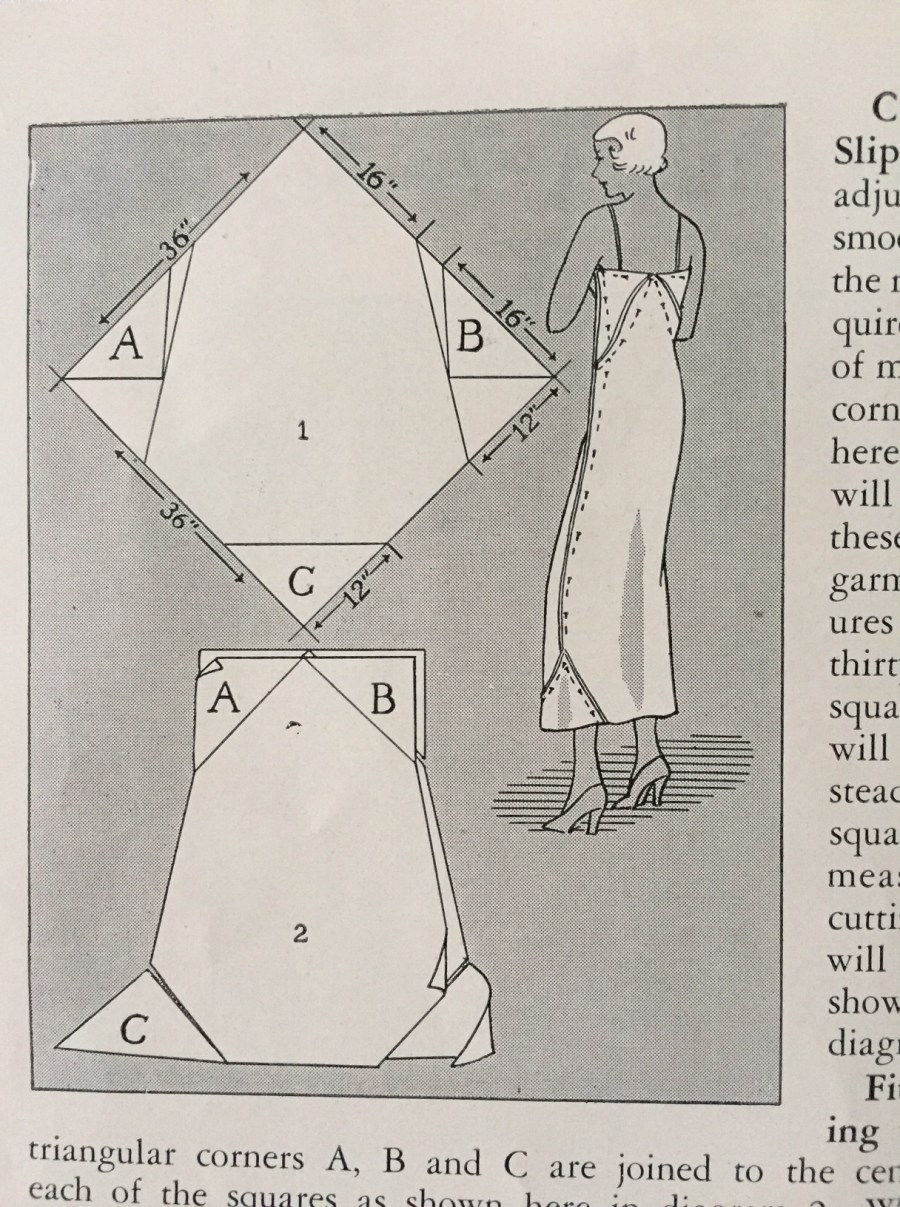
Cutting out: using the diagram, cut out the entire slip as shown. Remember to use the new triangle dimensions – if you had changed them from those suggested in the diagram. There are 4 for the top part of the slip; keep the back triangles as they are since we’re not changing their shape. The two front triangles can be set aside or thrown away because you are going to cut the front triangles from another piece of fabric.
Using the dimensions of the front triangle, I traced out the pattern dimensions on paper. I marked it to note the top edge and the side edge. By placing the piece on yourself or a dress form, you’ll see how much needs to be darted out at the top and side edges. Pinch and pin these darts and mark the bust point clearly. We’re moving the darts to the diagonal seam where it attaches to the body! Remember, darts may be invisible, but they’re never gone. Here they’ll be hiding in the seam.
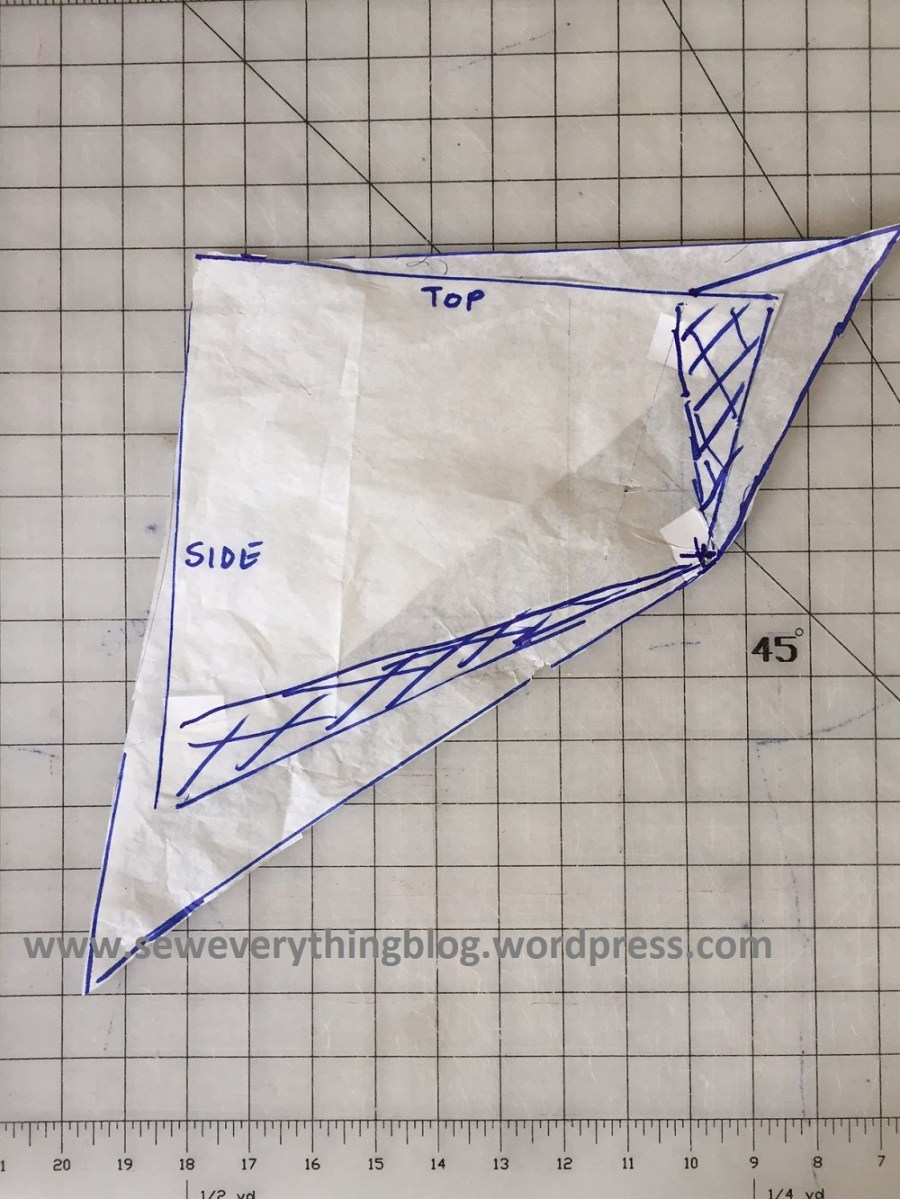
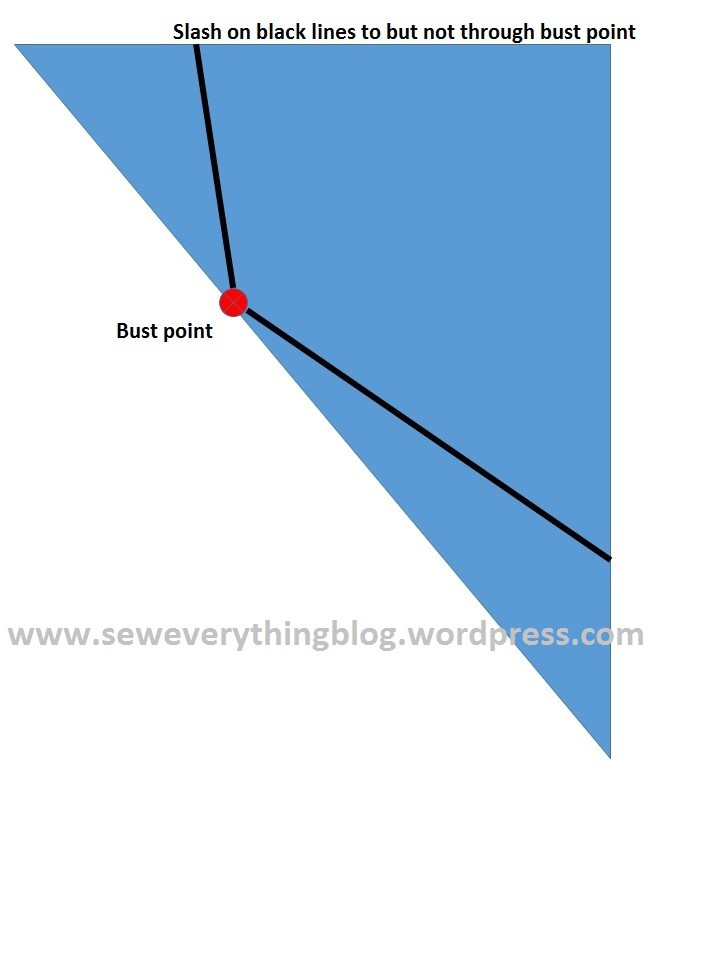
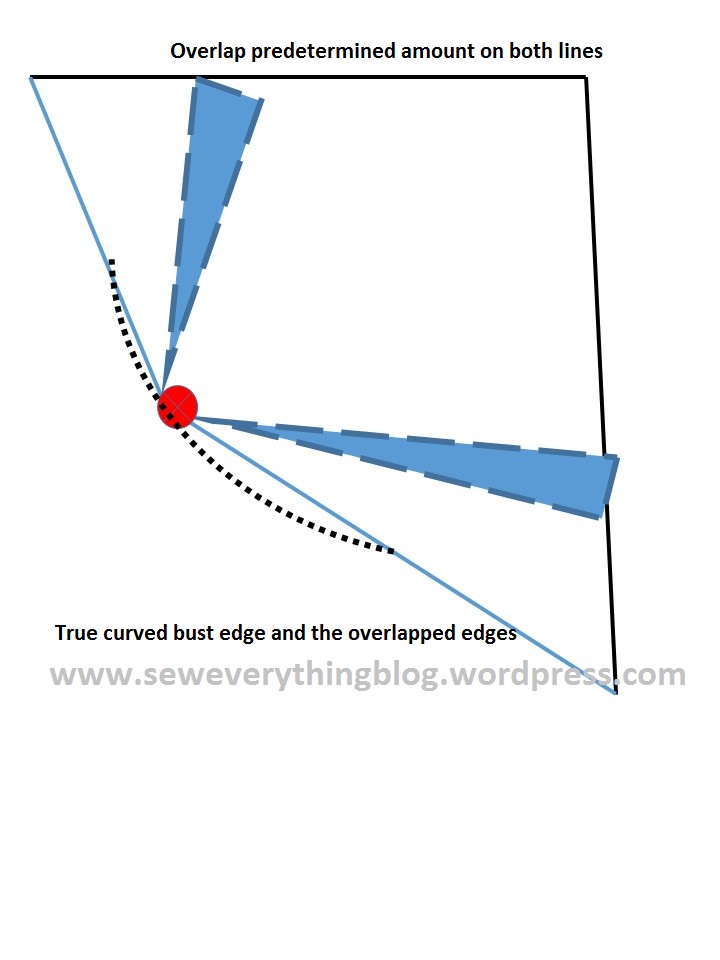
Remove the triangle paper pattern from the dress form or your body. Mark the darts centers with straight lines to the bust point. You may want to take up more than 2 darts. Then begins the slashing and overlapping (twin of the slash-and-spread method) process. Above are some not-to-size graphics which may explain it clearly.
Sewing it up: Simple. Sew up the diagonal seams, then the side seams.
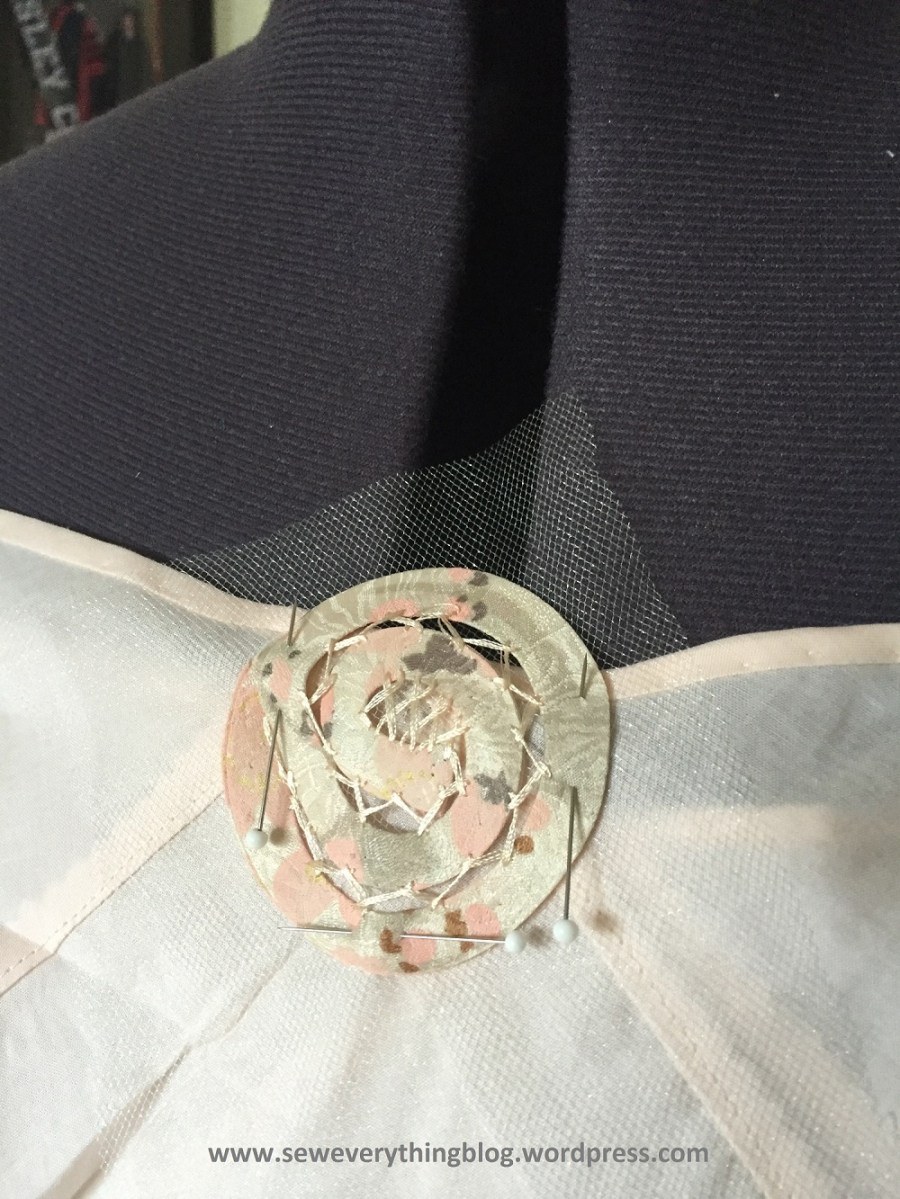
I made bias strips with a piece of jacquard, kimono-like fabric for the straps and embellishment, bound the top edges of front and back with thin bias binding, and spent some time with the fagoted motif. The medallion is ok – if you don’t look too closely. If you do, it — meh.
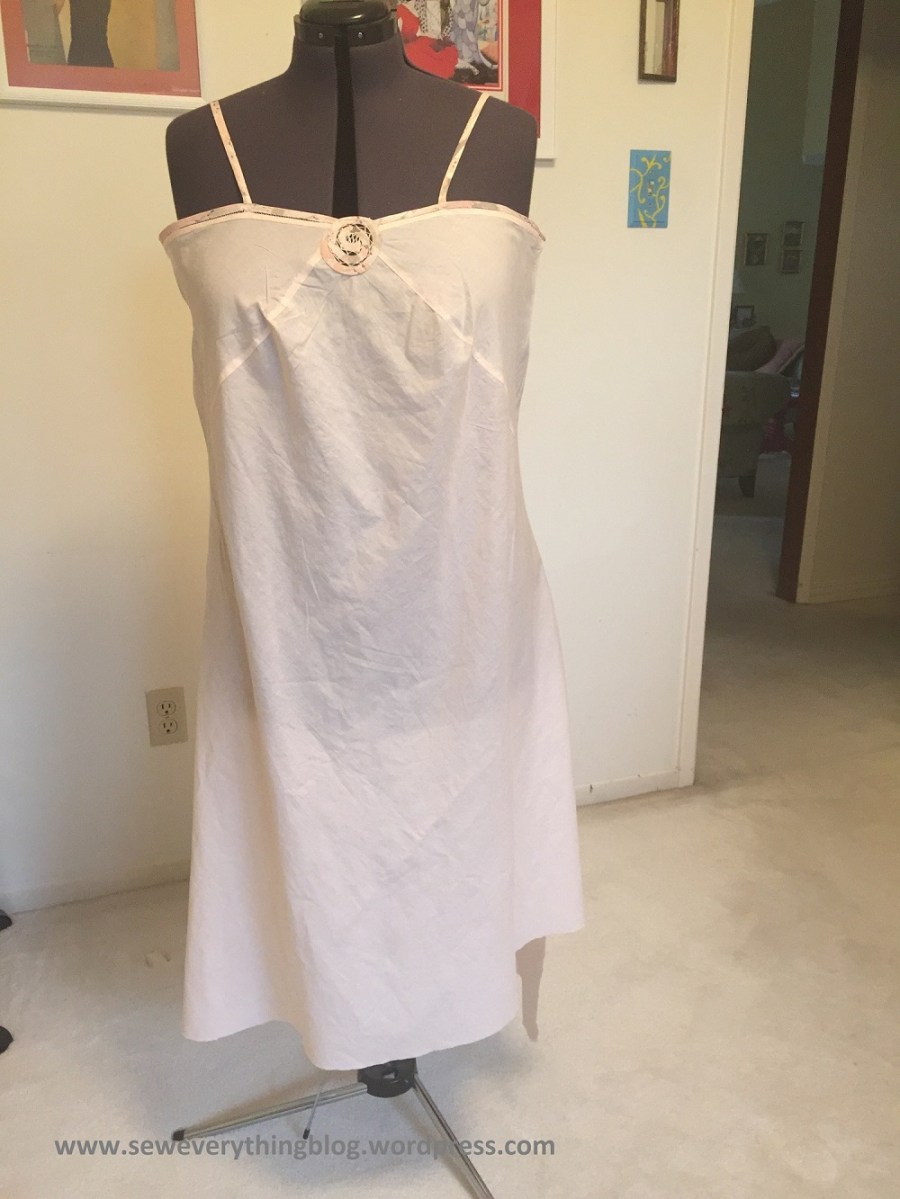
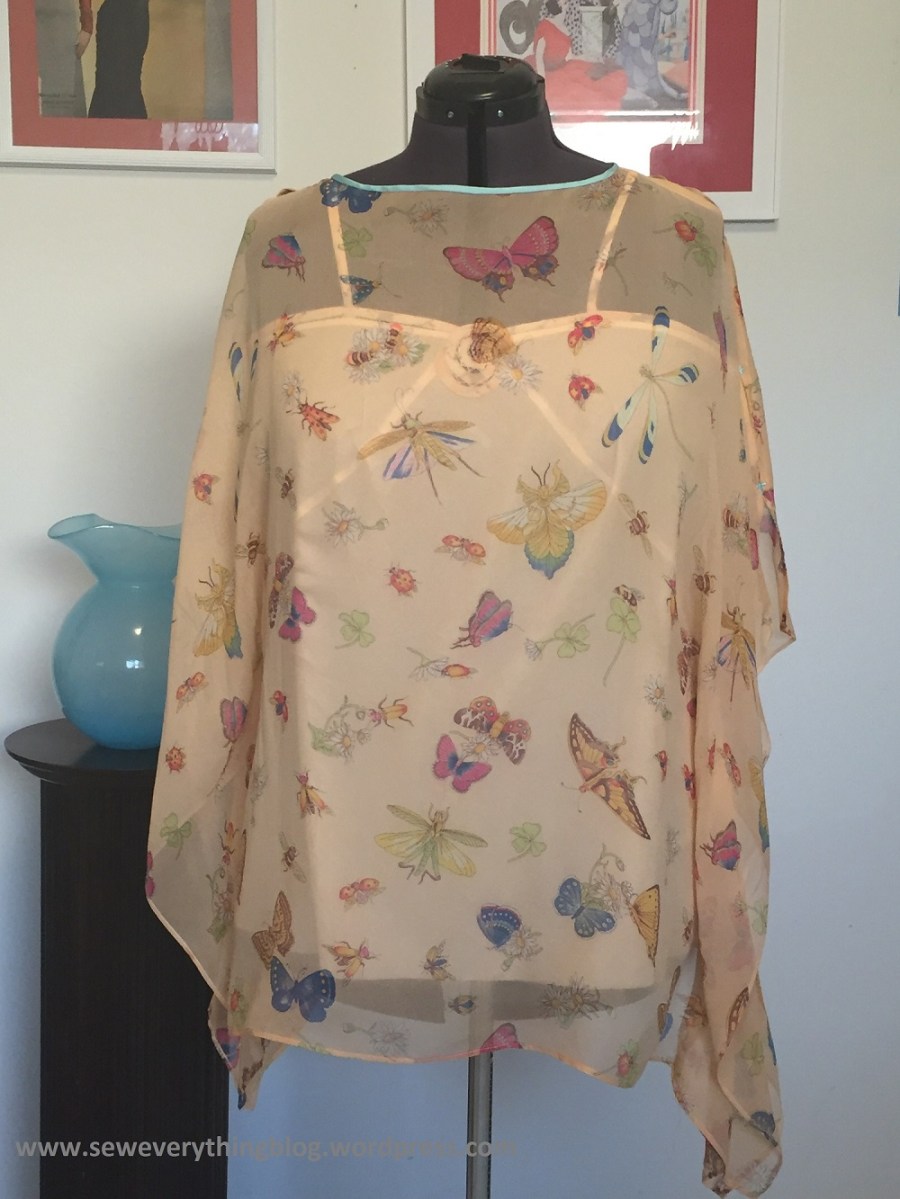
I cut the slip length to a tunic length, hemmed it and we’re good to go.
Do you follow me on other social media outlets? If not, feel free to do so 🙂 – friend me on Facebook, Instagram (@saminakaty) or Twitter (@seweverything).
So, that’s how it is with me. I’ll keep sewing, and am mulling over something different to bring some sewing excitement in September, the National Sewing Month!
Samina

Thanks Samina, I’ve had this in my file to do/explore ‘one of these days’. Your modifications will be very helpful. It really looks great under your top.
LikeLike
Thanks, Janith! Need to practice on the medallion, though. 🙂 I was in no shape to pose with it on myself; that photo will be coming soon, though.
LikeLike
How very retro. You did a great job. I love it
LikeLike
Thanks, Marilyn!
LikeLike
This tunic-slip combo is absolutely gorgeous!
LikeLike
Thank you! I think I’ll be making more of the same summery look. Our hot weather lasts until November so that should work out….
LikeLike
I think you did a marvelous job, love the butterflys!
LikeLike
Interesting project! The outcome is beautiful, and just perfect for the butterfly top.
LikeLike