
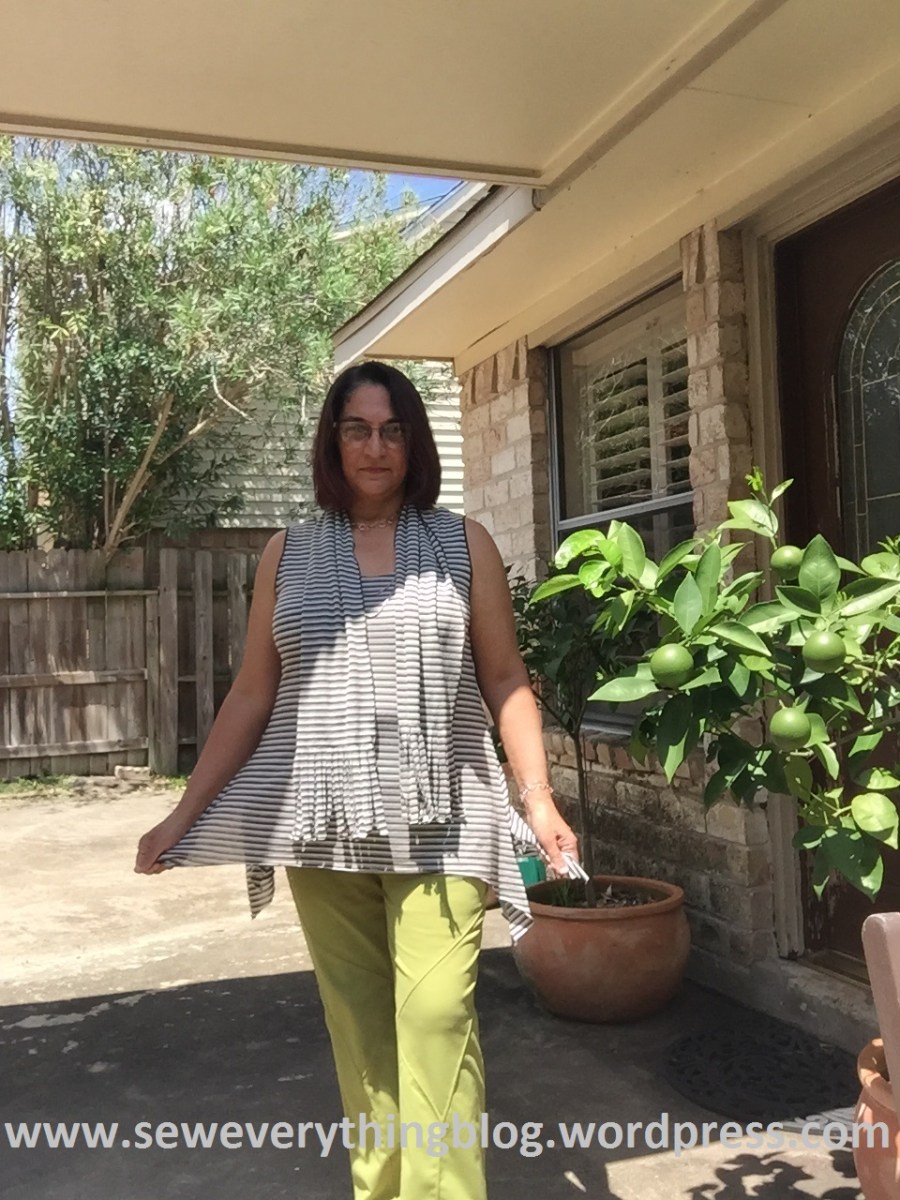
Or, how to turn a quick 4 seam project into a considerably longer one. It all started when I decided to do some quick summer sewing. A sleevless knit tunic would be great in the scorching Texas heat.
Pattern of choice: Sewing Workshop’s Anne’s Cardigan and Tank , released in 2011 . I’d already made the cardigan, and decided this simple tank would be my choice for a cool, breezy top. You can see the pattern designer’s version here. The guide sheet shows how to do it in 4 seams – two shoulder seams sewn and serged, two side seams sewn to the side slit point and seam-finished whatever way you want. The Sewing Workshop likes the hem and armhole edges unfinished, but they do give you options.
Fabric of choice: A featherweight, striped knit purchased from Sew Much Fabric – oh, a few years ago. Keyword here is featherweight; because that changed things ……
How it went down: The pattern fans out on the sides and so I did not have to merge it into a larger size at the hip area as I usually do with other patterns. Here, there is enough room for the pear in my pear shape. The bodice is a pretty good fit; the armholes are high and the bust fit is good. Yay. The only shape/fit change I made was in the length; the top was lengthened a few inches to make it a “tunic”.
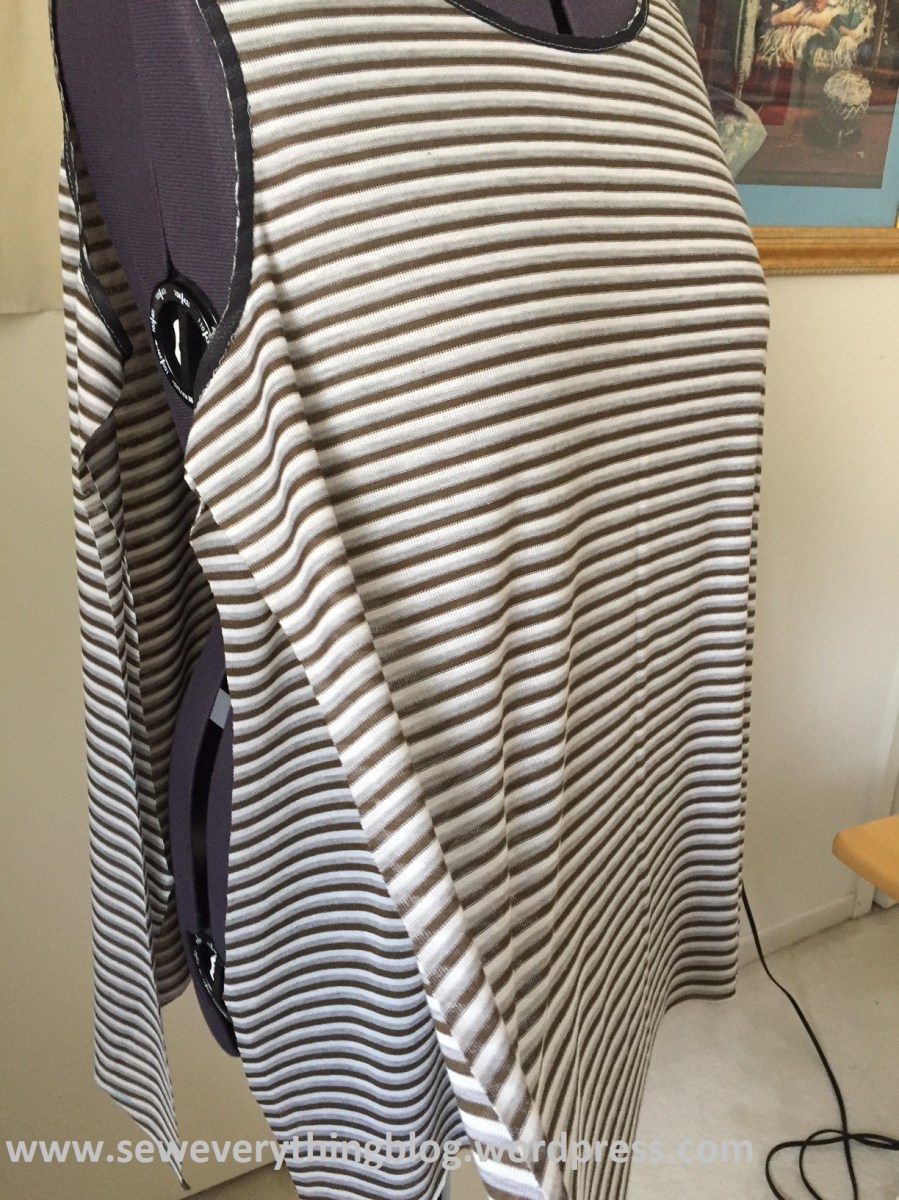
About the featherweight knit fabric – it’s see through. This tunic is meant to keep me cool, but I’m not feeling the translucence. So I decided to make it a double layer since there was enough fabric. I eked out a second tank – which we’ll call a “lining” for our purposes. Other than having to make do with a small wedge shaped shortage on each side of the hem, the “lining” was fine.


Stabilize!!! Is it my imagination, or does featherweight knit stretches when you look at it? I stabilized each shoulder seam, back necklines and front necklines but not the side seams because most of the garment weight is carried by the neck and shoulder seams. For stabilizing such fabric, my go-to item is a “bias fusible” product which I bought from SewKeyse, owned by the awesome Emma Seabrook. Make sure you use a press cloth while fusing. A mishap occurred here while the back neck of the lining was being fused, but we creatives are not fazed by such incidents; I fused a piece of self fabric at the accident location and sewed around it – sort of like a label? No one will know.

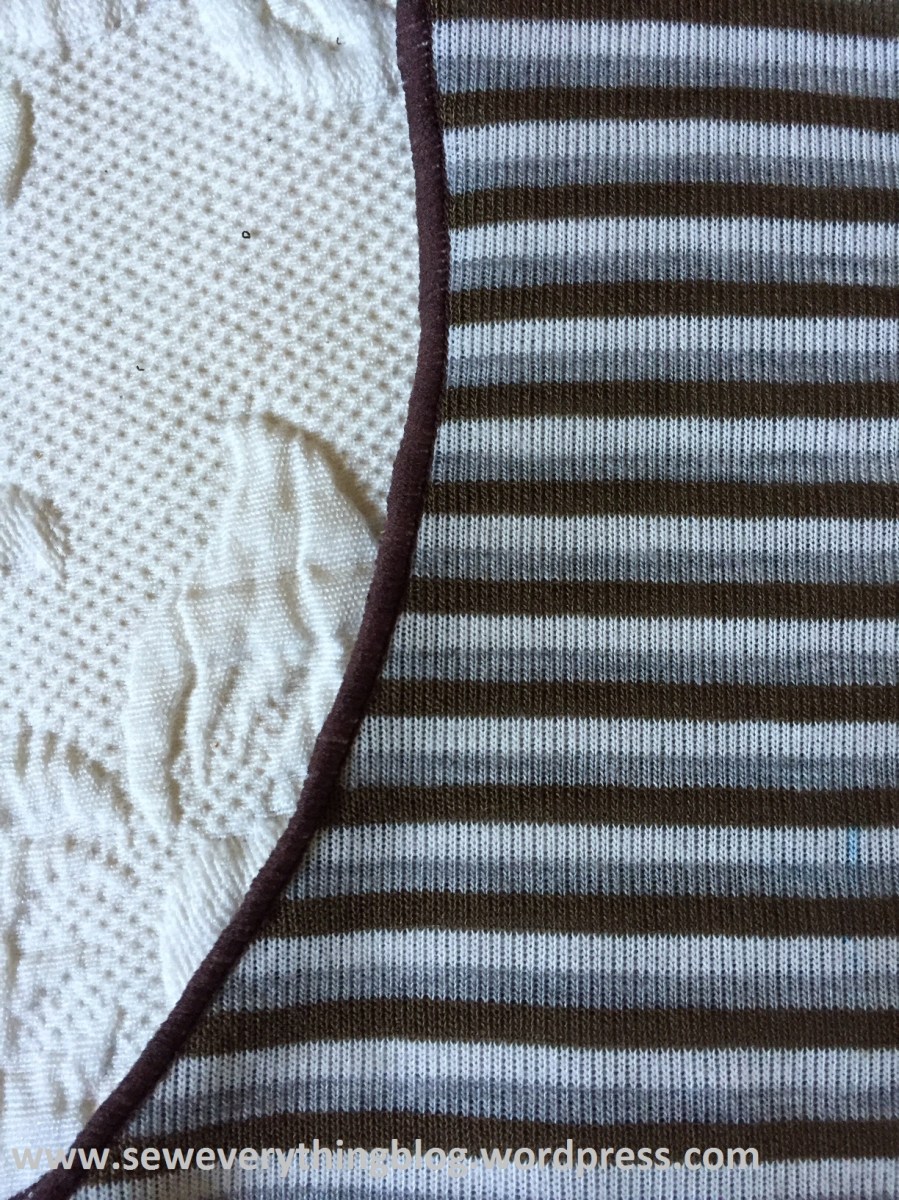
Putting together the two layers: I stitched the shoulder seams of each layer separately, and then stitched both layers together at the neck. Seams trimmed and the lining was put through the neck to the wrong side. Stitching together at the neck eliminated the need for a neck finish.What to do about the armhole edges? I roll-hemmed them together on the serger, using brown woolly nylon. Success!!
Both layers were then opened up and the side seams were sewn together starting from the front slit opening to the back slit point – on each side. Seam was pressed and layers brought together. The hem was left raw edged. I love the end result!

The bonus: two long strips of leftover fabric were joined together at both edges by the same rolled hem, their ends cut up for 6 inches as “fringe” to make a matching scarf. Notice that I’m wearing the tunic with the kiwi knit pants from last week. How amazing that two colors which conventional wisdom does not put together, kind of do go together, I think. More styliing notes: I’m wearing a beautiful silver circle necklace, a birthday gift to me from a lovely lady who is now family. The other long silver chain was a wedding gift to my mother from her aunt – an heirloom.
Are you sewing up a hurricane??
Thank you for checking in with me in this 3 year old blog. I love you all.
Samina

Brilliant label. I think I will do the label on purpose .
LikeLiked by 1 person
Yeah!! Its true that mistakes are the root of creative ideas…..
LikeLike
Reblogged this on Siri2Siri-Reflecting the style within and commented:
Sew Everything is SEW awesome. I love this knit tunic pattern! check out her blog!
LikeLiked by 1 person
I loved this tunic. It looks good on you!
LikeLiked by 1 person
Thank you, Siri! And I’m thrilled and humbled that you reblogged this. Many thanks!
LikeLike
Love the top and was going to comment on how great it looks with your kiwi pants. Super pairing fun. I’m off to see if I have that pattern and some stripe fabric in my stash. Love Lyla’s fusible tapes!
LikeLike
Please make it! Yep, I should have included a link for the fusible tapes – will edit the post to add links.
LikeLike
There are very few things that say “a must have sewing notion” that ARE. That stuff is the best! I cut the fabric. I iron that stuff on. I can now sew knits because of that stuff.
God bless Emma Seabrook.
LikeLike
The fusible tapes really are a must-have. In my greed, I bought a lot of packages, and now I have a lifetime supply. 🙂
LikeLike
What a wonderful top Samina and you look absolutely beautiful! Thank you ever so much for your kind words and for showing me so much love on Tuesday night’s Blab.
LikeLike
Hi Faye! It was lovely to see you “live”, after just reading your words. The Blab session was fun. Thank you for the compliments on the top – I’ve been wearing it a lot in the hot Texas weather. Thank you for taking the time to leave a comment :).
LikeLike