Hi Readers, thank you for visiting! Posted here for your pleasure are fabric and cutting details for the South Asian kurta. If you’ve missed earlier posts about it, you can read them here and here. Feel free to ask any questions in the comment section!
Measurements: the only two needed measurements are shoulder width and desired length of kurta. Let’s use the following since I’m making this simple, bare bones kurta for my mother who is 88 1/2 years old, and is short …. and shrinking:
Shoulder width: 15″
Kurta length (to the knee): 33”
Seam allowances are 1/2″ and the hem is 1″ (double folded to a finished 1/2″ hem)
Fabric: make your first kurta with stable but soft fabric, either cotton or linen. Voile or lawn are good choices. I’m using 45” wide soft quilting cotton from Joann Stores for my mom.

- Determining the fabric needed is simple. Front length + back length + hem allowances + seam allowances. Example: 33”+33”+2”+1”=69” (let’s round it up to 2 yards. You can add another 1/2 yard if it makes you feel better).
- If short on fabric, making “kalis” (side triangles) from a coordinating or contrast fabric can “make it work”.
- Do your usual fabric prep like pre-washing etc.
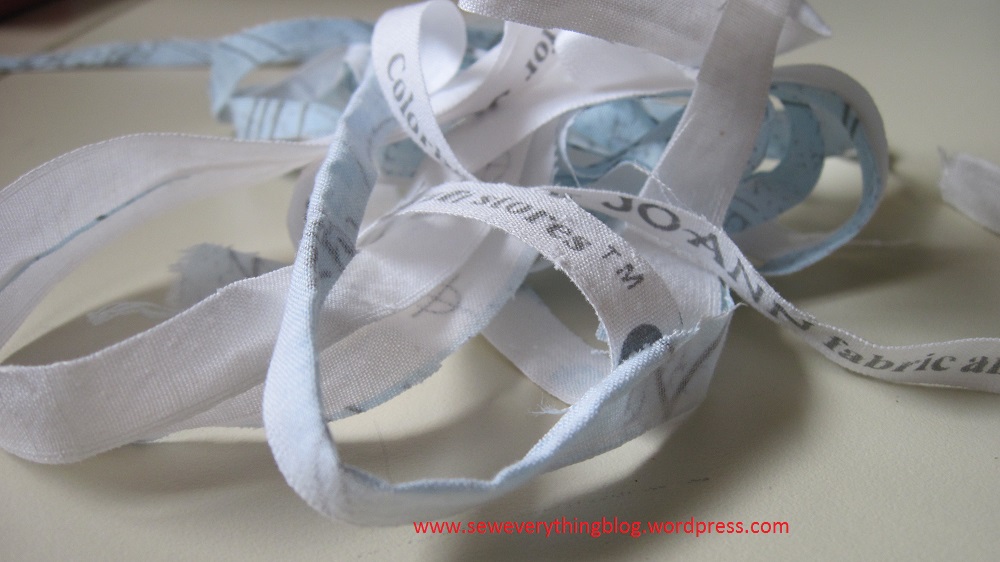
- Important: The fabric should be perfectly on grain. See picture above.
- Remove the selvedge from both sides.

Cut out selvedges
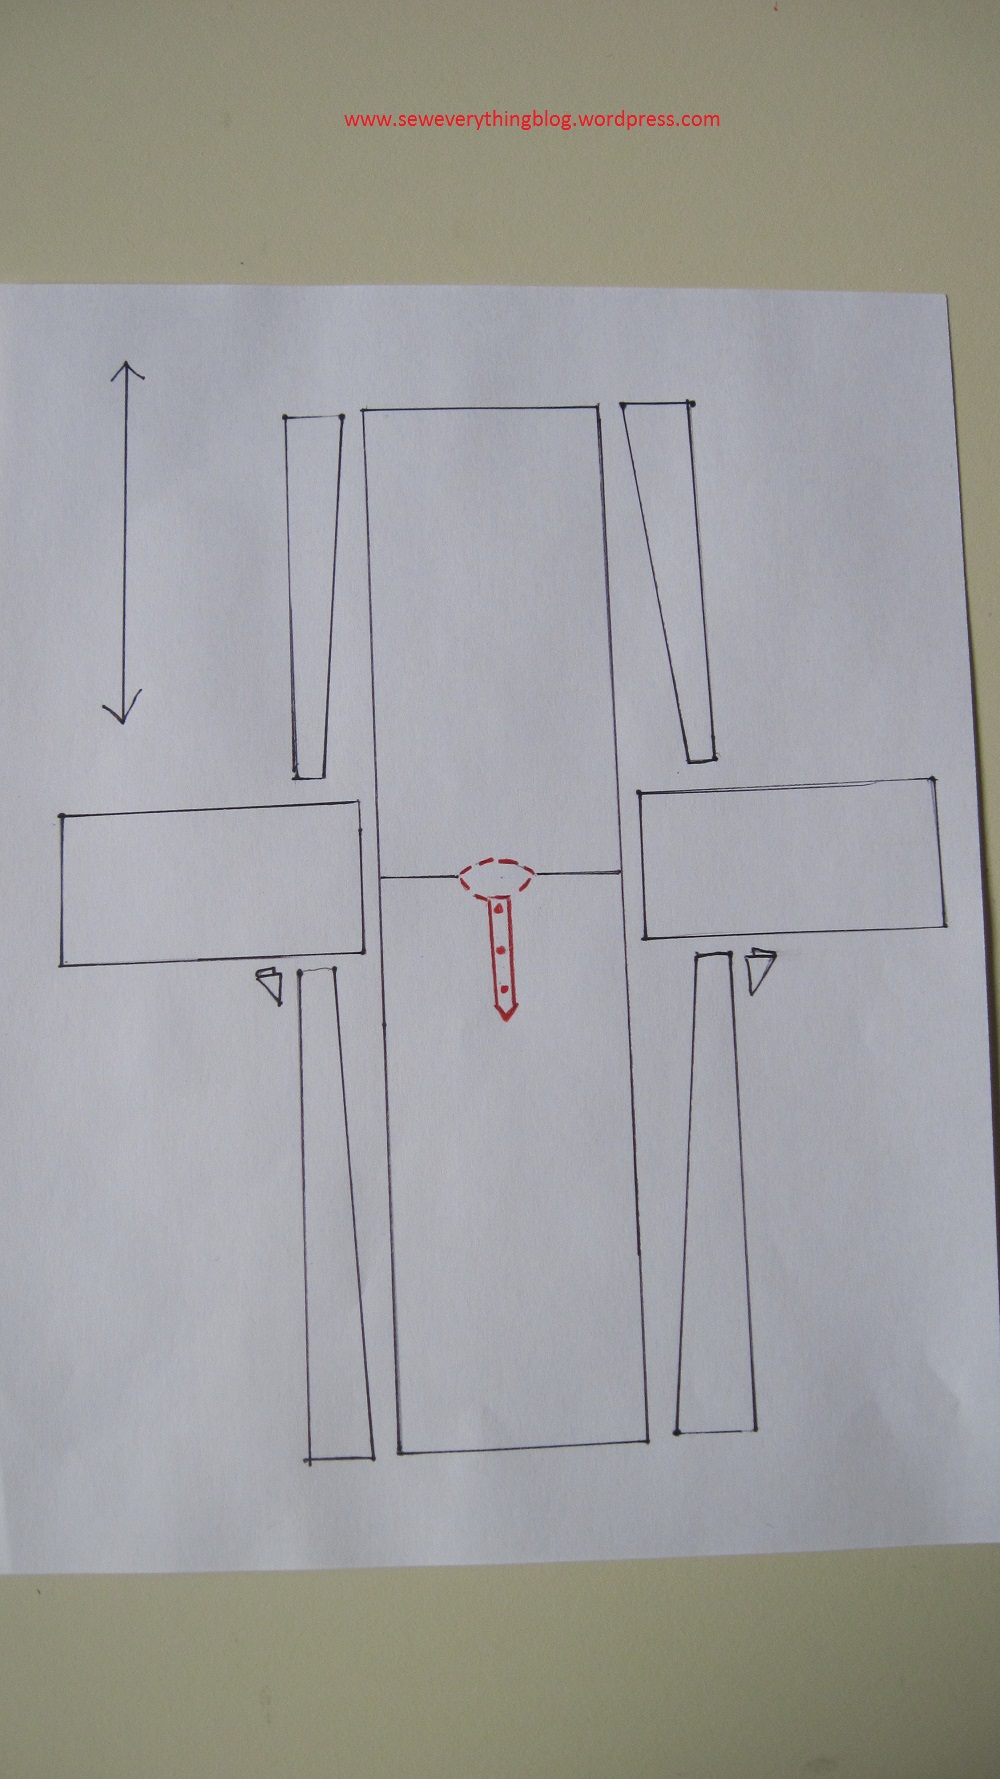
Cutting: The layout illustration below shows pieces of the kurta as they are cut. Click on it to enlarge. Since these are geometric pieces there is no need for a pattern. I’ve added a key below the image to the numbered pieces in the illustration.

1 – Kurta Front (the blue thing indicates the neck opening and placket)
2 – Kurta Back
3 – Sleeves
4 – Gussets
5 – Kalis (triangular sides and yes, there are four of them)
The choice here is for you to follow the self explanatory layout picture above and skip my words below ; or you can read my lengthy cutting description and keep referring to the same illustration.
- Lay out the yardage in a single layer. From the left side of yardage, cut one continuous piece for front/back. If you prefer to add the shoulder seam, cut apart in the center to separate front and back, making sure the ½” seam allowance is included in each piece. Width of front/back piece = shoulder width measurement plus seam allowances. Length = desired length from shoulder plus hem allowance. My front and back pieces, therefore, measures 34.5 long and 16” wide. Yep, I added a shoulder seam.
- Sleeve width/armhole can vary with individual figure and preference. I used 7” for this kurta. This means we need a sleeve piece which is 14” wide plus seam allowances. Length usually ends at the wrist bone. (The kurta sleeve is on the crosswise grain). Keep in mind that this is a loose garment. Mark the shoulder point halfway on sleeve width. When attached, the sleeve will be 7” from the shoulder down on each side of front and back.
- The narrow end of each side triangle (“kali”) is 3” plus seam allowances. The wider end of the kali is the hem. The wider end is determined by default when you cut out the 4 kalis as shown. Therefore each kali on my kurta measures 7” at the bottom. See illustration. The length of each kali is length of kurta minus the sleeve width. Therefore each of my kalis measure 27” long on the straight side. There should be four kalis. Each one has one long straight side and one long bias side.
- This is how to cut out accurate kalis – easily: From the shoulder point of the kurta, measure down 8″, and square off a straight horizontal line to the right end. The kalis will be cut from this rectangular section. Draw a vertical line with chalk marker or disappearing ink pen to divide this section in half. Mark off 4″ at the top left of one section, and 4″ at the bottom right of the same section. Connect the two marks. Repeat this on the right section. Can you see the 4 kalis now, two up and two down? Cut apart at the markings.
- If using a napped fabric or one way print, you will need more fabric equal to the length of “kali”.
- Cut two 4” square pieces for the underarm gusset (i.e. a gusset which will be 3″ when finished. These two small pieces are important to the kurta. Skipping the gusset is tempting but the armhole will be wonky at the underarm.
- Mark and cut out the jewel neck and opening for the placket. You can use any jewel neck pattern as a template, making it larger if you wish. I used this handy tool to mark off the neckline!


Marked neckline - For the front placket some preplanning is necessary. Placket instructions are the same as any shirt or sleeve placket. You also have a choice of making a bias bound slit neckline treatment instead of a placket. It is not traditional, but is much easier.


So this is how you cut out a kurta. You may find other ways for the cutting step in kurta construction as you go along; feel free to share with other readers. Meanwhile, the following two images show how the kurta pieces go together! The picture is hand drawn, and the image below it shows the actual fabric pieces laid out on my dining table.

Do you have any questions about the cutting process? Or any other thoughts about it? I would love to hear from you. Watch for the kurta sewing post which will be up here to complete our project!
Samina

Thank you, Samina. You have made the whole process perfectly simple!
LikeLike
You are welcome! I will be posting the actual sewing process very soon.
LikeLike
Great post Samina. I used to curve approximately measured from underneath the bust line to the waist to give a bit of fitting to the kurta…try it! 🙂
LikeLike
Thanks! I will be posting the actual construction order later and then some adaptations. Feel free to chime in with more ideas. I will link back to your website.
LikeLike
how to make tape below neckline?
LikeLike
Hi Samina, Thank you for your pattern! I have a question…Are the bias sides of the kalis sewn to the front body of the garment or do they make up the side and slit of the kurta. I couldn’t quite tell from your pictures.
LikeLike
Hi Kristin! Thank you for reading my post 🙂
The bias sides of the kali are sewn to the front, AND the other side (straight grain side) of both kali pieces are sewn together to form the side seam with a slit at the bottom. Repeat on the other side of the kurta.
I hope I answered your question. Feel free to ask again if my answer is not clear. Hope you will make a kurta. Send me a picture of the finished kurta!
LikeLike
I can’t thank you enough for this detailed blog. I was desperate to find a draft for kali kurta. The apparel store I visit frequently sells this model with custom made designs in standard sizes. Very recently I learnt to sew and I wanted to make one so much like the one I regularly buy.
Though there is a video on the drafting the measurements, I wasn’t quite good grasping on how to get the fabric to the explained layout. Your tutorial dispelled the confusion.
Thank you so much . I was able to make one today and with much lesser length of the cotton fabric.
My details to add would be.. For thinner people , like I’m, 2 yards fabric should do .. and in each of your measurements, we can clip by almost an inch.
For instance I could take the sleeve round (arm round) to be 7″ (as you did, may be for me 6.5″ was also fine) and the kalis are typically 2.5 X 8″ and the centre pieces are 14″ wide
My fabric was 33 ” x 78 ” long
Also, I folded the fabric in double length wise (each piece was 33″ x 39 “) , separated the centre pieces first (14″ x 39″) and then from the back half of remaining fabric (19 ” x 39″), I made the sleeves ( 28 ” x 32″) folding the fabric again length wise and from the front half of the remaining (19″ x 39″) I made 4 kali pieces of (2.75″ – 8″ x 31″) using your alternate layout model for the kalis
Wanted to share with you that I was able to sew something using your tutorial and did a lot of jugglery with the fabric length.
LikeLike
Thank you for taking the time to respond! I really appreciate that my kurta post was useful for you. And, you seem to have worked out the layout perfectly. I am thinking of further expanding on the kurta cutting process, as well as the design. Again, hope you come back and read other sewing posts on this blog. 🙂
LikeLike
Hi samina, don’t we need to cut armhole and shape sleeves in kurta…
LikeLike
In a traditional kurta, the armhole and sleeve shape are not shaped into any curved shape. However, they can be cut into any shape according to personal preference and fashion dictates. But traditionally, the kurta is all straight lines, except the neck.
Thank you for commenting, and your question 🙂
LikeLike
Hi.I am not able to find designers neckline curve tool.kindly guide me where I can find that tool online.email roopshergill78@gmail.com
LikeLike
Wonderful post. How big should the gussets be if on a mens kurta?
LikeLike
I have been looking for something like this for ages, thank you, I can now replace the black Kurta I lost somewhere and cannot find a readymade
Thank you again
LikeLike
You lost a kurta? Make another one instead of buying :).
LikeLike
Thank you for sharing these instructions- they are not easily found elsewhere!
LikeLiked by 1 person
I have been looking at drawings of these pattern shapes for so long and wondering how they go together. Thank you so much for more detailed explanation. I look forward to the post on assembly . I am just learning how to sew from patterns and also hoping to create traditional garments with zero or very low waste. Do you think that this pattern could be laid out on narrower fabric without such a large section unused? I am thinking of handwoven on a small loom or older repurposed fabric, such as the narrow fabric from deconstructed silk kimonos which would look so wonderful in a kurta.
thank you for sharing your knowledge and experience.
LikeLike